
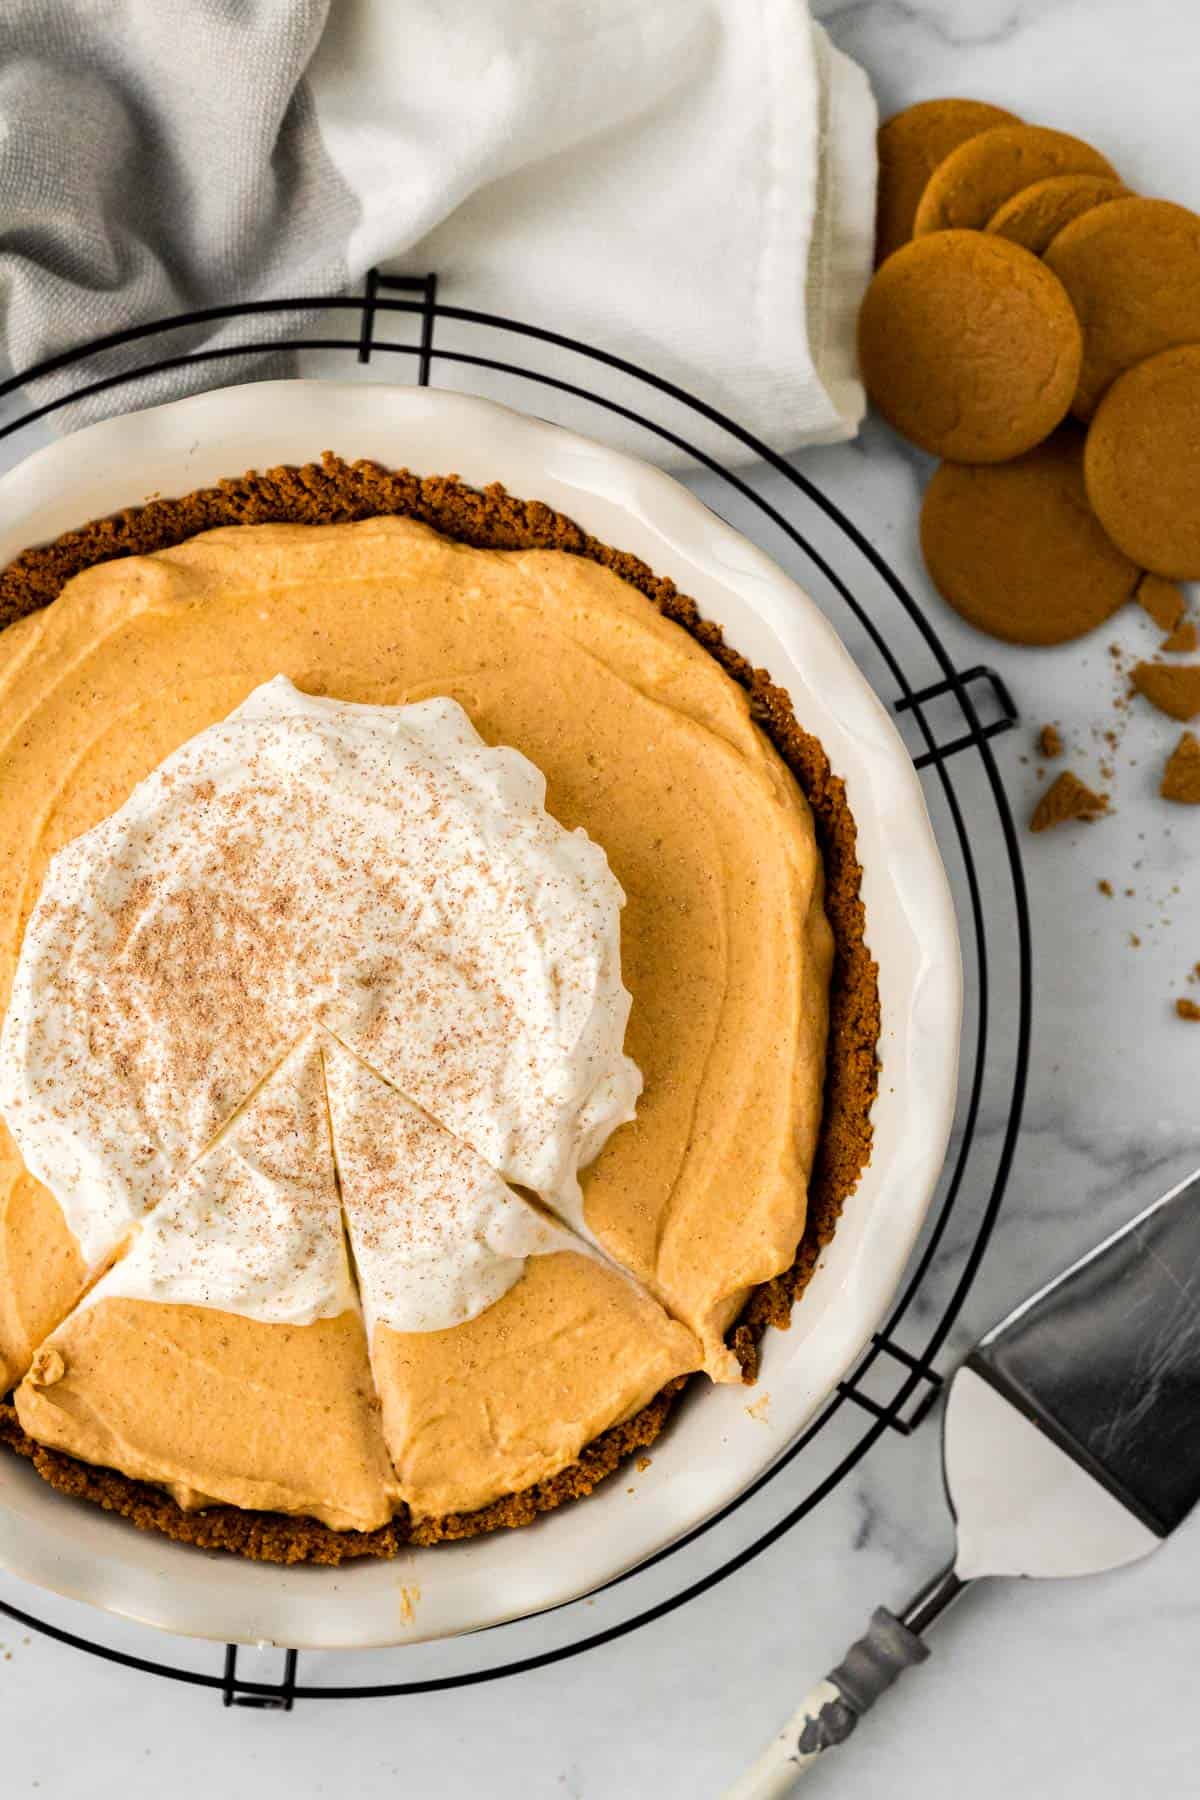
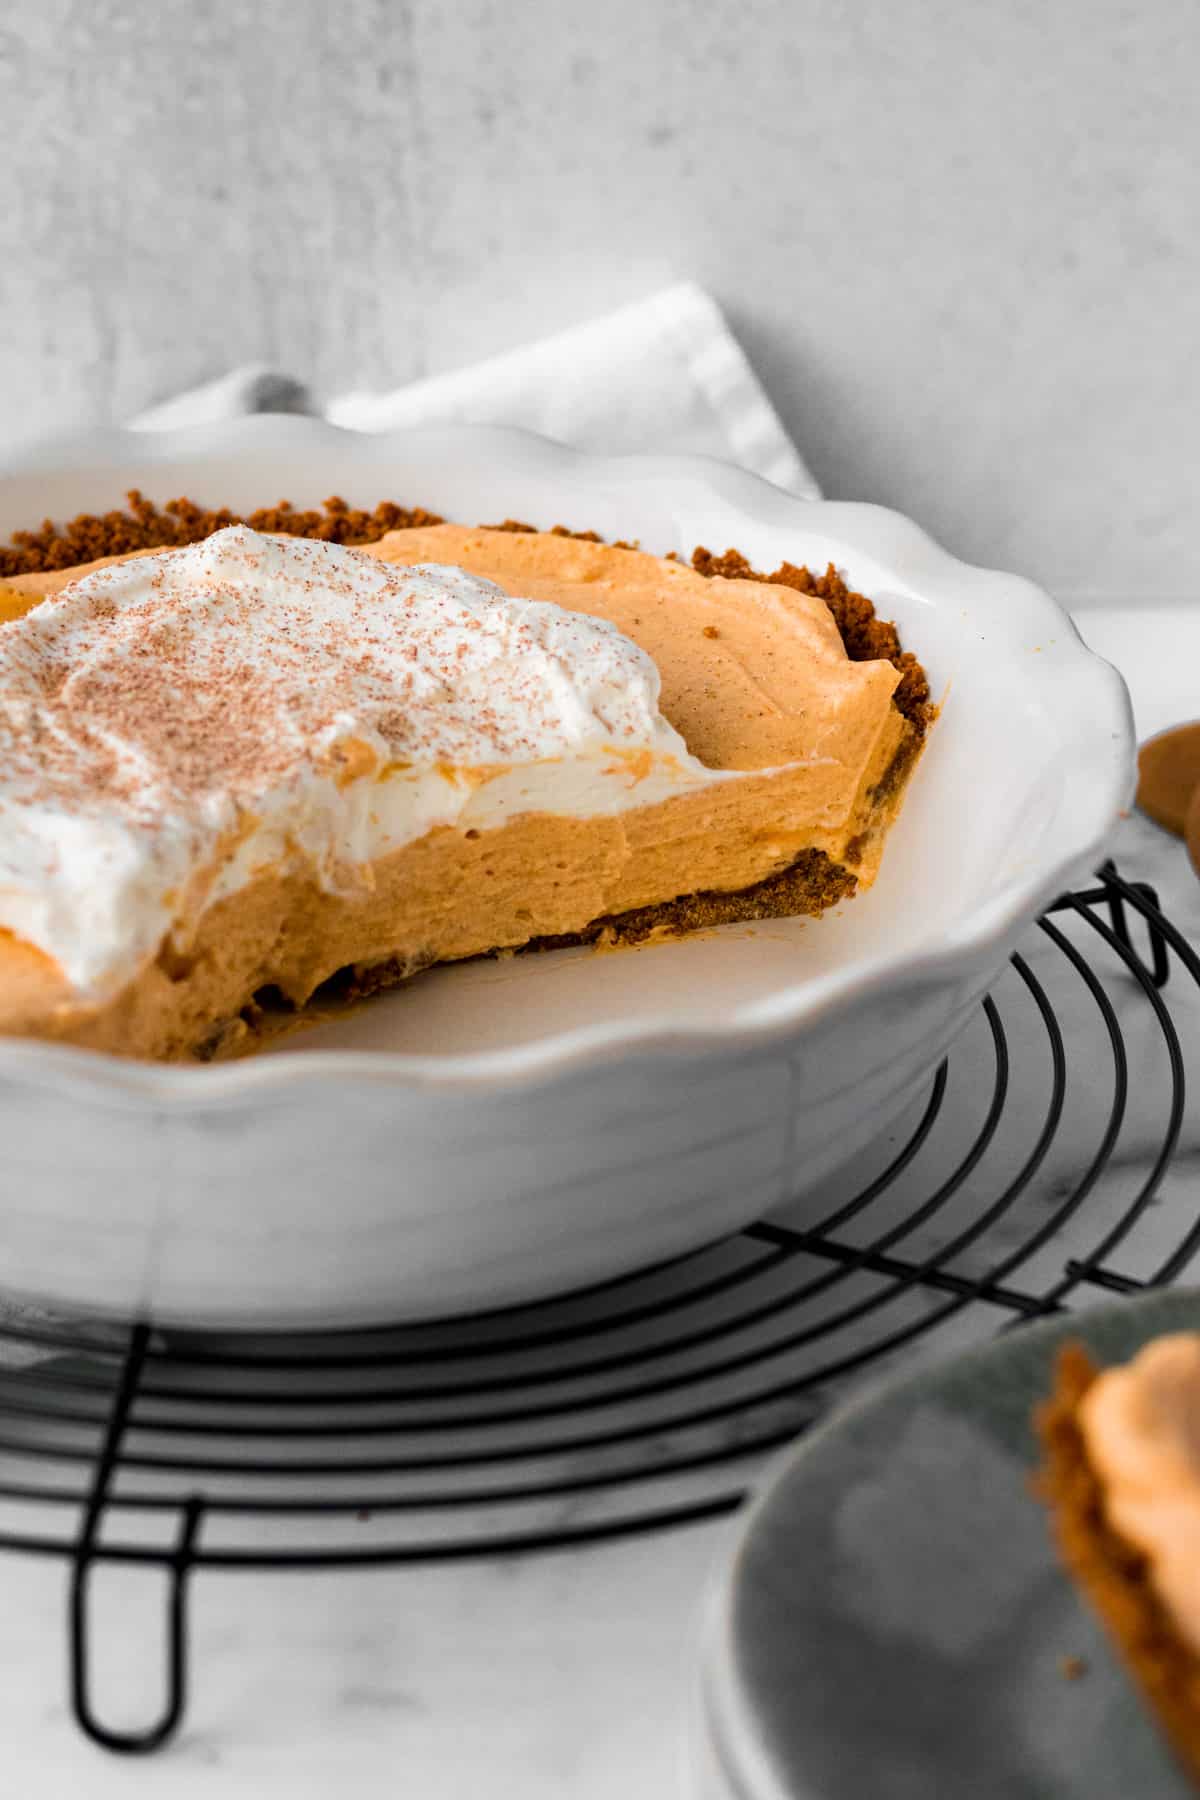
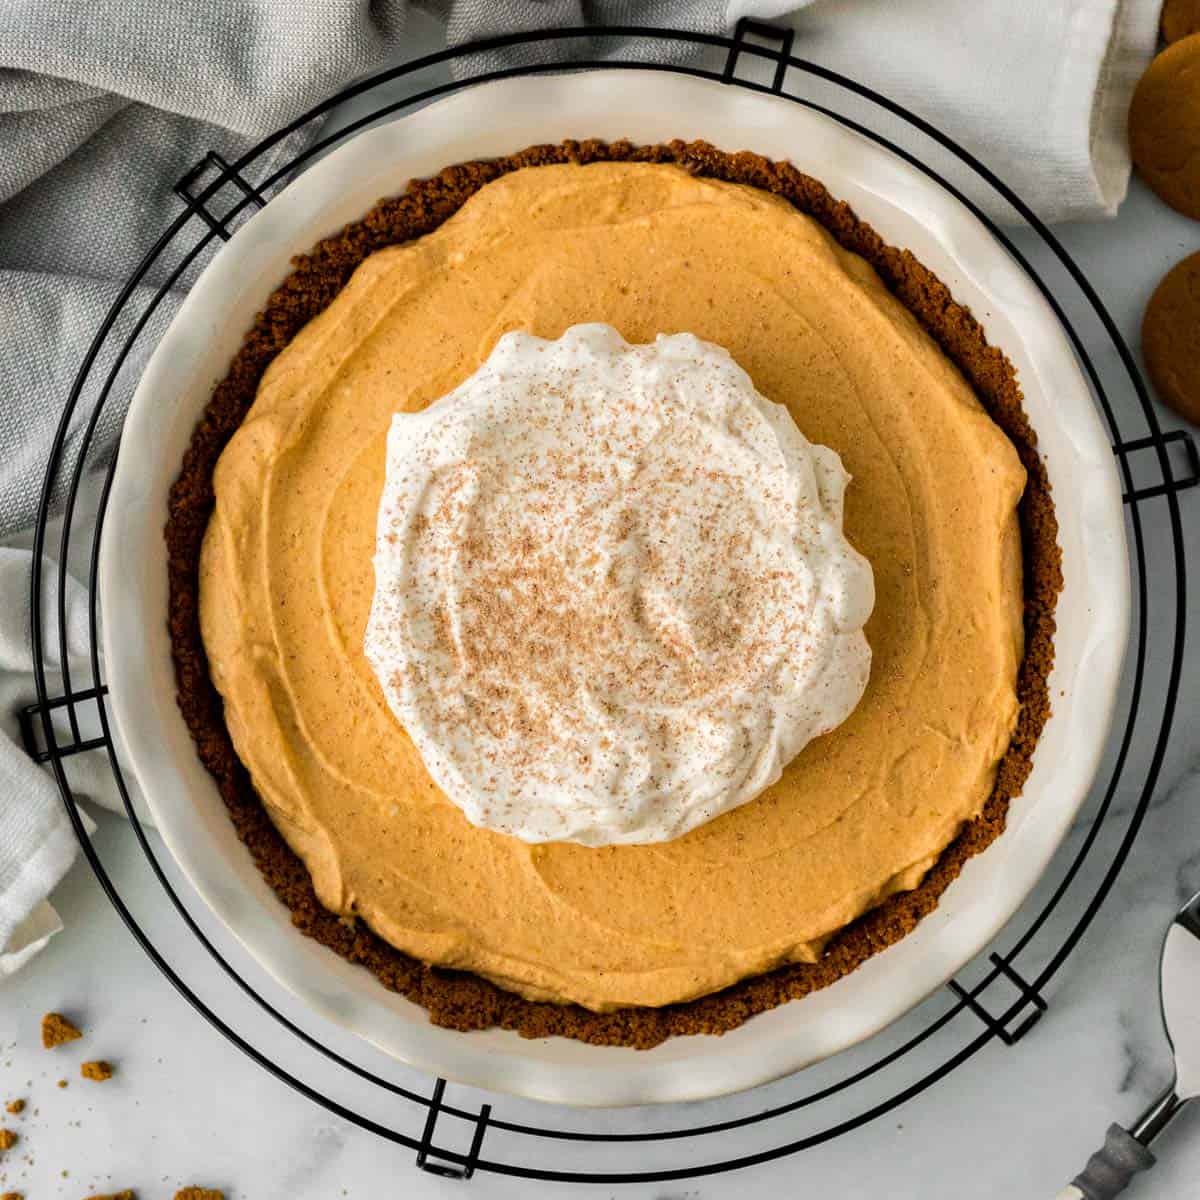
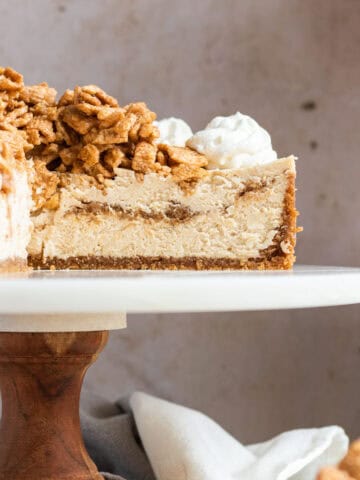
This pumpkin mousse pie will beat a regular pumpkin pie any day! The pumpkin mousse is made creamy with cream cheese and pumpkin puree and then lightened with fresh whipped cream. The crunchy gingersnap crust is the perfect contrast to the light and airy pumpkin mousse.
What makes this better than pumpkin pie?
I am just not a fan of pumpkin pie. I will easily pass on a slice and opt for the chocolate or apple pie first. The texture just doesn't cut it for me. It's kind of custardy and kind of thick and I just can't get behind it.
I do however love pumpkin and pumpkin pie spice flavors. Enter this pumpkin mousse pie! Let me spell out why this is such a better pumpkin dessert!
- Contrast of textures: The crunchy gingersnap cookies and butter combine to make a spicy ginger crust that not only pairs beautifully with pumpkin but most importantly provides a crunchy layer to the smooth and creamy mousse.
- Light and airy mousse: The mousse is flavored with pumpkin pie spice for all those spices we crave in the fall and then lightened up with fresh whipped cream for the most divine pillowy pumpkin mousse.
- EASY!: This pie is almost no-bake (a quick 6-7 minutes in the oven to set the crust). Once the 2 ingredient crust is done, the simple mousse is whipped up in literally minutes, poured onto the crust and then left to chill in the refrigerator. No wondering if the middle is set or if you will burn your pie crust moments today!
Easy gingersnap crust
The crust is just two ingredients: gingersnap cookies and unsalted butter. To make the crust, you simply crush the cookies in a food processor or in a plastic zip top bag with a rolling pin and then combine the crumbs with melted butter.
Stir it together until the butter evenly coats the crumbs and then press it into a deep dish pie dish. There are enough crumbs to push them almost entirely up the sides of the dish while also coating the bottom.
Tips for the best gingersnap crust
While this is an easy crust to make, I did find a few things during testing that make a difference.
- Store-bought gingersnaps: I used store-bought cookies for the crust but first tested it with Tate's Bakeshop cookies. I LOVE their crispy chocolate chip cookies and used them in my chocolate icebox cake but for this crust, they seemed too buttery. When baked, the butter pooled at the edges. For my next try, I used a store brand gingersnap cookie (the kind you find in a cardboard box) and didn't have the butter pooling issue. So forgo the high-end cookies for this crust!
- Pressing down the crumbs: When you are pressing the crumbs into your pie plate, press them down enough to form a solid crust layer but don't pack them down too hard. I found this made the crust too crunchy and difficult to cut through.
- Bake time: The crust doesn't need a long time in the oven. I baked it just enough that it was set. It was turning slightly more brown than when it started and you could just start to smell the gingersnap cookie aroma wafting from the oven. I only needed about 6 minutes. If you bake it too long it could become too hard.
- Deep Dish Pie Plate: For best results, use a deep-dish pie plate for this recipe. One that is about 2 inches high is best. If you don't have a deep dish, then your crust will be a bit thicker and you may need to mound the mousse in the middle to fit it all in.
Pumpkin Mousse
The mousse layer is simple to make and takes just a few minutes. Here are a few tips to get it just right!
- Softened cream cheese: start with room temperature cream cheese for the best results. If it's too cold, you will end up with lumps in the mousse. If you are like me and forget to pull the cream cheese out of the refrigerator early, then unwrap it and place it on a microwave safe plate. Microwave on half power for 5-10 seconds and flip to do the same on the other side.
- Pumpkin pie spice: to make it easy, I used pumpkin pie spice in this pie. If you don't have pumpkin pie spice, but have the individual spices then here is the amounts needed instead: ½ teaspoon of cinnamon, and ¼ teaspoon each of nutmeg and ginger and ⅛ teaspoon cloves.
- Heavy whipping cream: Make sure to whip the cream to stiff peaks before combining it with the pumpkin cream cheese mixture. You'll know it's ready when you can turn your beater upside down and the peak of the cream will not move.
Serving the Pie
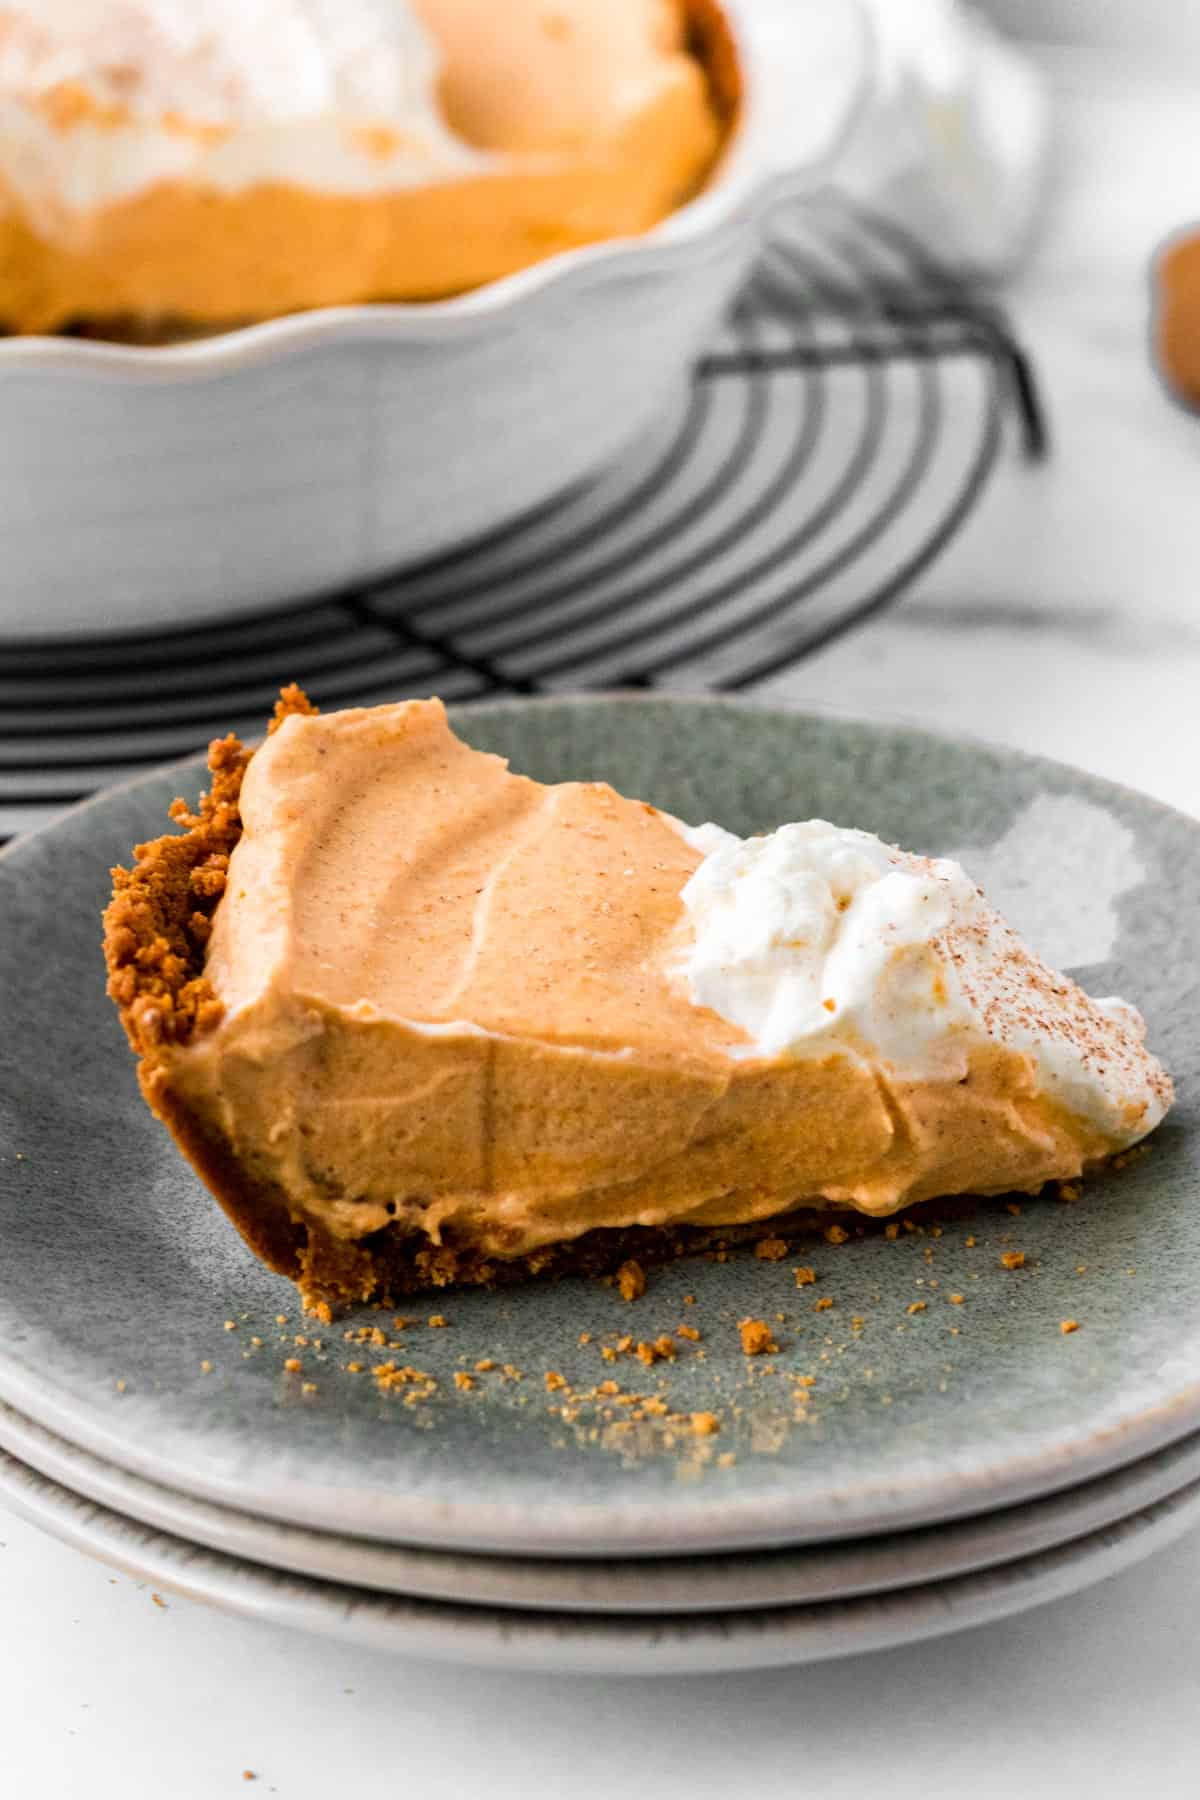
If you want to get that perfect slice of pie, then consider placing the pie in the freezer for 10-15 minutes prior to cutting it. It will be easier to cut into neat slices this way.
I also suggest running a knife between the pie dish and the crust gently prior to lifting out a slice of pie to loosen the crust from the dish.
You can opt to place a large dollop of whipped cream on top of the middle of the pie like in the pictures or just leave the cream off the pie and serve on individual slices. I also grated some fresh nutmeg over the whipped cream for a little more flavor.
Storing the pie
The pumpkin mousse pie is best within a day or 2 of making it. The longer it is refrigerated, the softer the crust will get.
I found that the crust would start weeping slightly after about the second day but was still delicious! It will still be good day 4 or 5 but the crust may lose its crunchiness. Keep the pie refrigerated and covered.
For more pumpkin recipes, check out:
Tag me on Instagram @themarblekitchenblog if you make this and leave a star rating and comment below! Thank you and enjoy!
Pumpkin Mousse Pie with a Gingersnap Crust
Ingredients
Gingersnap Crust
- 8 oz gingersnaps crushed into fine crumbs (about 2 cups)
- 5 tablespoon unsalted butter melted
Pumpkin Mousse
- 8 oz cream cheese room temperature
- ¾ cup sugar
- 1 cup pumpkin puree
- ¼ teaspoon salt
- 2 teaspoon pumpkin pie spice
- 1 cup heavy whipping cream
Whipped Cream
- 1 cup heavy whipping cream
- 2 tablespoon powdered sugar
- 1 teaspoon vanilla
Instructions
Crust
- Preheat oven to 350 degrees. Combine melted butter with gingersnap crumbs and mix until combined.
- Press the crumbs into a pie dish, using your fingers or the bottom of a cup to push it down lightly.
- Bake for about 6-7 minutes until starting to turn golden brown. Cool completely.
Pumpkin Mousse
- Beat cream cheese and sugar until creamy and no lumps remain. Add pumpkin puree, salt and pumpkin pie spice and mix well.
- In a separate bowl, beat the heavy whipping cream on medium to medium high until stiff peaks form.
- Fold the whipped cream into the pumpkin mixture until no streaks of cream remain.
- Pour the filling over the baked pie crust, smoothing the top.
- Cover and refrigerate the pie for 4 hours.
Whipped Cream
- Beat together 1 cup of heavy whipping cream and powdered sugar until stiff peaks form.
- Top the individual slices or the whole pie with whipped cream.
Leave a Reply