
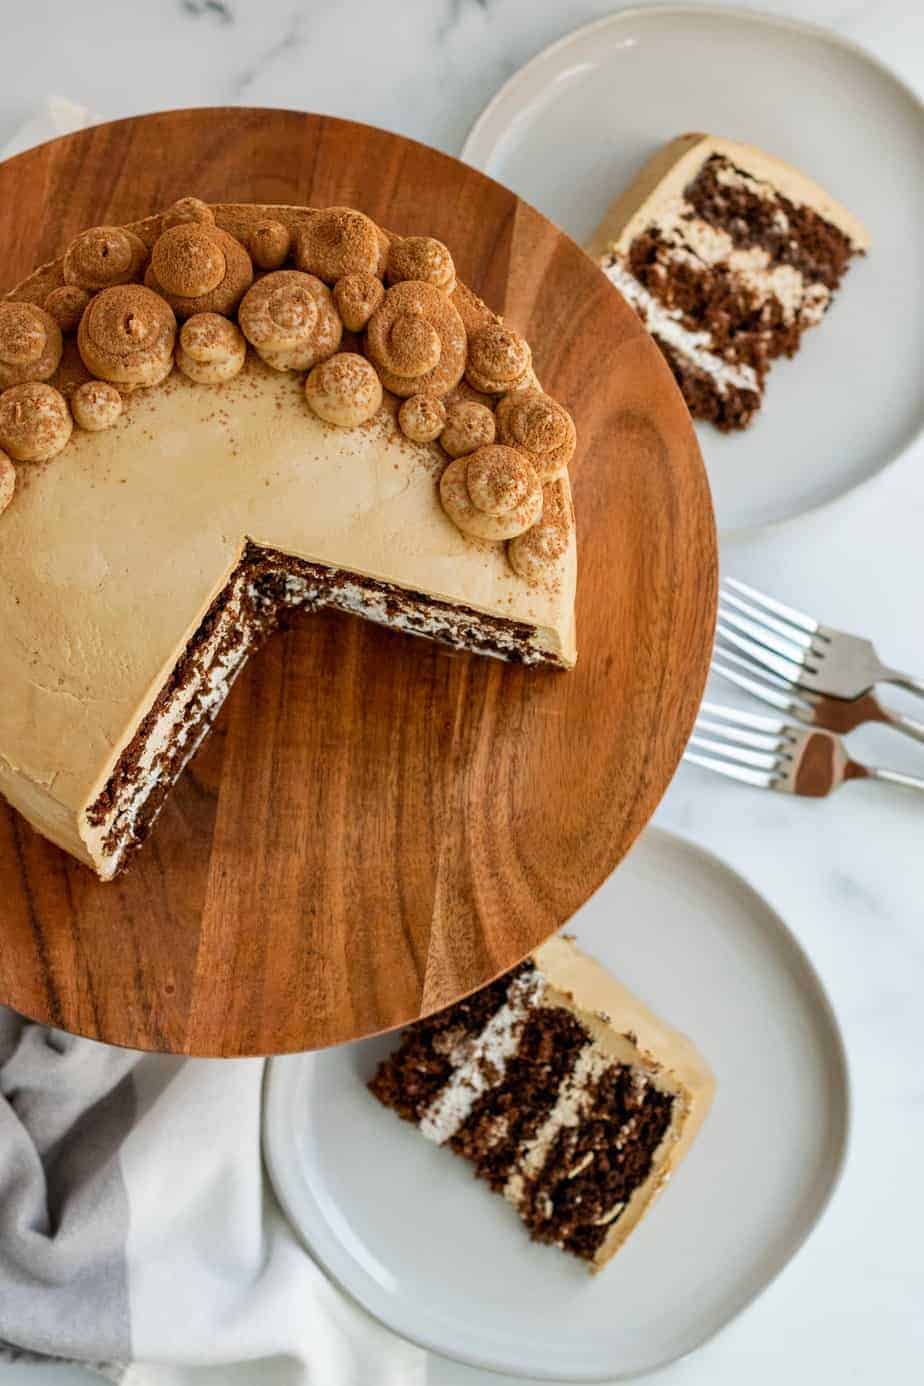
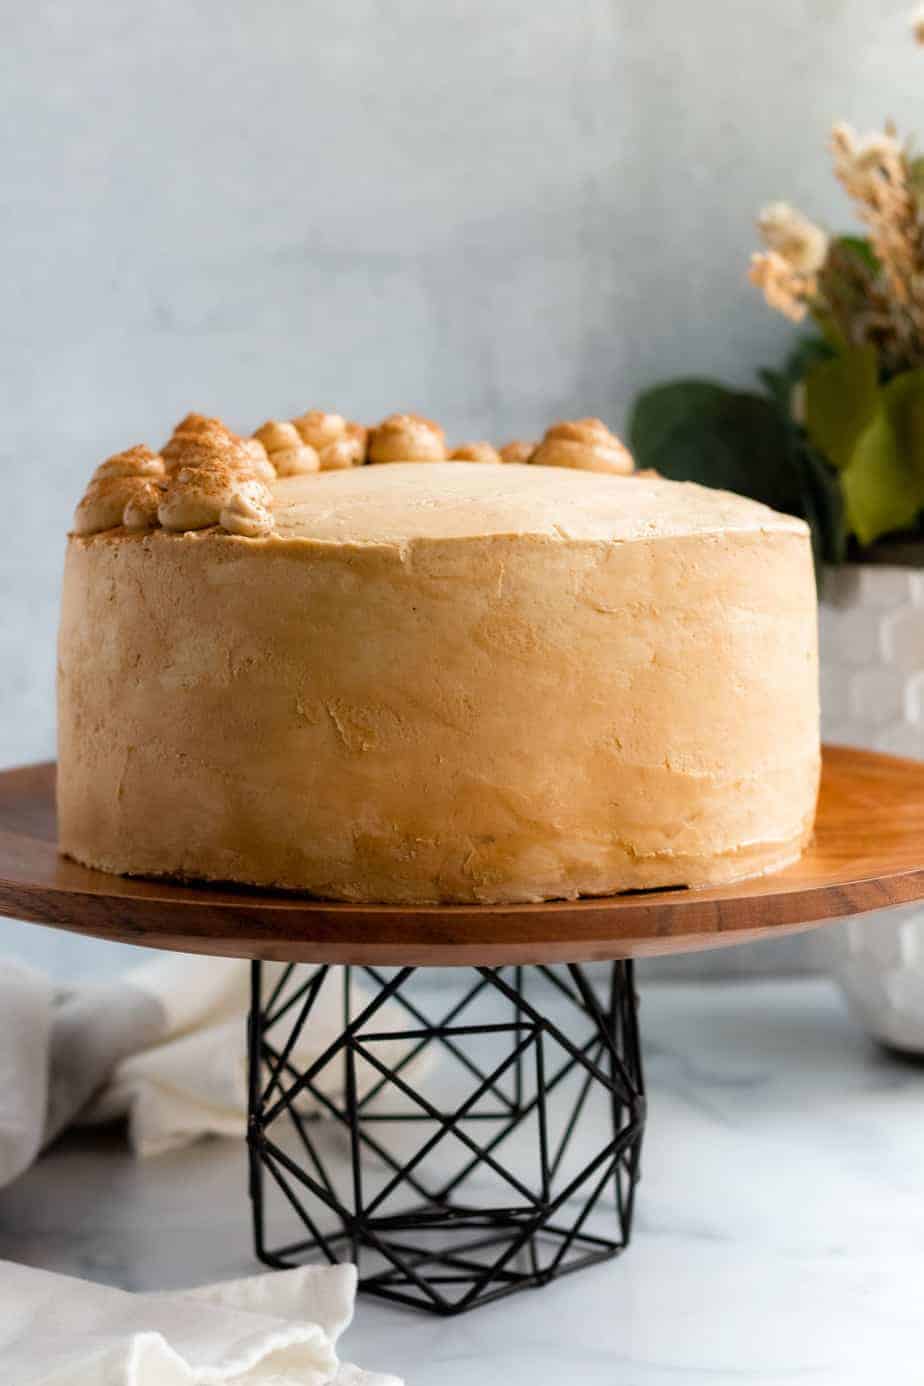
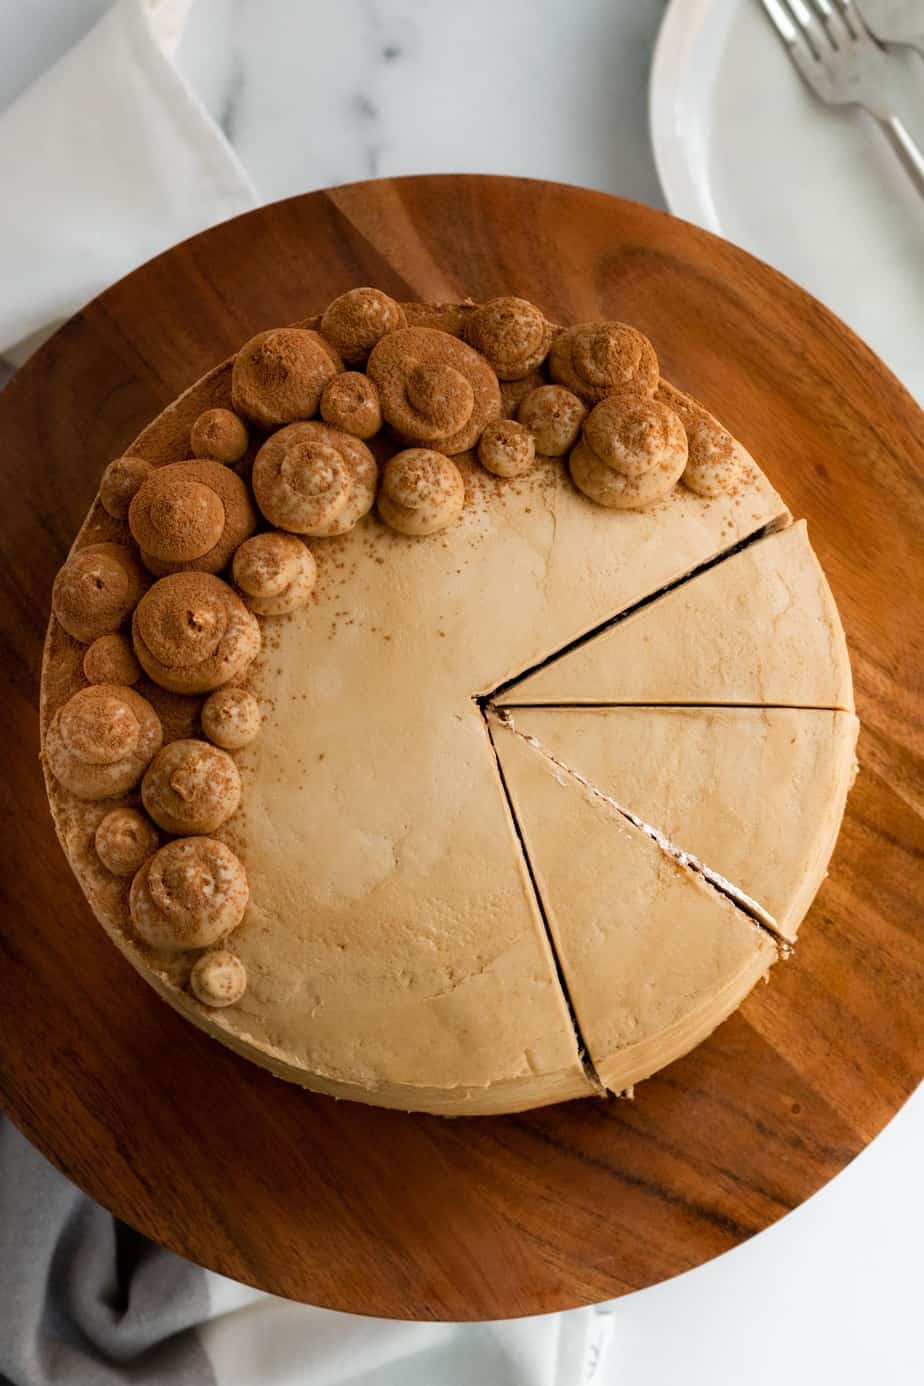
Deep, rich chocolate cake forms the base of this chocolate mocha cake. Creamy tiramisu cream and espresso cream divide the fluffy cake layers with an ultra smooth espresso swiss meringue buttercream on top. In addition to this gorgeous cake, I have a super fun collaboration with Lisa from Garrison Street Design Studio for you today. Not only do you get the recipe for this chocolate mocha cake, but Lisa will walk you through making your own modern farmhouse cake stand! Let's get started.
My husband and I are quickly approaching our 5 year anniversary. I'm sure it will look pretty different in the year of Covid plus 2 kids under 3 but I wanted to do something special to mark the occasion.
At our wedding, having the best tasting (and looking) cake was at the top of my list. I immediately voted myself out of making my wedding cake as that sounded way too stressful (I made 2 flavors of homemade marshmallows for a s'mores bar instead-not stressful at all 😂).
I had 2 flavors of cake: a white cake with a strawberry and lemon filling and a decadent chocolate cake with tiramisu and espresso cream. While the design of my cake wasn't what I had envisioned, the taste of the cake was out of this world.
My quest to recreate the cake led to this chocolate mocha cake recipe.
The best mocha cake
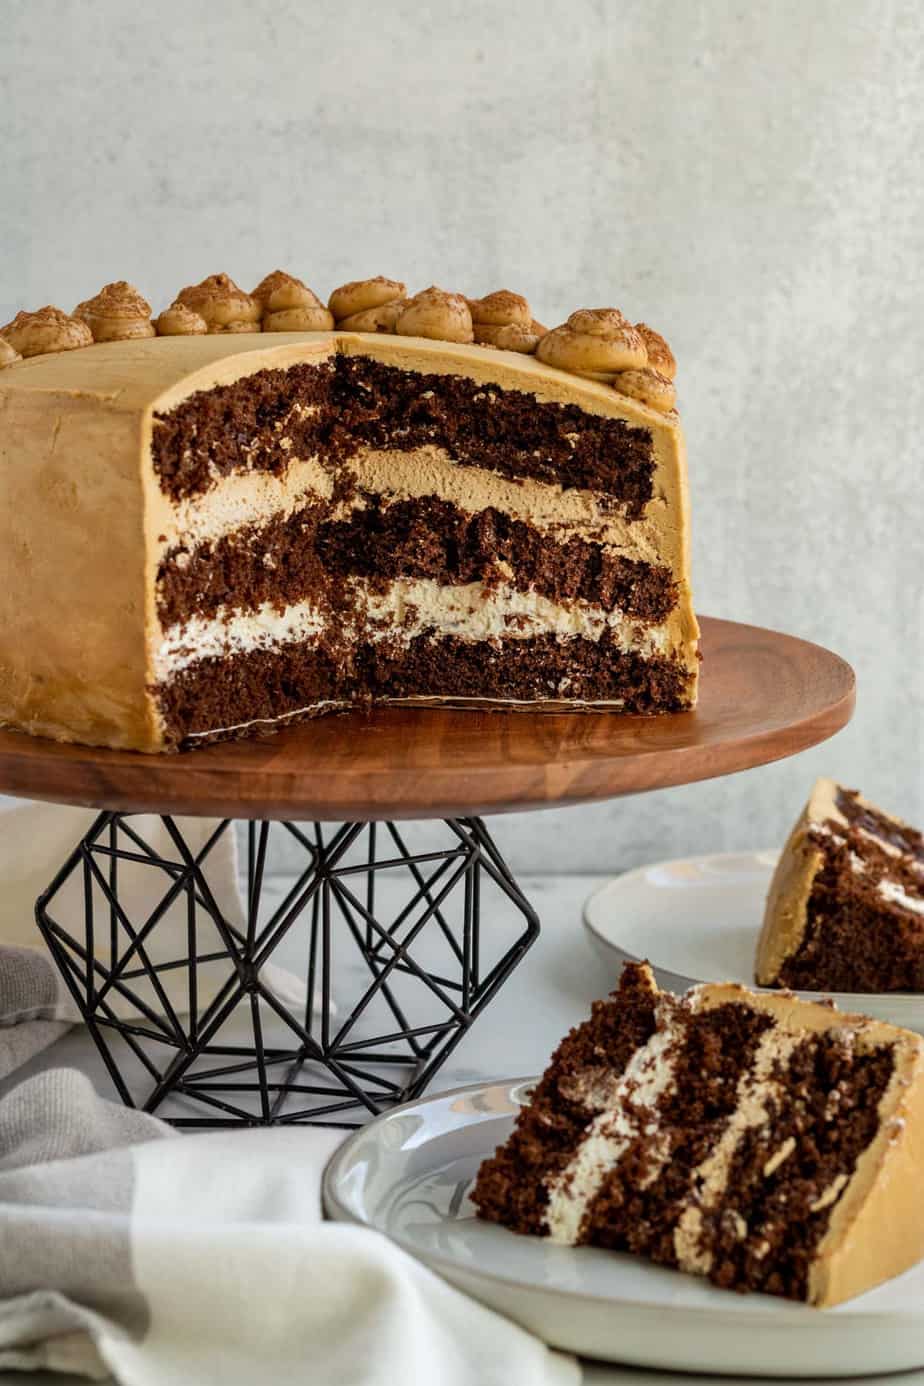
The cake is made up of four components. The chocolate cake, tiramisu cream filling, espresso cream filling and espresso swiss meringue buttercream.
- Chocolate cake- This chocolate cake is fluffy, has a tender crumb and deep chocolate flavor. Hot coffee is added to the cake to enhance the chocolate. The cake is simple to put together and requires no electric mixer!
- Tiramisu cream- Rich sweetened mascarpone cheese is the foundation of this tiramisu filling with whipped cream folded in to lighten it up.
- Espresso cream- Enhancing the coffee flavor, espresso cream is simply the tiramisu cream with the addition of espresso powder.
- Espresso swiss meringue buttercream- Less sweet than traditional American buttercream, this swiss meringue buttercream is silky smooth and loaded with espresso flavor.
Troubleshooting swiss meringue buttercream
Swiss meringue buttercream can be intimidating. I'll be the first to admit that I've had it both seperate and look curdled or be runny and not light and fluffy like it should be. Follow these steps below to get perfect swiss meringue buttercream.
- The first step when making the buttercream is to gently heat egg whites and sugar over a double boiler. If you don't have a double boiler, simply use any medium-sized heatproof bowl that will fit over one of your saucepans with a couple of inches to spare at the bottom of the bowl. I like to use my stand mixer bowl over a medium saucepan so that I don't have extra bowls to clean. This step ensures that your buttercream is safe to eat as you will heat the egg whites to 160 degrees. Make sure when separating the eggs that you do not get any egg yolks into the whites!
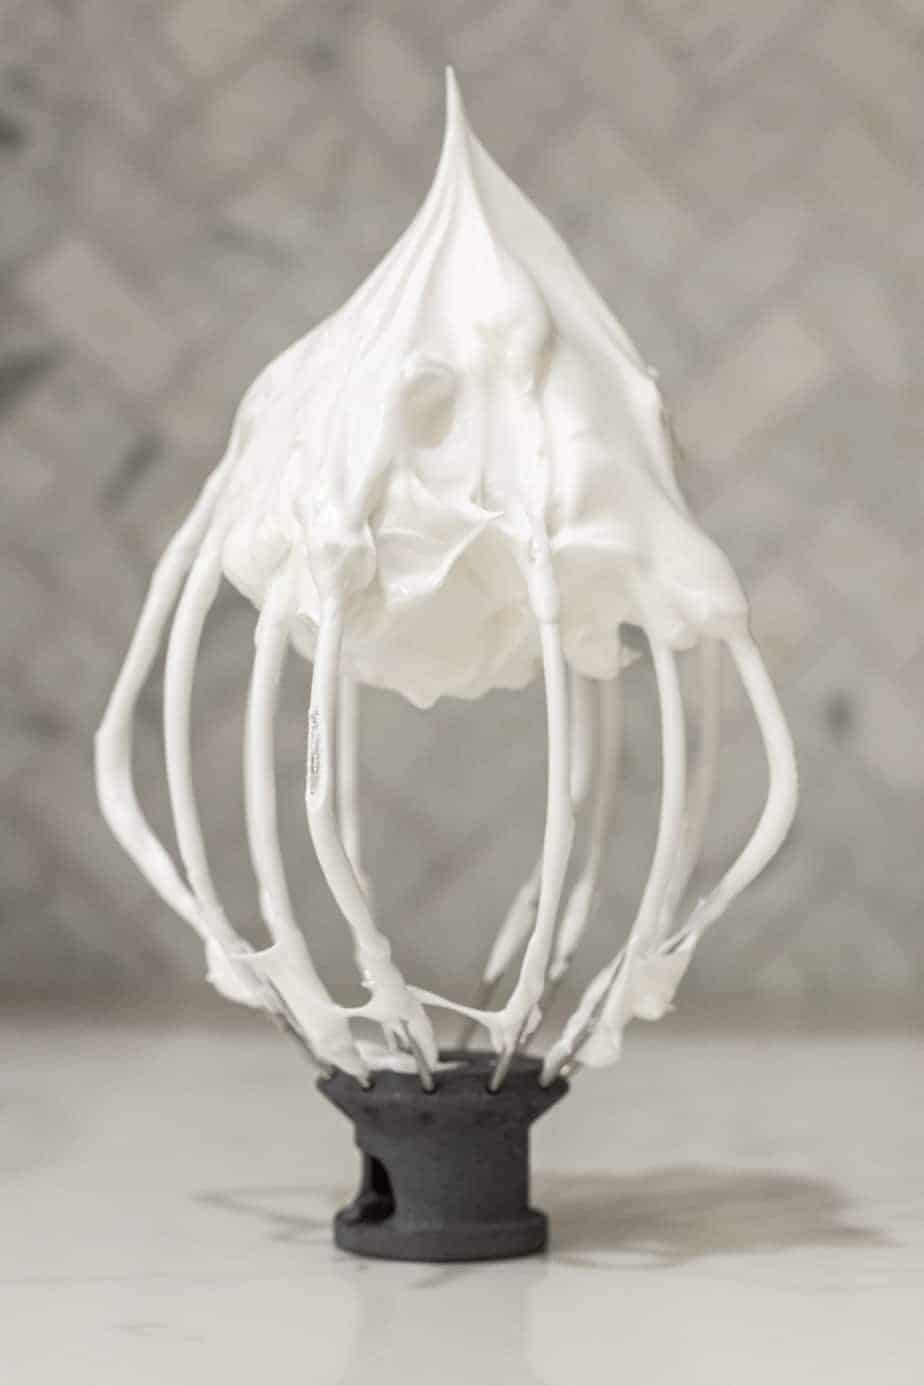
- After the sugar has melted and the egg whites have reached 160 degrees, transfer the bowl to a stand mixer and mix on medium-high until the meringue forms stiff peaks and the meringue and bowl are both cool. This is a very important step and one that can cause the most trouble if not cooled completely. This will likely take 10 to 15 minutes of beating in the stand mixer and possibly even longer if using a hand mixer.
- Once the meringue and bowl have cooled and the meringue is stiff and glossy, you'll add cubes of softened butter one at a time while continuing to beat. The mistake can occur in this step if your butter is too warm. You want slightly softened butter but not so soft that when touching it your finger can push all the way through the butter. If you add butter that is too soft, your buttercream can become thin and soupy. Continue adding all the butter, allowing it to incorporate after each cube is added. You should have light, silky buttercream at this point.
- You will finally add a pinch of salt and the espresso powder and mix until the espresso powder is completely incorporated.
Swiss Meringue broke or seperated
If when adding the butter and beating, you start to see the buttercream separating and looking curdled, don't give up as it can be saved! This is caused by adding butter that is too cold.
To save the buttercream, simply place the bowl back over the double boiler with gently simmering water. Leave it there for about 2 minutes until you see the buttercream on the sides of the bowl start to melt. The middle should still be solid.
Once melted, move the bowl back to the stand mixer and mix on low for a minute and then increase to medium high until the mixture becomes smooth and fluffy.
Swiss meringue is runny
If after adding the butter, your swiss meringue is nowhere near the consistency of buttercream and becomes runny, it's either that the meringue/bowl was still too warm or the butter was too soft.
To save the buttercream, place the bowl into the refrigerator for 10 to 20 minutes depending on how liquid it is. After chilling, remove it from the refrigerator and beat it in the stand mixer until it becomes light and fluffy.
If it's still too runny, place it back into the refrigerator for up to another 10-20 minutes and beat again. Do not leave it longer than 20 minutes in the refrigerator before beating again.
Assembling the cake
The first step to assembling the chocolate mocha cake is to make sure the cake layers are even. If any of the layers domed up in the middle or baked unevenly, use a knife to shave off some of the cake to make as flat of layers as you can.
Place your first layer on whatever you are going to serve the cake on or use a cardboard cake circle if you want to transfer the filled cake to a different surface.
Now onto filling the layers. I like to pipe the filling onto the cake using a piping bag and large round tip as it goes on evenly and I don't need to smooth it out. You can also just spoon on the filling and spread it out with a knife or offset spatula.
Fill the first layer with one of the two fillings-either the tiramisu cream or espresso cream, using all of one of the fillings. Smooth the top and then place the second cake layer on top.
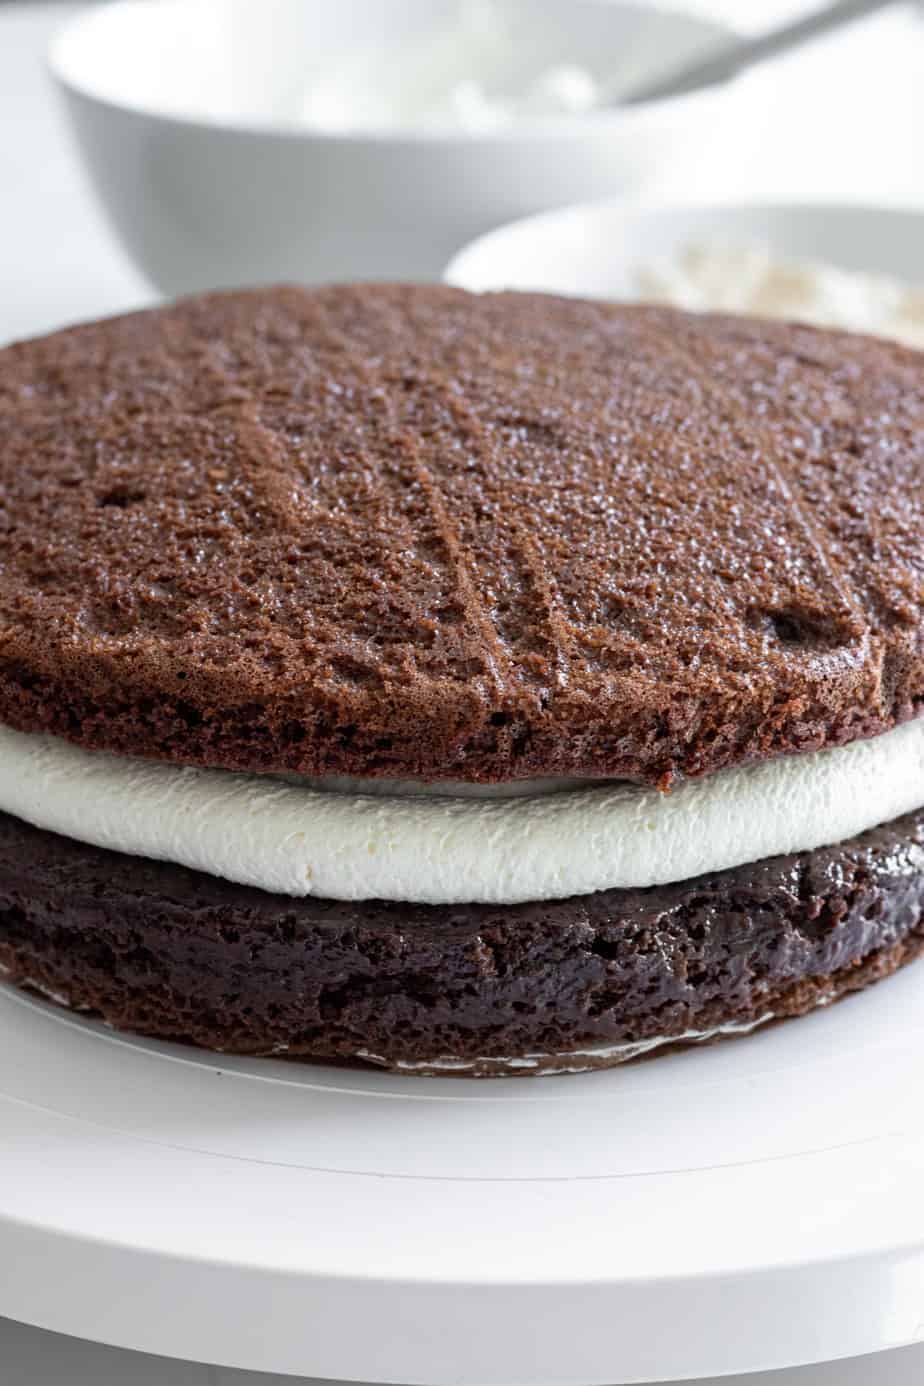
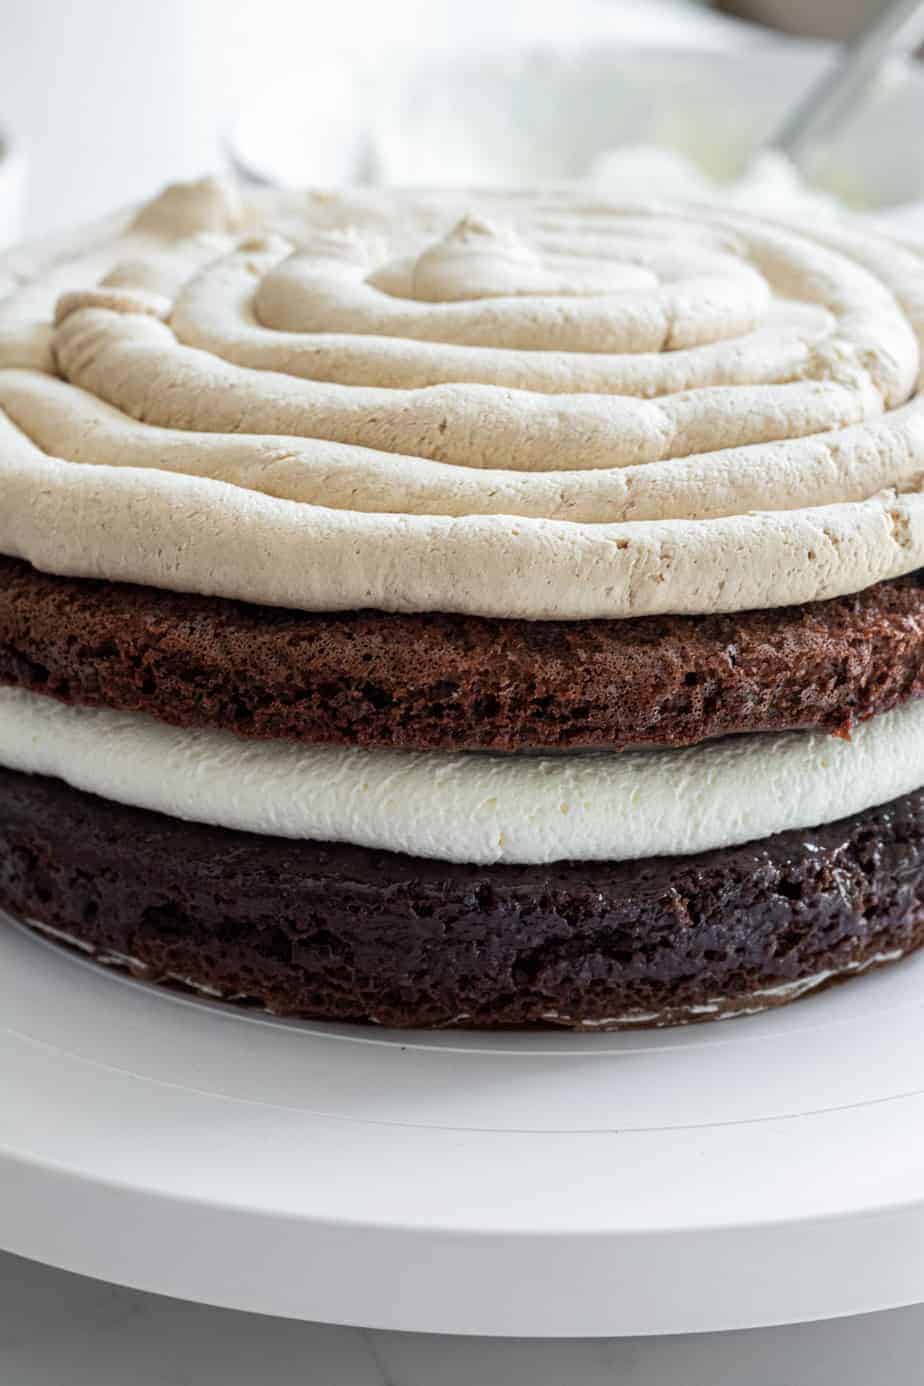
Next pipe on or spread on the other filling and place the final cake layer on top. Now onto the frosting!
How to get even layers
If you don't want to go through the hassle of trimming the cake layers to make them flat, use these tips to get even, flat layers.
- Weigh the batter- If you have a kitchen scale, weigh out about 12 ounces of batter into each of the pans. If you don't have a scale, measure out about a cup and a half into each pan.
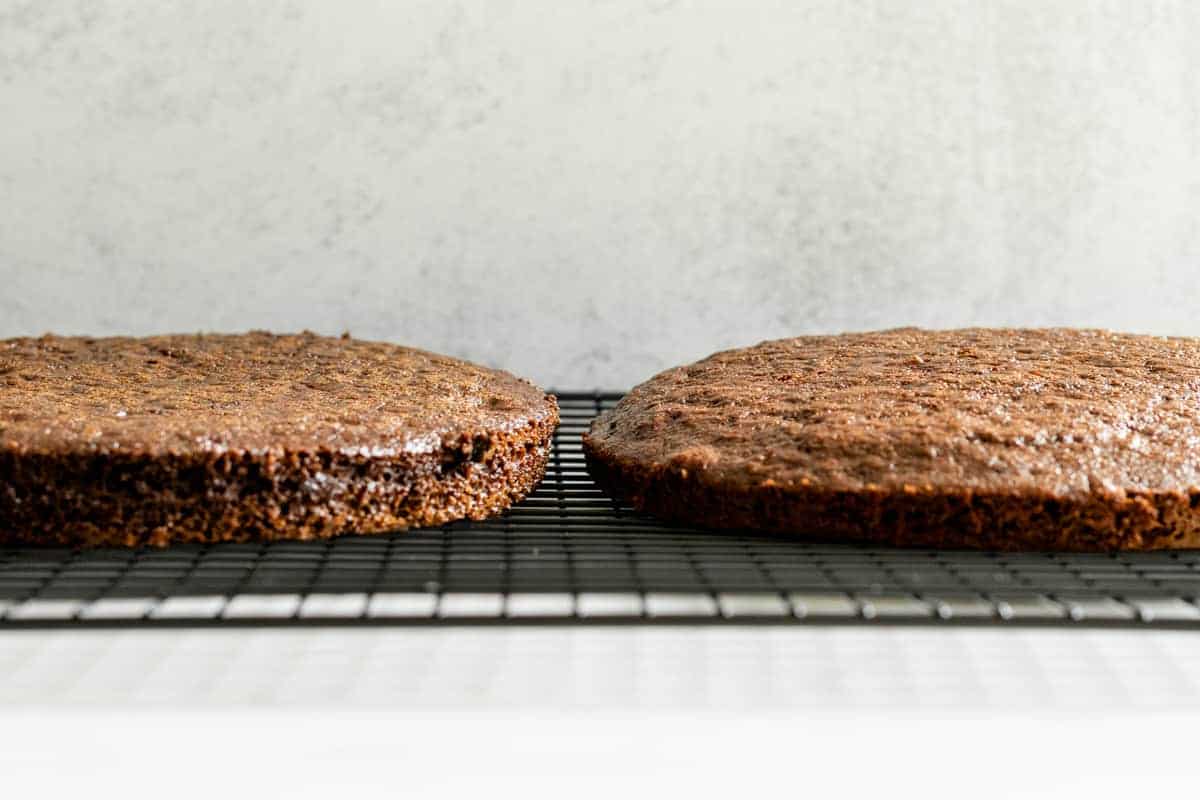
- Use cake strips- I'll admit that I resisted using cake strips on my cakes because I didn't think it would make that much of a difference. I was wrong! If you want to spend a little money but get a big return, I highly recommend buying some cake strips. I have these cake strips from Wilton. You'll need three individual 35-inch cake strips if baking all three pans at the same time. Check out the difference in the picture below of one pan baked with a cake strip and the other without. What a difference!
Storing the cake
Because of the swiss meringue buttercream, this chocolate mocha cake does need to be refrigerated. If you have a cake keeper, I recommend storing it in the keeper. I have this cake keeper.
If the cake has been cut and you don't have a cake keeper, then place plastic wrap over the cut edges of the cake and then refrigerate.
The cake can be stored uncovered for a day if it is whole and you plan to serve it the next day.
The cake will last 3-5 days in the refrigerator if properly stored.
You can also freeze the cake as a whole or in individual slices. Wrap the cake or individual slices with plastic wrap and then with a layer of foil. Cakes keep in the freezer for about 3 months (but I saved the top layer of my wedding cake for our 1 year anniversary and it was still edible!).
How to make the cake over a couple of days
If you don't have enough time to make the cake in one day, you can easily make the chocolate cake layers one day and the filling and frosting the next day.
Wrap the cake layers in plastic wrap and place in the refrigerator overnight until you are ready to assemble the cake.
Can I make the cake in different sized pans?
This recipe is for three 9 inch round cake pans. You can also use three 8 inch cake pans however the cake layers will be thicker.
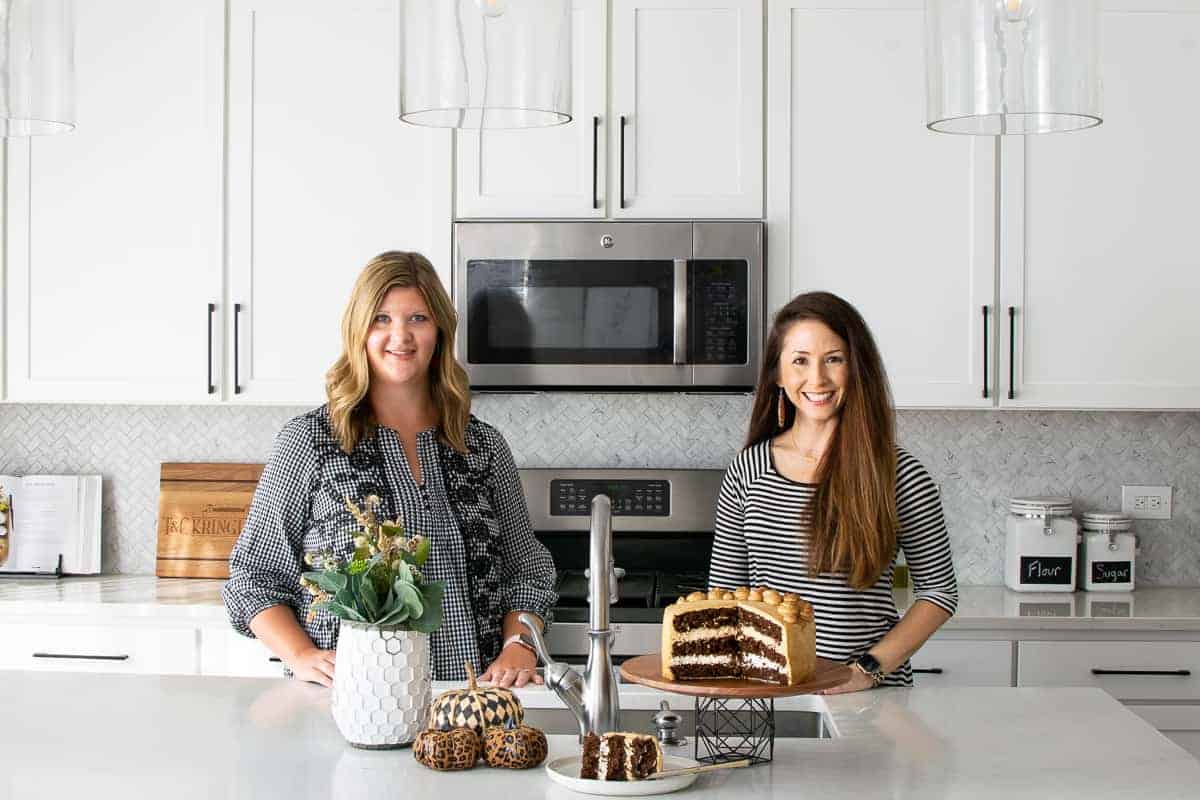
DIY Modern Farmhouse Cake Stand
Make sure to check out Garrison Street Design Studio for all the deets on how to make this gorgeous cake stand in a simple and easy to follow tutorial. You'll swoon over all the super cute and affordable hacks to put a designer touch on your home!
For more cake recipes, check out:
- Chocolate Zucchini Cake
- Apple Cake with Cinnamon Cream Cheese Frosting
- Nutella S'mores Cake
- Pumpkin Gooey Butter Cake with Pecan Streusel
Tag me on Instagram @themarblekitchenblog if you make this and leave a star rating and comment below! Thank you and enjoy!
Chocolate Mocha Cake
Ingredients
Chocolate Cake
- 2 ¼ cups all-purpose flour
- 1 ¾ cups sugar
- ¾ cup cocoa powder unsweetened
- 1 teaspoon baking powder
- ½ teaspoon baking soda
- 1 teaspoon kosher salt
- 1 cup whole milk
- ½ cup vegetable oil
- 2 eggs
- 2 teaspoon vanilla extract
- 1 cup hot brewed coffee
Tiramisu Cream Filling
- 8 oz mascarpone
- ½ cup heavy cream
- ½ cup powdered sugar
Espresso Cream Filling
- 2 teaspoon espresso powder
- ½ cup heavy cream
- 8 oz mascarpone
- ½ cup powdered sugar
Espresso Swiss Meringue Buttercream
- 6 egg whites
- 1 ½ cups granulated sugar
- 1 ½ cups unsalted butter slightly softened and cubed
- ¼ teaspoon salt
- 1 tablespoon espresso powder
Instructions
Chocolate Cake
- Spray 3-9 inch pans with cooking spray and then line bottoms with parchment. Heat oven to 350 degrees.
- Combine the dry ingredients in a medium bowl.
- Combine milk, oil, eggs and vanilla in another bowl.
- Slowly add the wet ingredients into the dry until just combined. Add the hot coffee and stir to combine.
- Pour the batter into pans, dividing evenly. Bake for about 20-22 minutes or until a toothpick comes out of the center clean. Cool in pans about 10 minutes, then transfer the cakes to a cooling rack to cool completely.
Tiramisu Cream filling
- Whip mascarpone for about 30 seconds until creamy.
- Add powdered sugar and heavy cream and beat on low speed for about 30 seconds and then medium high until stiff peaks form.
Espresso Cream Filling
- Whisk espresso powder into heavy cream and set aside.
- Whip mascarpone for about 30 seconds until creamy.
- Add powdered sugar and espresso heavy cream and beat on low speed for about 30 seconds and then medium high until stiff peaks form.
Espresso Swiss Meringue Buttercream
- In a medium bowl set over a pan of about 2 inches of gently boiling water that is not touching the bowl, add egg white and sugar.
- Constantly whisk the sugar and egg whites for about 4-5 minutes until the sugar has dissolved completely or an instant read thermometer reads 160 degrees.
- Remove the bowl and place into a stand mixer or use a hand mixer and mix on low speed gradually increasing to medium high speed for 10-15 minutes until a thick and glossy meringue forms.
- The bowl and the meringue should be cool to the touch so if it is not, continue mixing until it has cooled.
- Add the butter cubes, one at a time, mixing well after each addition until all the butter is incorporated. *See notes or blog post for troubleshooting if your frosting is runny or curdled.
- Add the salt and espresso powder and beat until the espresso powder has dissolved completely.
Assembling the Cake
- Trim the cake layers if they are not flat on top. Place the first cake layer on a serving plate or a cardboard cake board.
- Spread the tiramisu cream on top of the first cake layer all the way to the edges and smooth the top.
- Top with the next cake layer and spread the espresso cream over that layer all the way to the edges and smoothing the top.
- Place the final cake layer on top and then frost with the espresso swiss meringue buttercream.
Notes
- To save the curdled or broken buttercream, simply place the bowl back over the double boiler with gently simmering water. Leave it there for about 2 minutes until you see the buttercream on the sides of the bowl start to melt. The middle should still be solid. Once melted, move the bowl back to the stand mixer and mix on low for a minute and then increase to medium-high until the mixture becomes smooth and fluffy.
- To fix runny buttercream, place the bowl into the refrigerator for 10 to 20 minutes depending on how liquid it is. After chilling, remove it from the refrigerator and beat it in the stand mixer (or hand mixer) until it becomes light and fluffy. If it's still too runny, place it back into the refrigerator for up to another 10-20 minutes and beat again. Do not leave it longer than 20 minutes in the refrigerator before beating again.
- For even and flat cake layers, consider purchasing cake strips.
- Store the cake in the refrigerator either in a cake keeper or with foil or plastic wrap at least covering any cut areas of the cake.

Jejej says
Hi can i ask what is a one cup whole egg and 2 egg?
Tara Kringlen says
Hi Jejej,
I'm not quite sure what you are asking? I use large eggs in my recipes so when I call for "2 eggs" I mean 2 large eggs. So the cake contains 2 large eggs and the buttercream contains 6 egg whites from 6 large eggs. As far as the one cup, what ingredient are you referring to? Are you using metric measurements?