
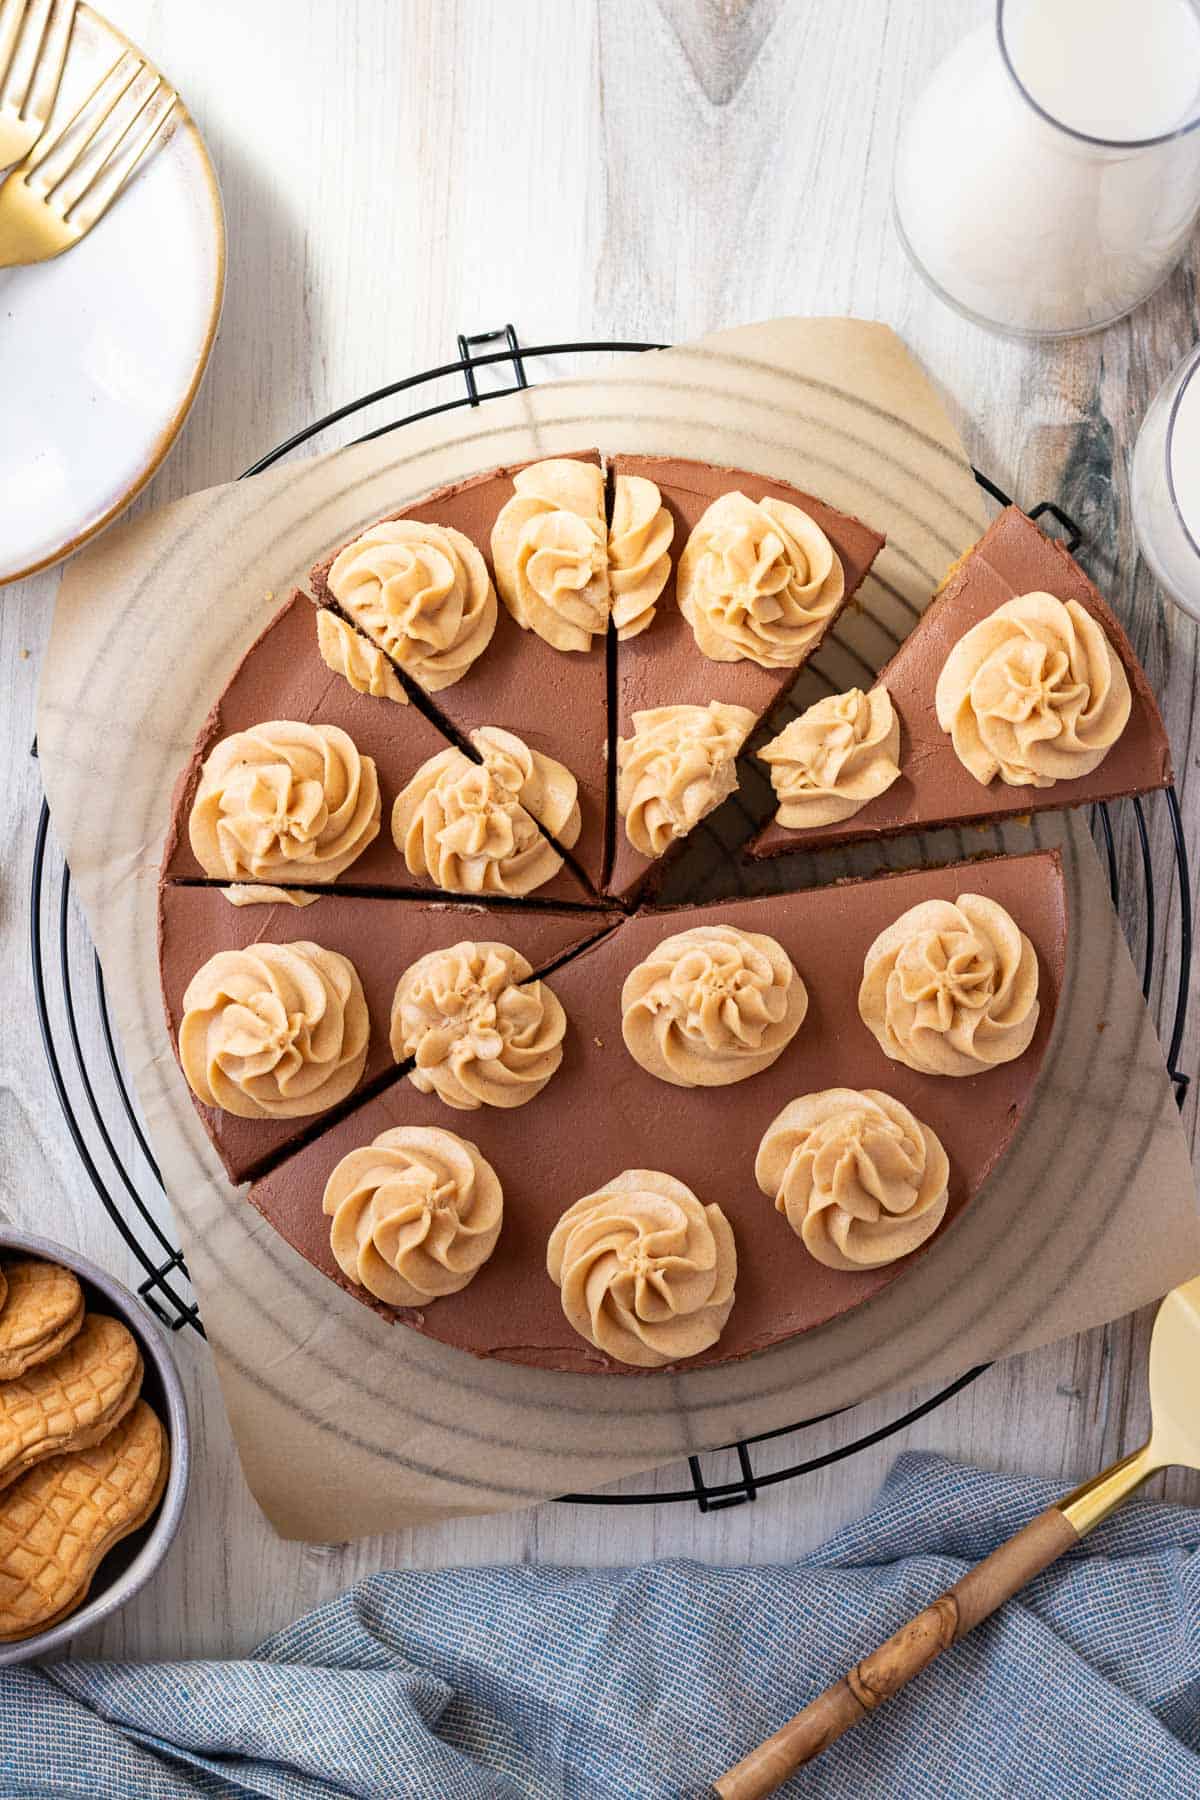
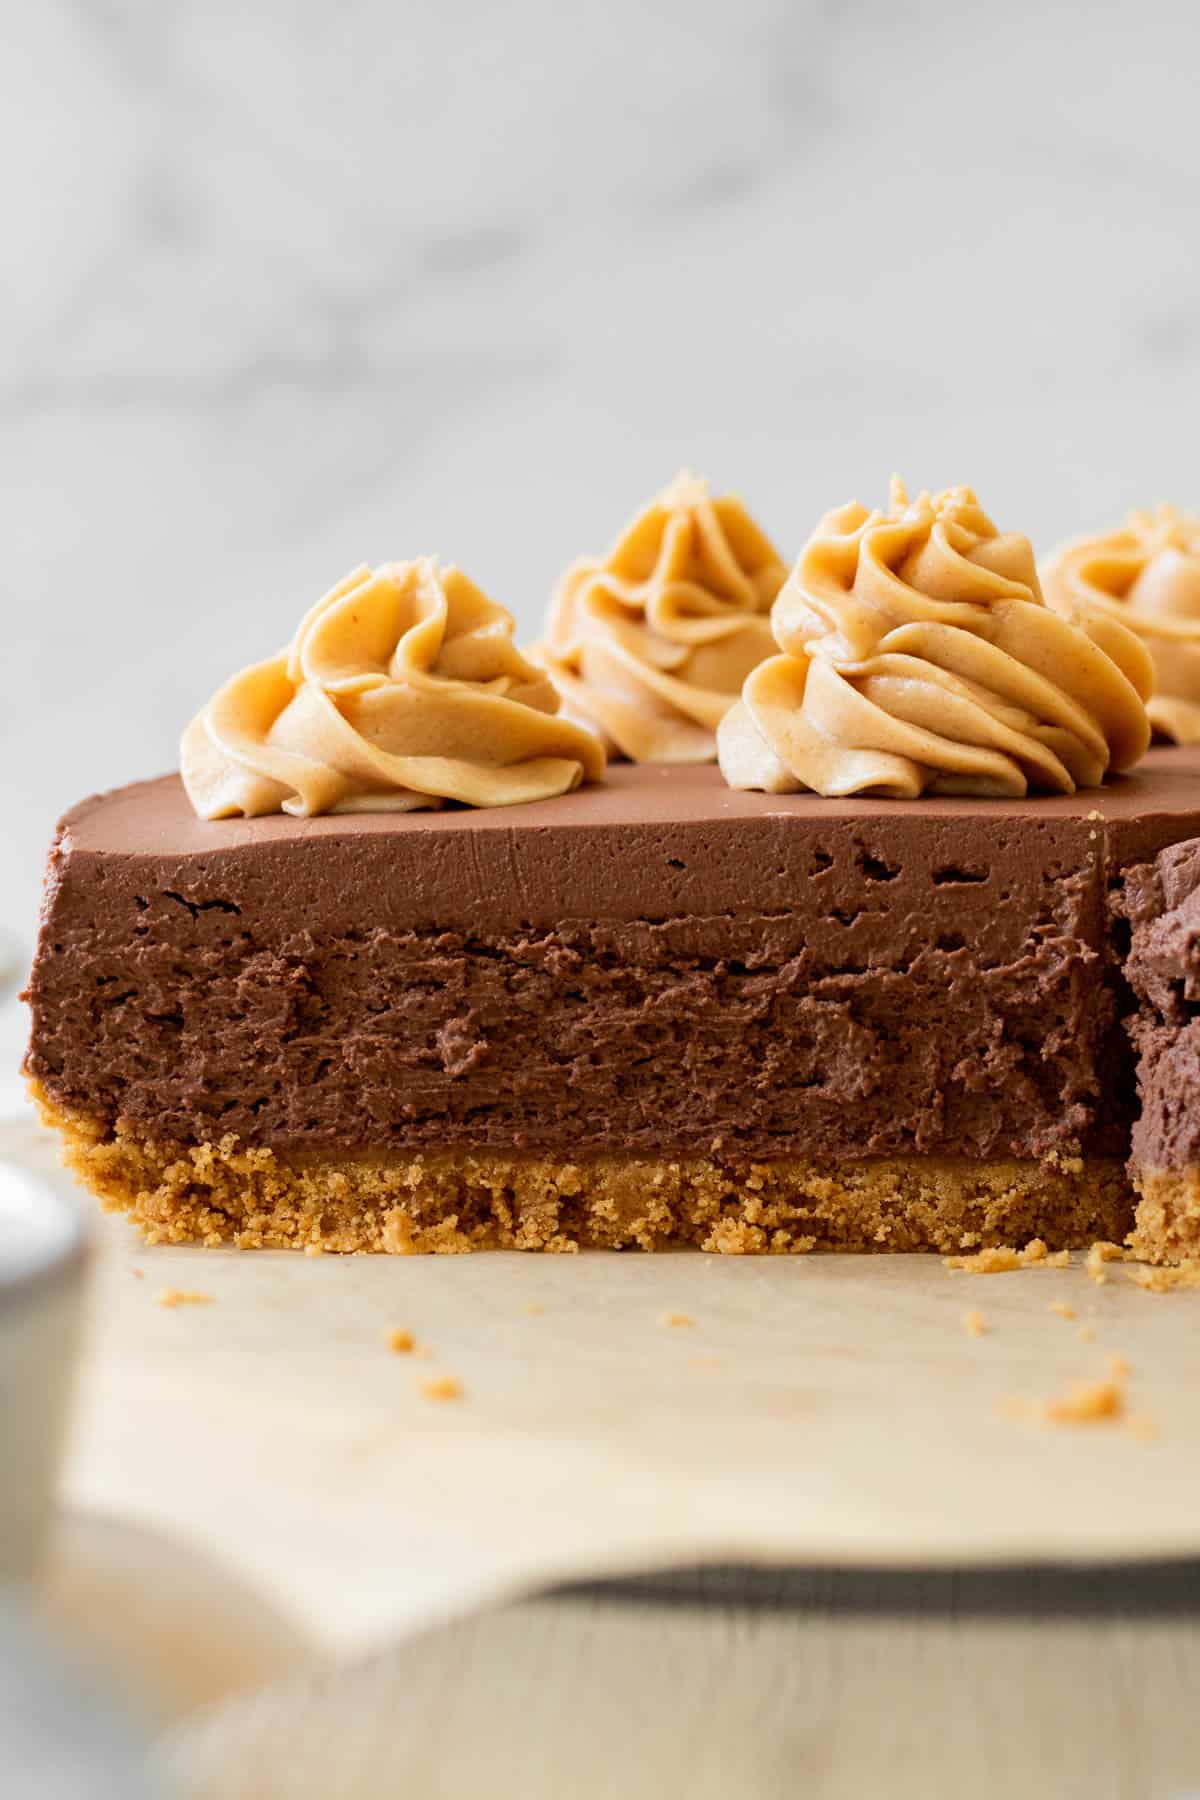
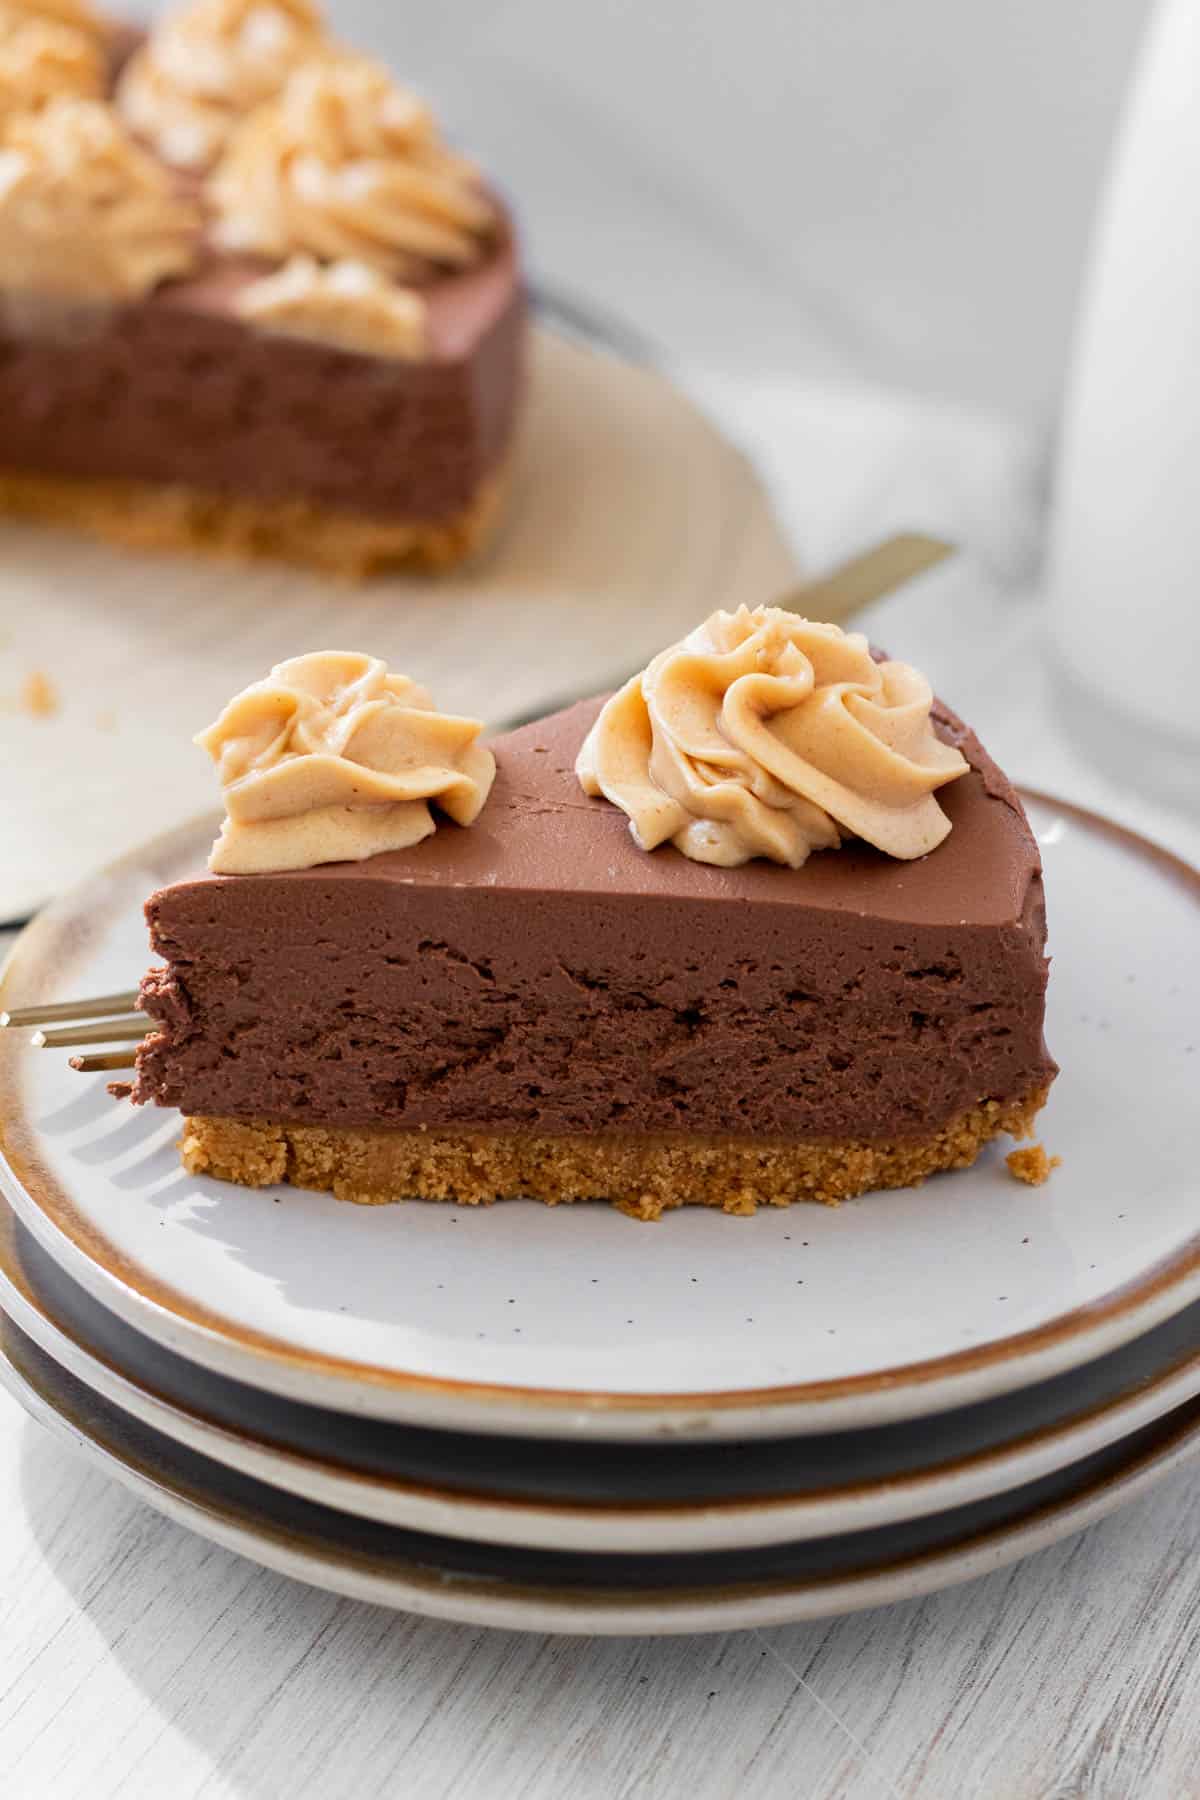
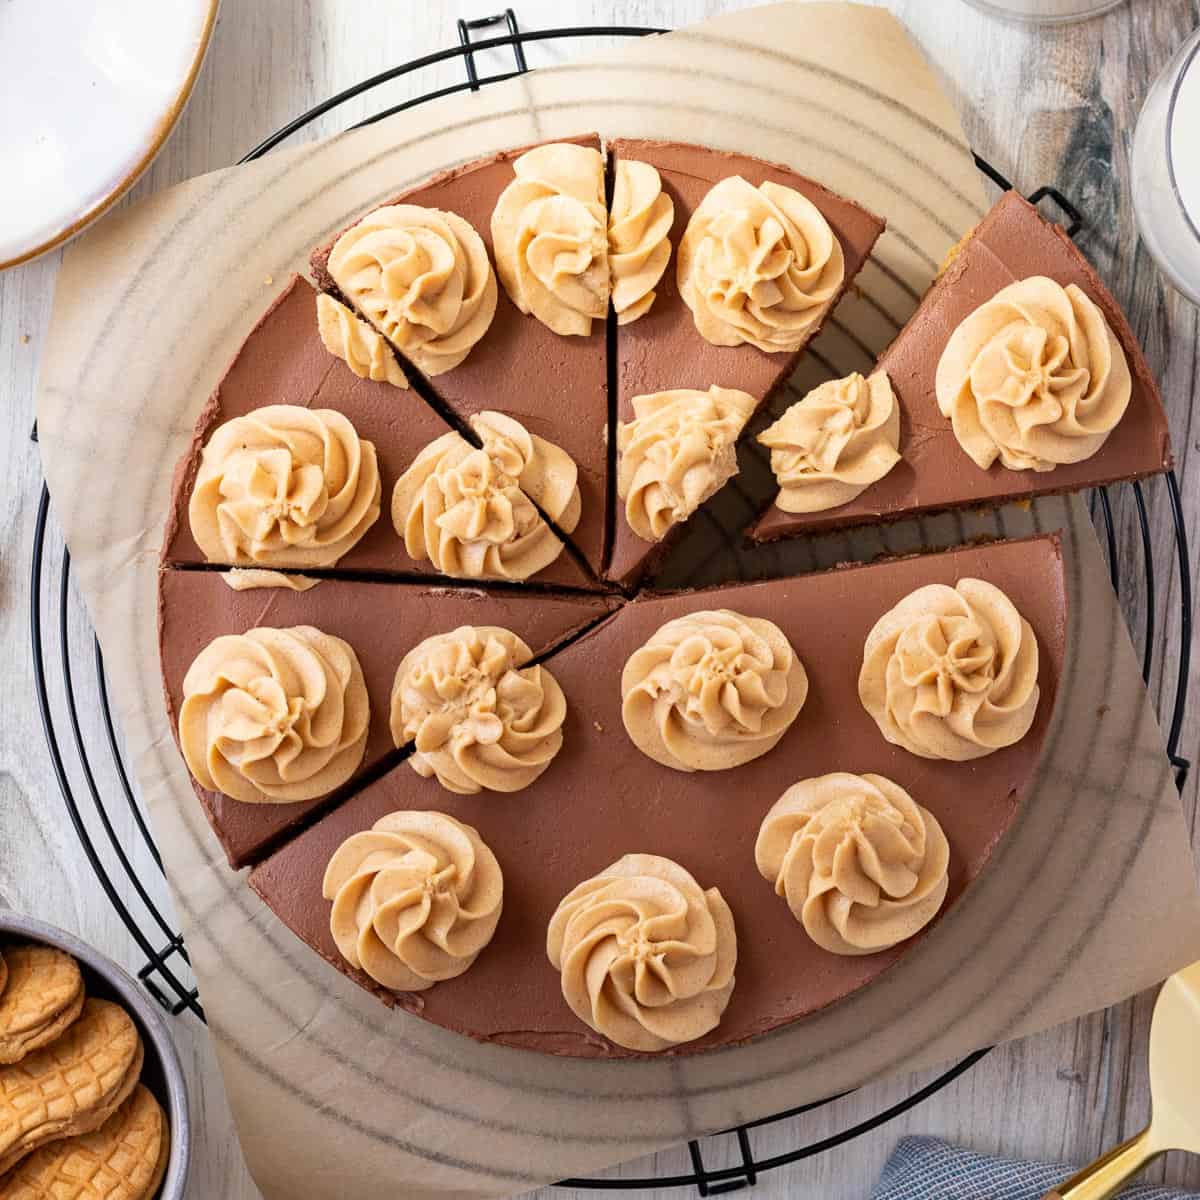
This decadent and ultra-creamy chocolate peanut butter no-bake cheesecake is an easy go-to dessert if you need to impress. A creamy chocolate filling sits on top of a crunchy peanut butter-filled nutter butter crust. The cheesecake is finished with swirls of creamy peanut butter mousse.
What is the difference between a baked and no-bake cheesecake?
While baked cheesecakes have their place in any home baker's repertoire, they are labor intensive and can sometimes be finicky. Water baths, cracks, knowing when they are done, and slowly cooling them are some of the roadblocks you may encounter.
While going through all those hassles is totally worth it for that smooth, creamy and rich finale of a classic cheesecake, like in this vanilla bean cheesecake or this mango cheesecake, sometimes you just don't have the time. Enter the no-bake cheesecake.
Regular cheesecakes are thickened and held together by eggs while a no-bake cheesecake is thickened with the addition of freshly whipped cream. Both require refrigeration overnight to chill properly but the no-bake cheesecake is less time-consuming to make.
The crust is also not baked in no-bake cheesecakes. In this chocolate peanut butter no-bake cheesecake, nutter butter cookies are combined with melted butter. The melted butter is used to "glue" the crumbs together along with pressing them tightly into the pan.
Tips for the perfect no-bake cheesecake
While this no-bake cheesecake is difficult to mess up, there are still a few things to keep in mind for the best outcome.
- Press down the crust tightly- The nutter butter crust does not need to be baked and has extra butter in it that will harden while it chills to hold it together. It's also really important to press it tightly into the springform pan. Use the bottom of a glass or a measuring cup to press it down tightly.
- Softened cream cheese- Begin with softened cream cheese. Using cold cream cheese will result in a lumpy filling as it won't break down properly. If you forget to take the cream cheese out of the refrigerator, unwrap it and place it on a microwave-safe plate. Microwave it on half power for about 10 seconds and then turn it over and do another 5 seconds at half power. If it's still cold, continue for a few seconds at a time until softened. All microwaves are different so check it within those first 10 seconds to make sure it's not melting.
- Beat the heavy cream to stiff peaks- Because there are no eggs or baking involved to thicken the filling, heavy cream is used instead. The key to the right texture of this no-bake cheesecake is the heavy cream. It needs to be whipped to stiff peaks. You'll know you have stiff peaks when you remove the beater from the whipped cream and turn it upside down. The "peak" that forms should stay upright and not droop down.
- Chilling overnight- To get perfectly smooth slices when serving the chocolate peanut butter no-bake cheesecake, refrigerate it for 12 hours. Plan ahead and make it the night before serving (or morning of) so that it has adequate time to chill.
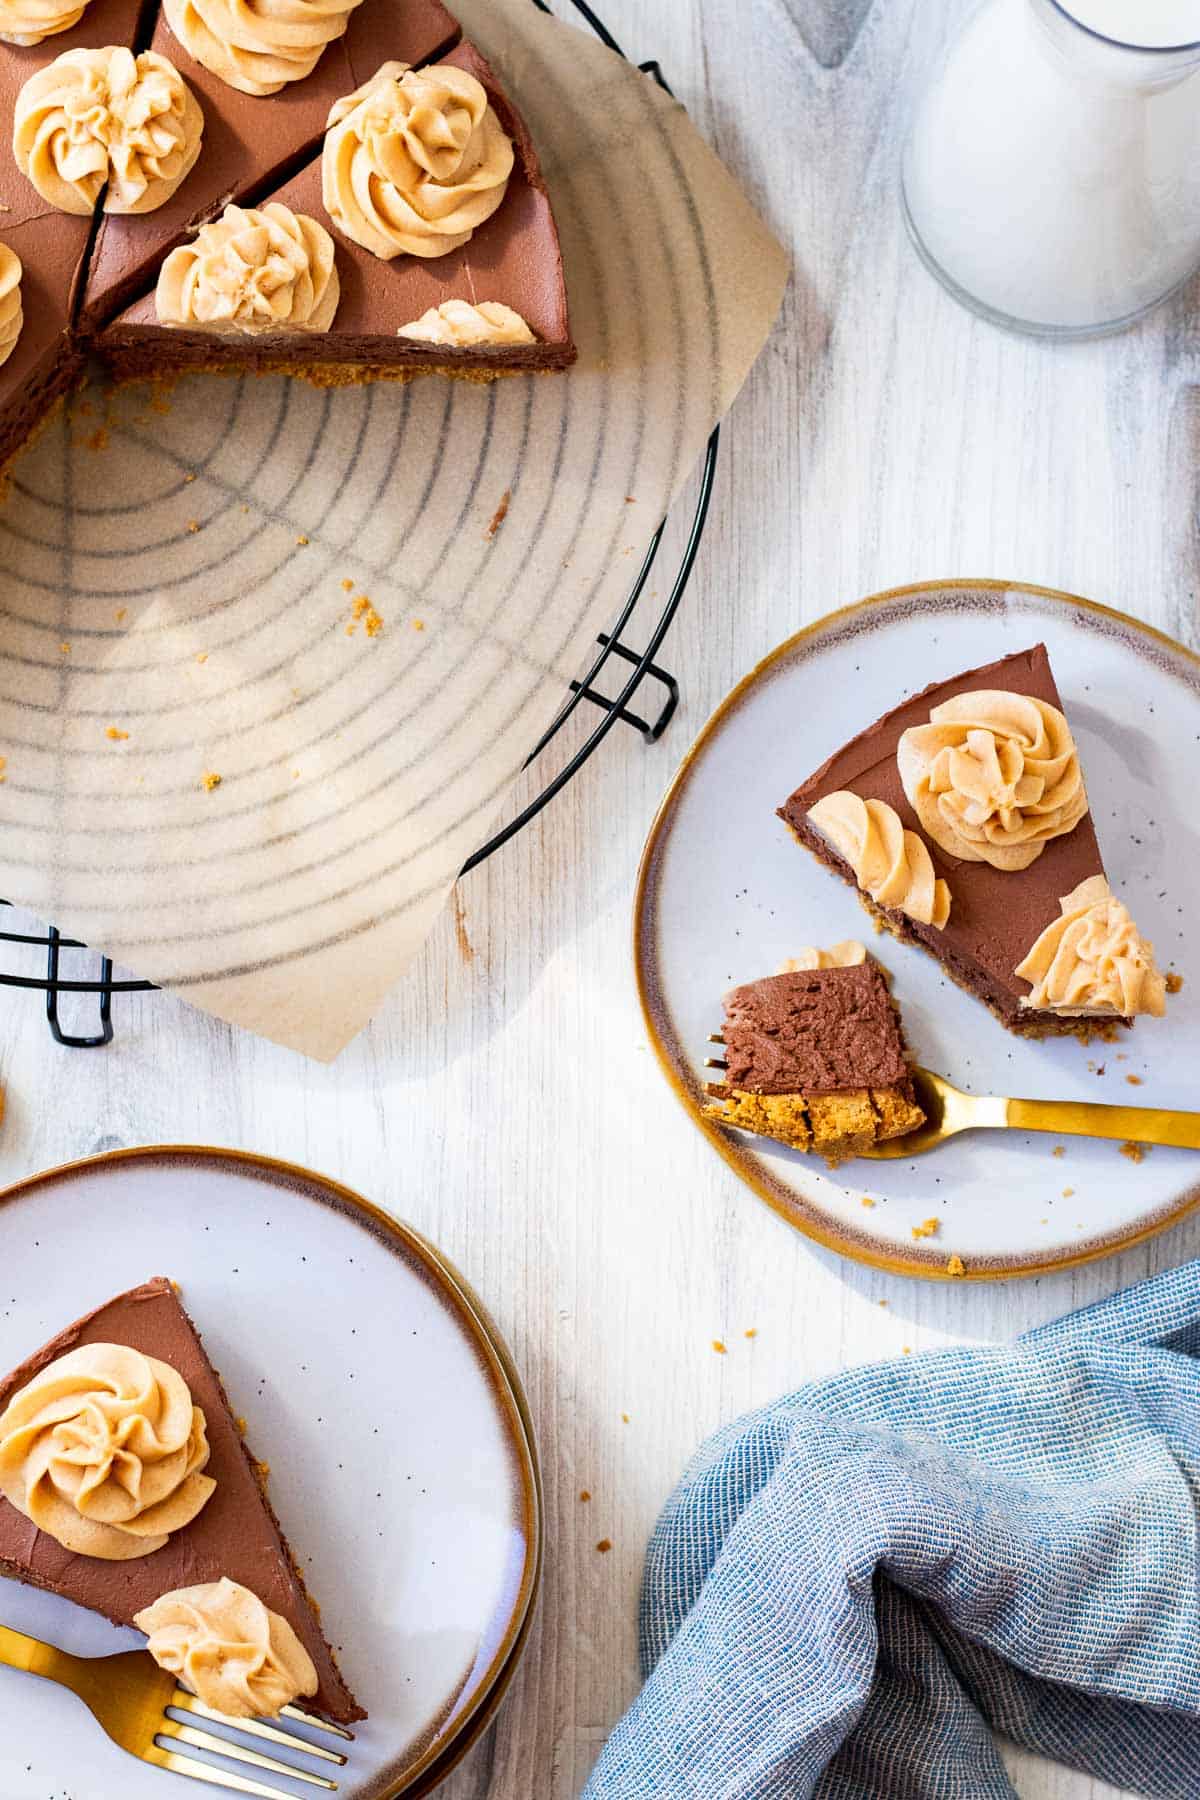
How to decorate with the peanut butter mousse
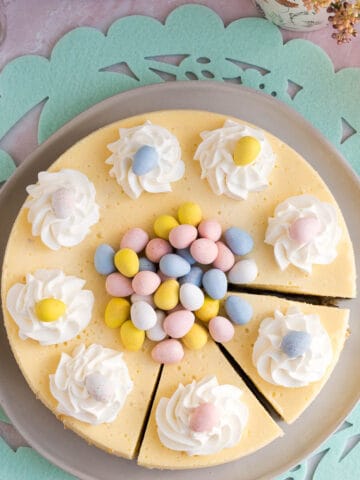
If you'd like to make your cheesecake look like the pictures, you'll need a piping tip and piping bag. I used a Wilton 1M star tip to make the swirls.
There is enough peanut butter mousse to cover the entire top of the cheesecake with swirls if you'd like. If you don't use it all, then save the rest of the peanut butter mousse to serve on the side because it is soooo good!
If you don't have a piping tip and bag, just spread it over the top of the cheesecake in an even layer.
How to release it from the pan
You'll use a springform pan for this cheesecake. The crust is only on the bottom of the pan and not the sides for an easier release. When you are ready to serve the cheesecake, slide a sharp knife around the edge of the pan to release the cheesecake.
Then you can release the spring and remove the outer ring. If you want to slide it off the bottom of the springform base, you can carefully run a knife between the pan and crust to loosen it up. Then slide a large spatula underneath until you feel it release from the bottom. Carefully slide it off onto a serving plate/stand.
Storing the no-bake cheesecake
The cheesecake will last for a good 5 days stored in the refrigerator tightly covered. Good luck with leftovers lasting that long!
Can you freeze a no-bake cheesecake?
The cheesecake can be frozen for later. Let it chill overnight first if you don't want to freeze it in the pan.
After chilling, place the cheesecake on a freezer safe plate and wrap it in plastic wrap and then foil tightly. Freeze for 1-2 months. To thaw the cheesecake, just place it in the refrigerator overnight or at least a few hours before serving.
You can also freeze individual slices. Follow the same procedure above.
For other easy desserts, check out:
Tag me on Instagram @themarblekitchenblog if you make this and leave a star rating and comment below! Thank you and enjoy!
Chocolate Peanut Butter No-Bake Cheesecake
Ingredients
Crust
- 25 Nutter Butter Cookies
- 8 tablespoon unsalted butter melted
Cheesecake
- 8 oz bittersweet chocolate finely chopped
- 1 ¼ cups heavy whipping cream
- 24 oz full-fat cream cheese room temperature
- ¾ cup granulated sugar
- ¼ cup cocoa powder preferably Hershey’s Special Dark or other dutch-processed but any cocoa powder will work
- ¼ cup sour cream
Peanut Butter Mousse
- ½ cup creamy peanut butter not natural peanut butter
- 4 oz cream cheese room temperature
- ½ cup powdered sugar
- ½ cup heavy cream
Instructions
Crust
- Finely crush the cookies in a food processor or place them in a zip top bag and crush with a rolling bin. Add the melted butter and mix until combined. Press the crumbs into the bottom of a 9 inch springform pan. Use the base of a cup or measuring cup to tightly push down the crumbs. Set aside.
Cheesecake
- Place the chopped chocolate in a microwave safe container and microwave for 30 second intervals, stirring after each one until the chocolate is completely melted. Set aside to let it cool.
- Whip the heavy cream in a medium bowl until stiff peaks form. Set aside.
- In a stand mixer or using a hand mixer, beat together the softened cream cheese and the granulated sugar until creamy and combined.
- Add the cocoa powder and sour cream and mix until smooth.
- Mix in the melted chocolate until combined.
- Fold the whipped cream into the cream cheese mixture gently until no white streaks remain.
- Pour the cheesecake filling into the crust and smooth the top with a spatula.
- Cover the cheesecake with foil or plastic wrap and refrigerate for 12 hours or overnight. Top with the peanut butter mousse before serving.
Peanut Butter Mousse
- Combine the peanut butter and cream cheese and mix until creamy. Add the powdered sugar and mix until combined. Add the heavy cream and mix for 2-3 minutes until thickened.
- Refrigerate the mousse for at least an hour before piping it onto the cheesecake.
Pam J Hanson says
I made this cheesecake a day ahead for a friend's birthday party. It is fantastic! A keeper for sure. As it is very rich, I sliced fairly thin, so it makes many pieces . I froze the remaining slices to enjoy later!.
Thanks, Tara!
Pam
Tara Kringlen says
It is rich and so very good! Thanks for the review Pam!