
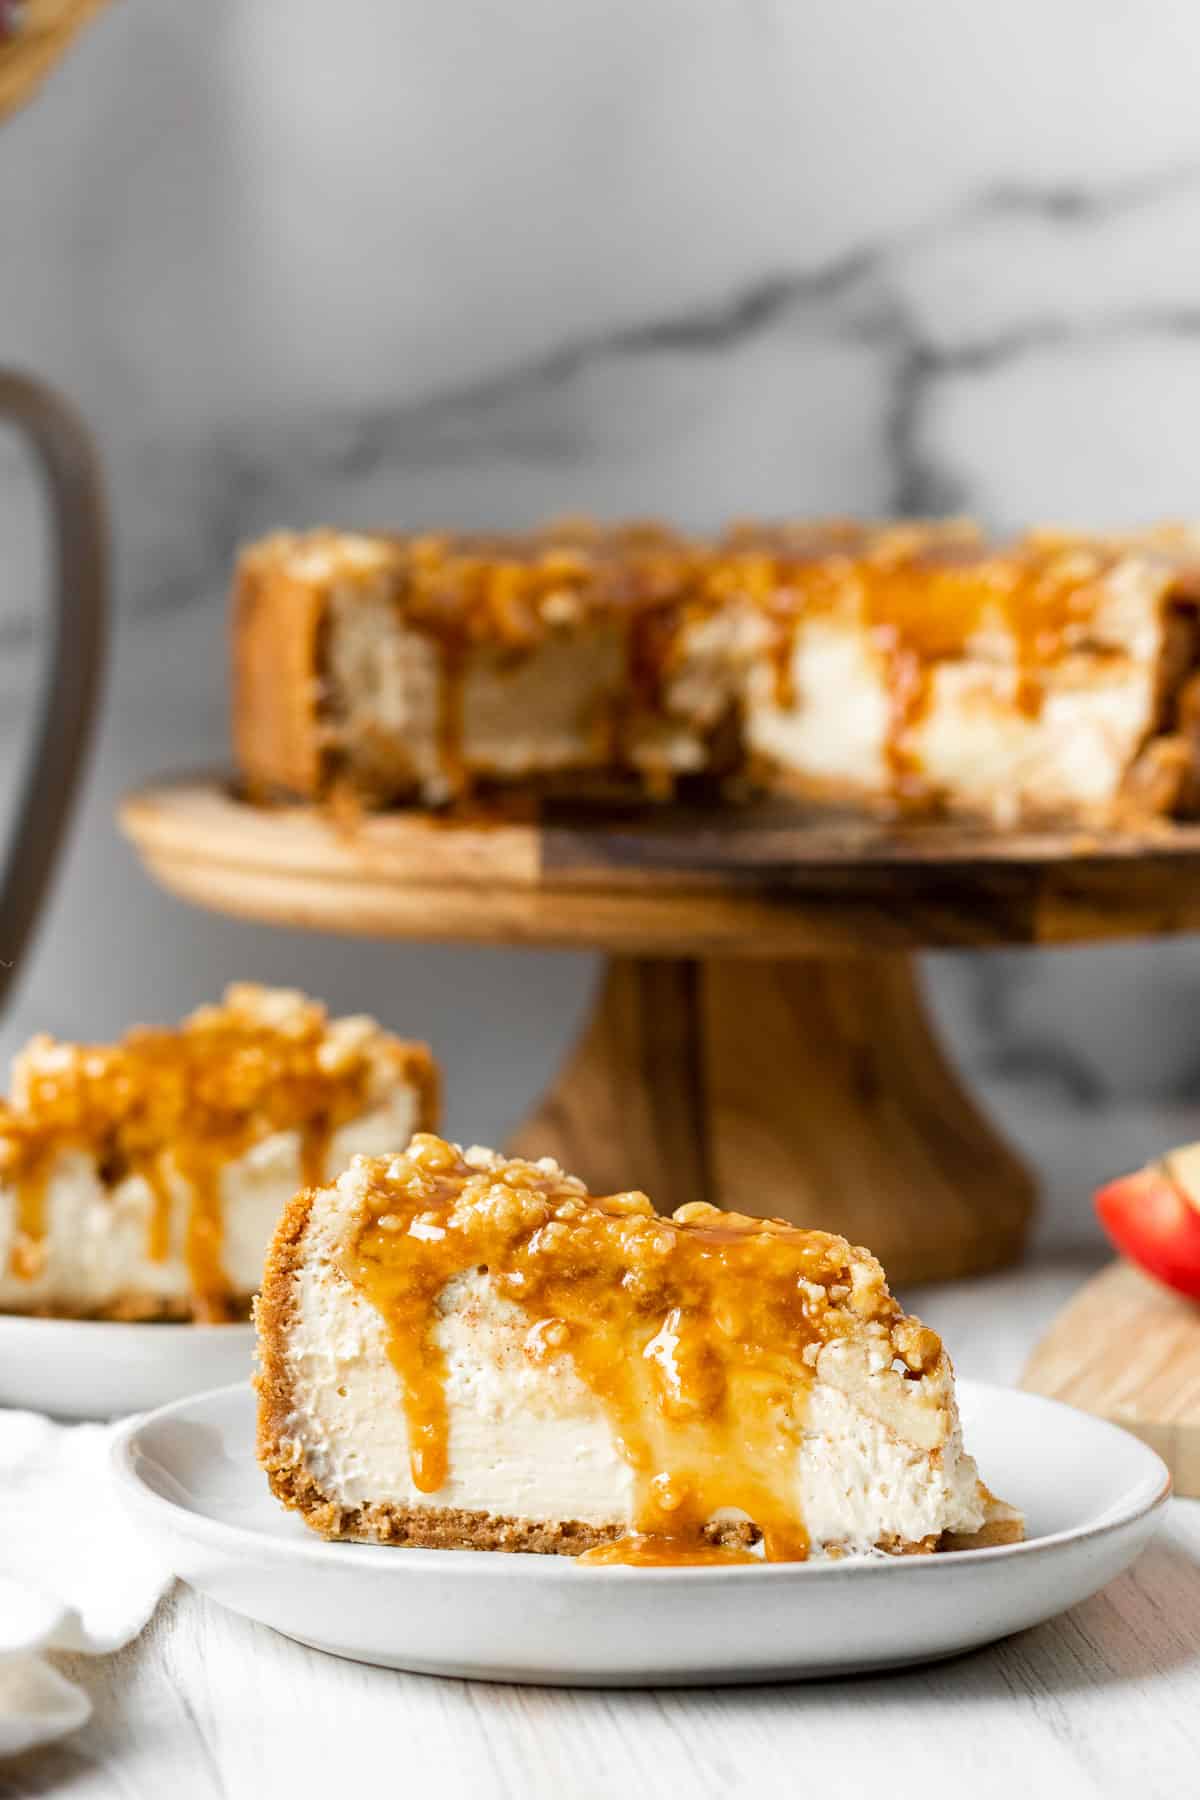
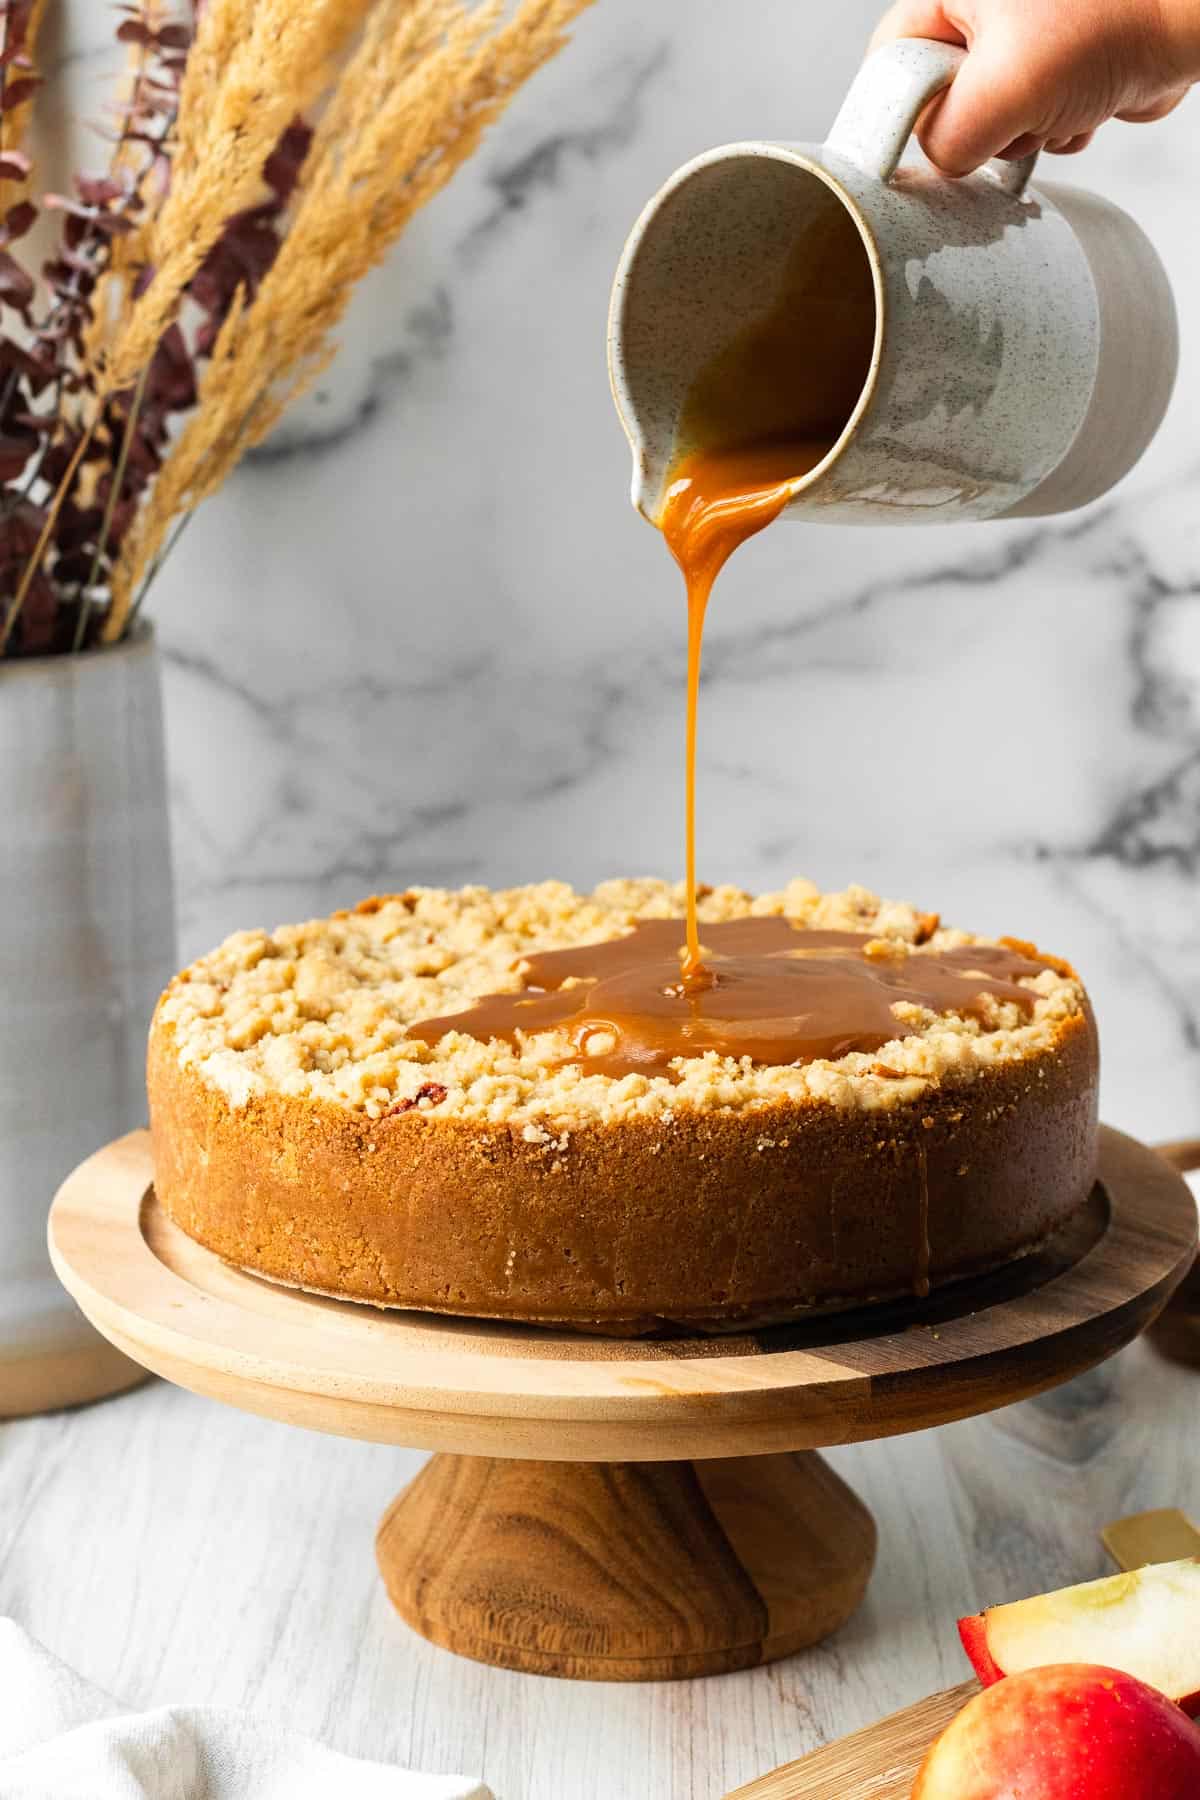
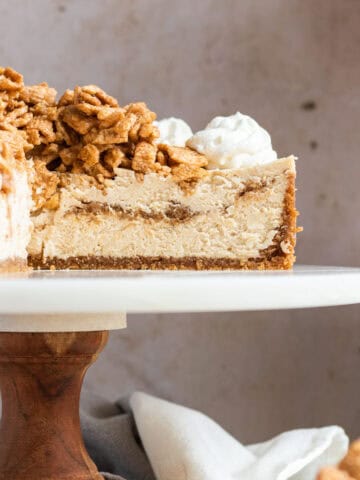
This apple crumble cheesecake screams fall baking project! The cheesecake starts with a crunchy cinnamon graham cracker crust and a creamy brown sugar cheesecake filling. Sliced Honeycrisp apples are combined with more brown sugar and layered on top of the cheesecake filling. The cheesecake is finished with a crunchy streusel topping and drizzled with salted caramel.
Cheesecakes are one of my favorite things to make! While there are a lot of steps to this apple crumble cheesecake, I promise they are worth it!
None of the steps are too difficult and the end result is a show stopper. This would be a great and unique Thanksgiving dessert. Read on for all the tips and tricks on nailing this cheesecake.
Best apples for baking
You typically want a firmer apple when baking so that it doesn't lose its shape. The sweetness of the apple really depends on what you are baking and can be countered with either less or more sugar and your personal preference for how sweet you want your dessert.
- Honeycrisp: This is the chosen apple for this recipe. It's perfect because it is a firm and crisp apple so it will hold its shape and adds the perfect amount of sweetness to the cheesecake. A Pink Lady apple can be a less expensive substitute for Honeycrisps.
- Braeburn: Also a sweet apple with some slight tartness, braeburns fit the bill due to not turning mushy when baked.
- Jonathans: This is the apple I remember picking as a child in Illinois. These apples are grown all over the midwest and are juicy, sweet and firm.
- Granny Smith: The apple of choice for a traditional apple pie, this variety is the most tart of the bunch with more tang than sweetness.
Tips for a perfect cheesecake
- Room Temperature Ingredients: This is so important! Make sure your cream cheese is room temperature before mixing it. If it is still cold, you will likely have little lumps of cream cheese throughout your cheesecake filling and will incorporate too much air trying to beat it. The eggs should be room temperature before adding them as well.
- Slow Cooling: To cool your cheesecake properly, when it is done cooking, turn the oven off and crack the door open. Let it cool for 1 hour in the water bath in the turned-off oven. Then, remove it and let it cool for another hour on the counter before placing it into the fridge to finish chilling for at least 4 hours or preferably overnight. This will prevent it from cooling too quickly and cracking.
- When removing the cheesecake from the outer ring of the springform pan, you may want to run a sharp knife around the edge to make sure it won't stick to the edge.
- Redeeming Cracks: If worse comes to worst and your cheesecake still cracks, remember that the taste should be the same and in the case of this apple crumble cheesecake, the apples, streusel and salted caramel should cover it up.
Assembling the chesecake
In testing this cheesecake, I tried layering the apples in the middle of the cheesecake batter. Because of their added moisture, the cheesecake never fully set in the middle despite ample cooking time.
So, the best way to incorporate the apples in on top of the cheesecake batter. Also, to make it easy, everything is layered on and cooked together. The crust will bake first by itself to yield a crunchy base and then the cheesecake batter, apples and crumble topping are layered on top.
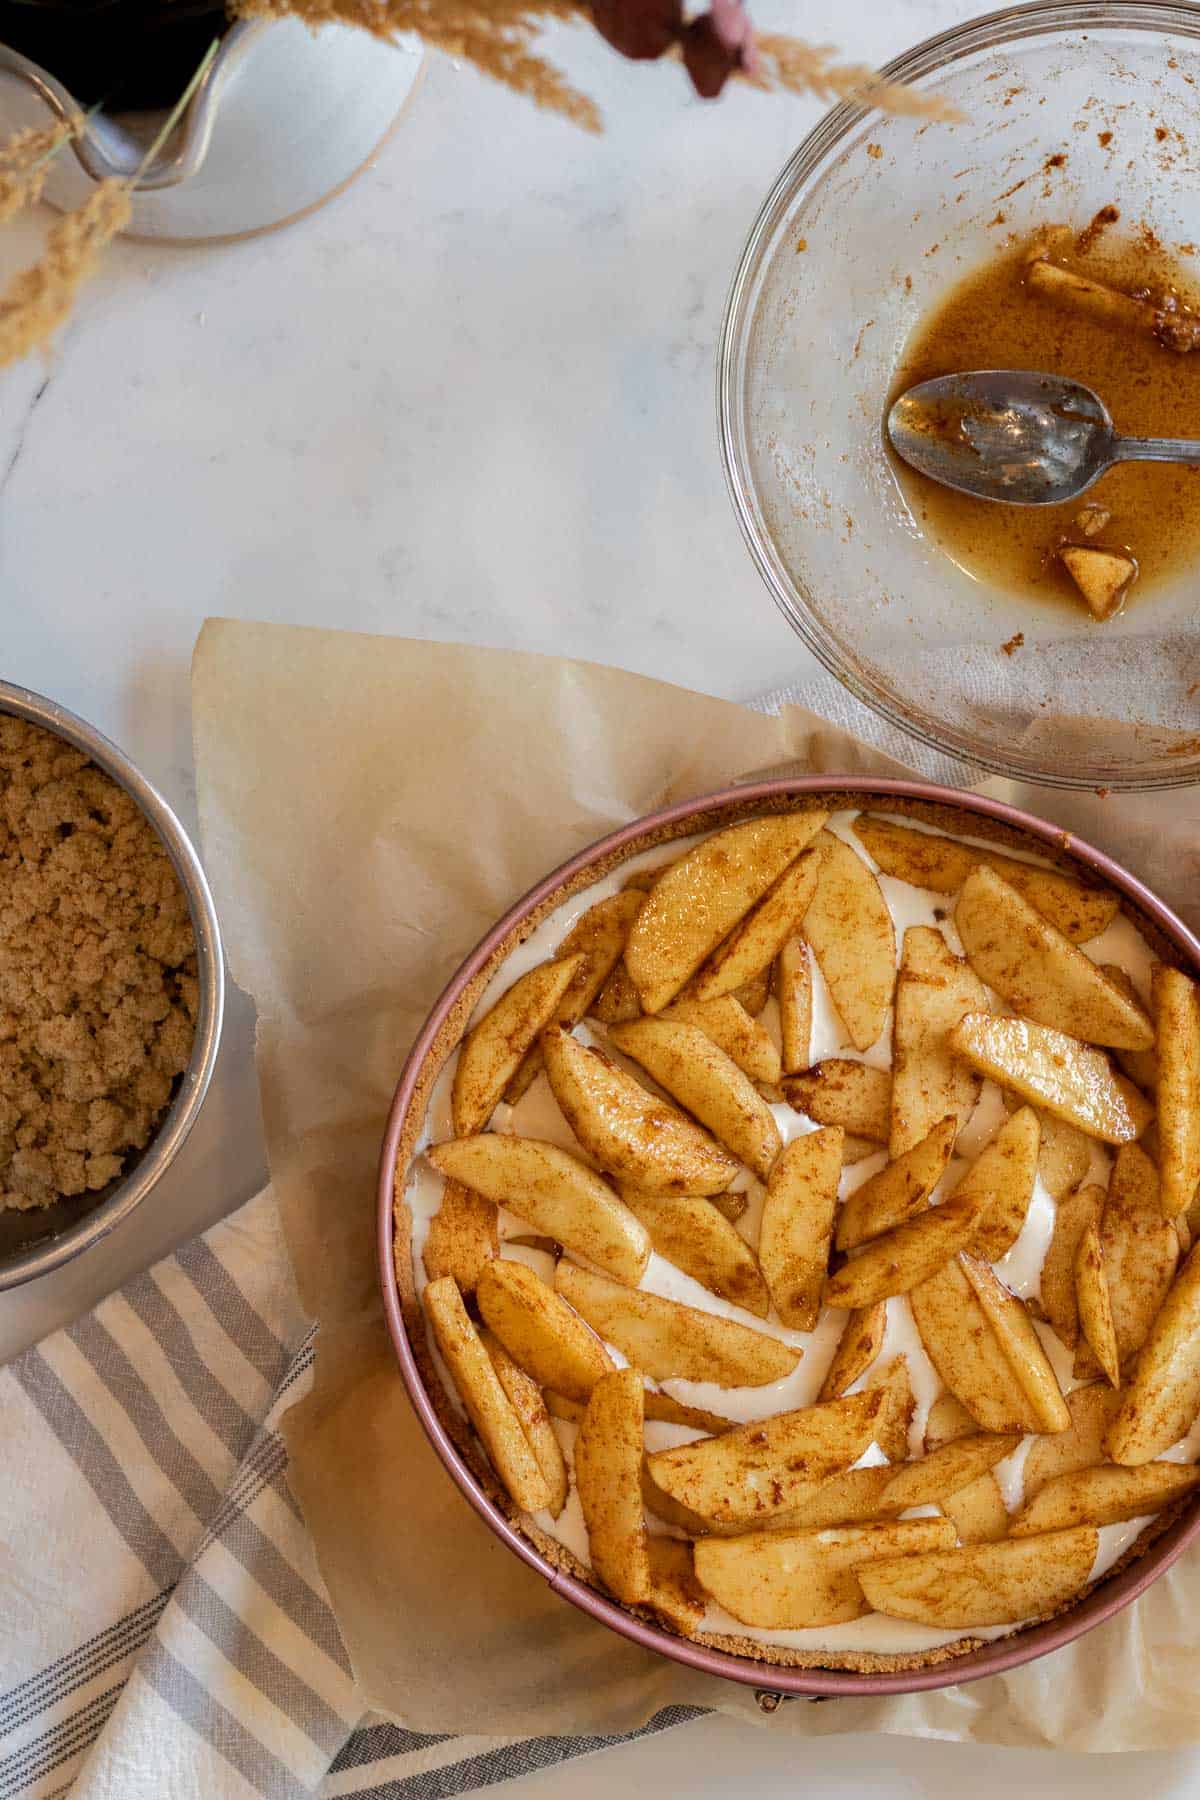
Gently place the apples over the cheesecake batter. Do not just dump them from a bowl onto the cheesecake as they will sink into the batter. Evenly layer them on top. They will sink just slightly into the batter but once it bakes, they will remain on top. If there are accumulated juices from the apples, leave those behind.
How to make a water bath
A water bath will add more moisture to the oven while cooking and allows more even heat to cook the cheesecake. While a water bath is the biggest step to prevent cracks, they also help yield a more creamy cheesecake.
Since this apple crumble cheesecake has toppings to cover the cracks, the cheesecake could still split during cooking. Water baths are simple to do and I highly recommend cooking this cheesecake using this method.
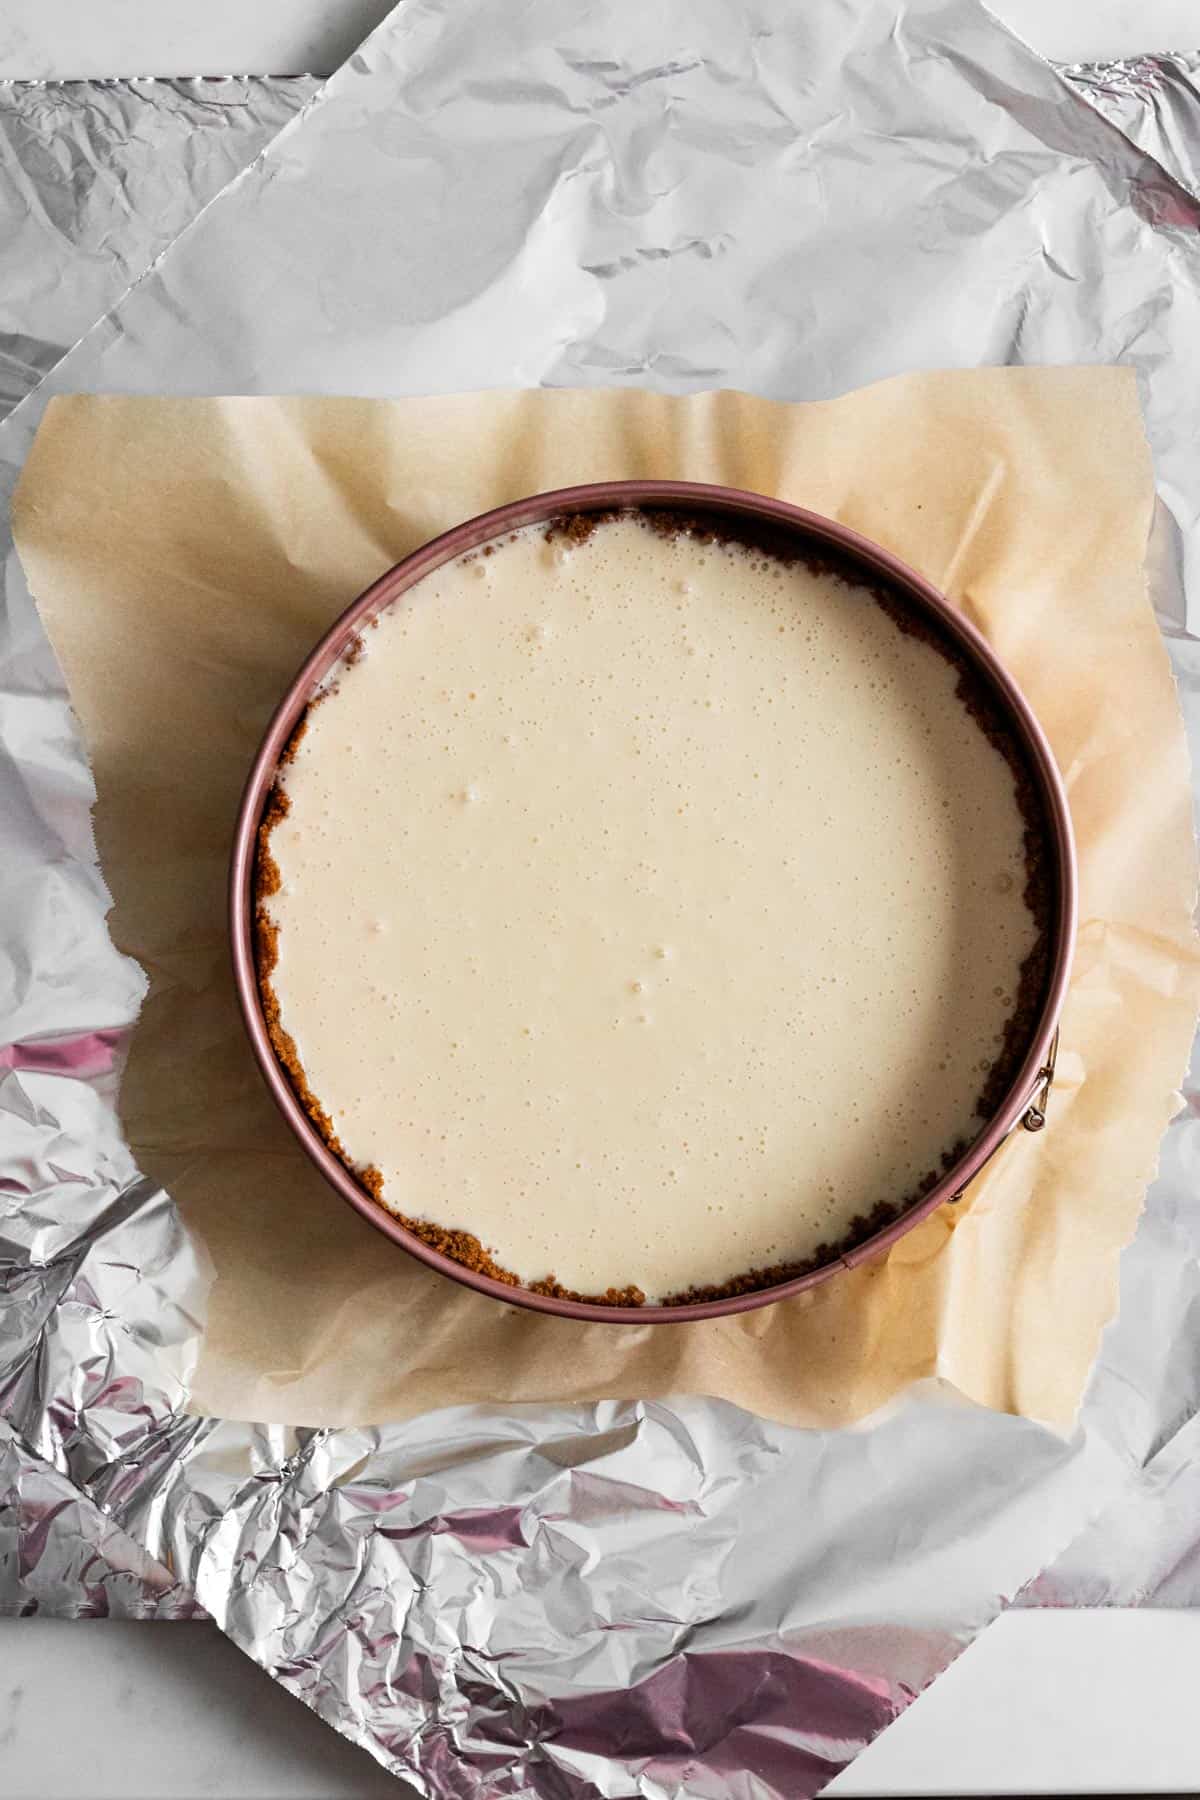
To make a water bath, take 2 pieces of heavy-duty foil and place your springform pan on top of them. Carefully wrap the foil around the pan until it is about ¾ up the side of the pan. Fold it down as necessary to fit.
Make sure there are no holes in the foil to allow water to seep through and get the cheesecake wet! If you don’t have heavy-duty foil, I would recommend using 3 layers of regular foil.
For an extra layer of insurance, you can wrap an oven-safe bag over the foil to make sure water won't seep in. I don't do this step and haven't had an issue but it can happen.
Place your foil-wrapped cheesecake pan in a larger roasting pan in the oven. You’ll pour hot water into the roasting pan until it’s halfway up the sides of the springform pan.
Be careful to not get it past the foil surrounding the pan. Pour the water into the pan after putting it in the oven so you don’t slosh it around while moving it.

How to tell when a cheesecake is done
Knowing when to take a cheesecake out of the oven can be intimidating. You just spent all of that time and money on this glorious cheesecake only to cut into a soupy mess. No one wants that!
Because of the extra moisture from the apples, it will bake longer than other cheesecakes. Mine was perfect at one hour and 30 minutes.
Begin checking the cheesecake for doneness around an hour and 15 minutes. When you give the cheesecake pan a slight jiggle, you should see the edges of the cheesecake are set and don't move. The middle part of the cheesecake should slightly jiggle but should not move like it is still liquid.
You can also test the temperature of the cheesecake using an instant-read thermometer. Test the middle of the cheesecake with the thermometer and look for a temp of 150 to 155 degrees Fahrenheit.
The cheesecake will keep firming up while left in the oven to cool down after baking. It will firm up completely after being refrigerated for at least 4 hours or for best results overnight.
How long does the cheesecake last?
The cheesecake can be placed in the refrigerator for 3-4 days tightly wrapped. The crumble topping does start to get less crunchy as time goes on but it's still delicious.
If you know you won't be serving the whole cheesecake, only pour the salted caramel over the slices you plan to serve to keep the whole cheesecake from becoming soggy.
Can the cheesecake be frozen?
You can make the entire cheesecake and then freeze it if you need to plan ahead. Cool the apple crumble cheesecake completely then remove it from the springform pan. Place it on a round cardboard circle or a heavy-duty plastic plate or keep it on the base of the springform pan.
Freeze the cheesecake for about an hour uncovered. It needs to be cold enough to wrap tightly without squishing it. After an hour or so, remove the cheesecake and wrap it tightly in plastic wrap and then in foil. It should last for about 1 to 2 months like this.
To thaw it out, place the cheesecake into the refrigerator the night before you will need to serve it. You can also slice the cake prior to freezing it and freeze individual slices of cheesecake, wrapped in the same way as a whole one.

For more cheesecakes, check out these:
- Eggnog Cheesecake
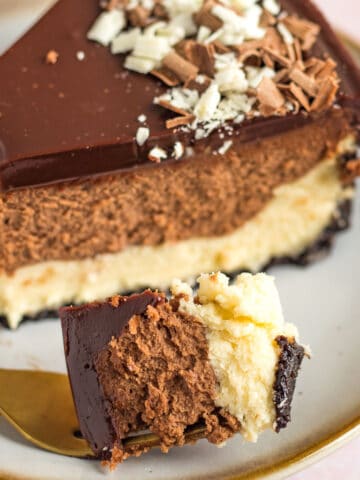
- Chocolate Bailey's Cheesecake
- Raspberry Cheesecake with a Brownie Crust
- Vanilla Bean Cheesecake with White Chocolate Mousse
Tag me on Instagram @themarblekitchenblog if you make this and leave a star rating and comment below! Thank you and enjoy!

Apple Crumble Cheesecake
Ingredients
Crust
- 16 graham cracker sheets yields about 2 cups of crumbs
- ¼ cup brown sugar packed
- 1 teaspoon cinnamon
- 8 tablespoons unsalted butter melted
Apples
- 3 large apples Granny Smith, Honeycrisp, etc, peeled and thinly sliced
- 1 teaspoon cinnamon
- 2 tablespoons brown sugar
Crumble Topping
- ¾ cup all purpose flour
- ½ cup brown sugar packed
- ¼ teaspoon kosher salt
- 6 tablespoons unsalted butter softened
Cheesecake Filling
- 24 oz (3-8oz packages) cream cheese full fat and softened
- 1 cup brown sugar packed
- 4 large eggs room temperature
- 1 teaspoon vanilla extract
- ½ teaspoon kosher salt
- ½ cup heavy cream
Instructions
Crust
- Preheat the oven to 350°F.
- Crush the graham crackers using a food processor or place in a zip top bag and crush them using a rolling pin.
- Combine the crushed graham crackers, brown sugar, cinnamon and melted butter and stir well.
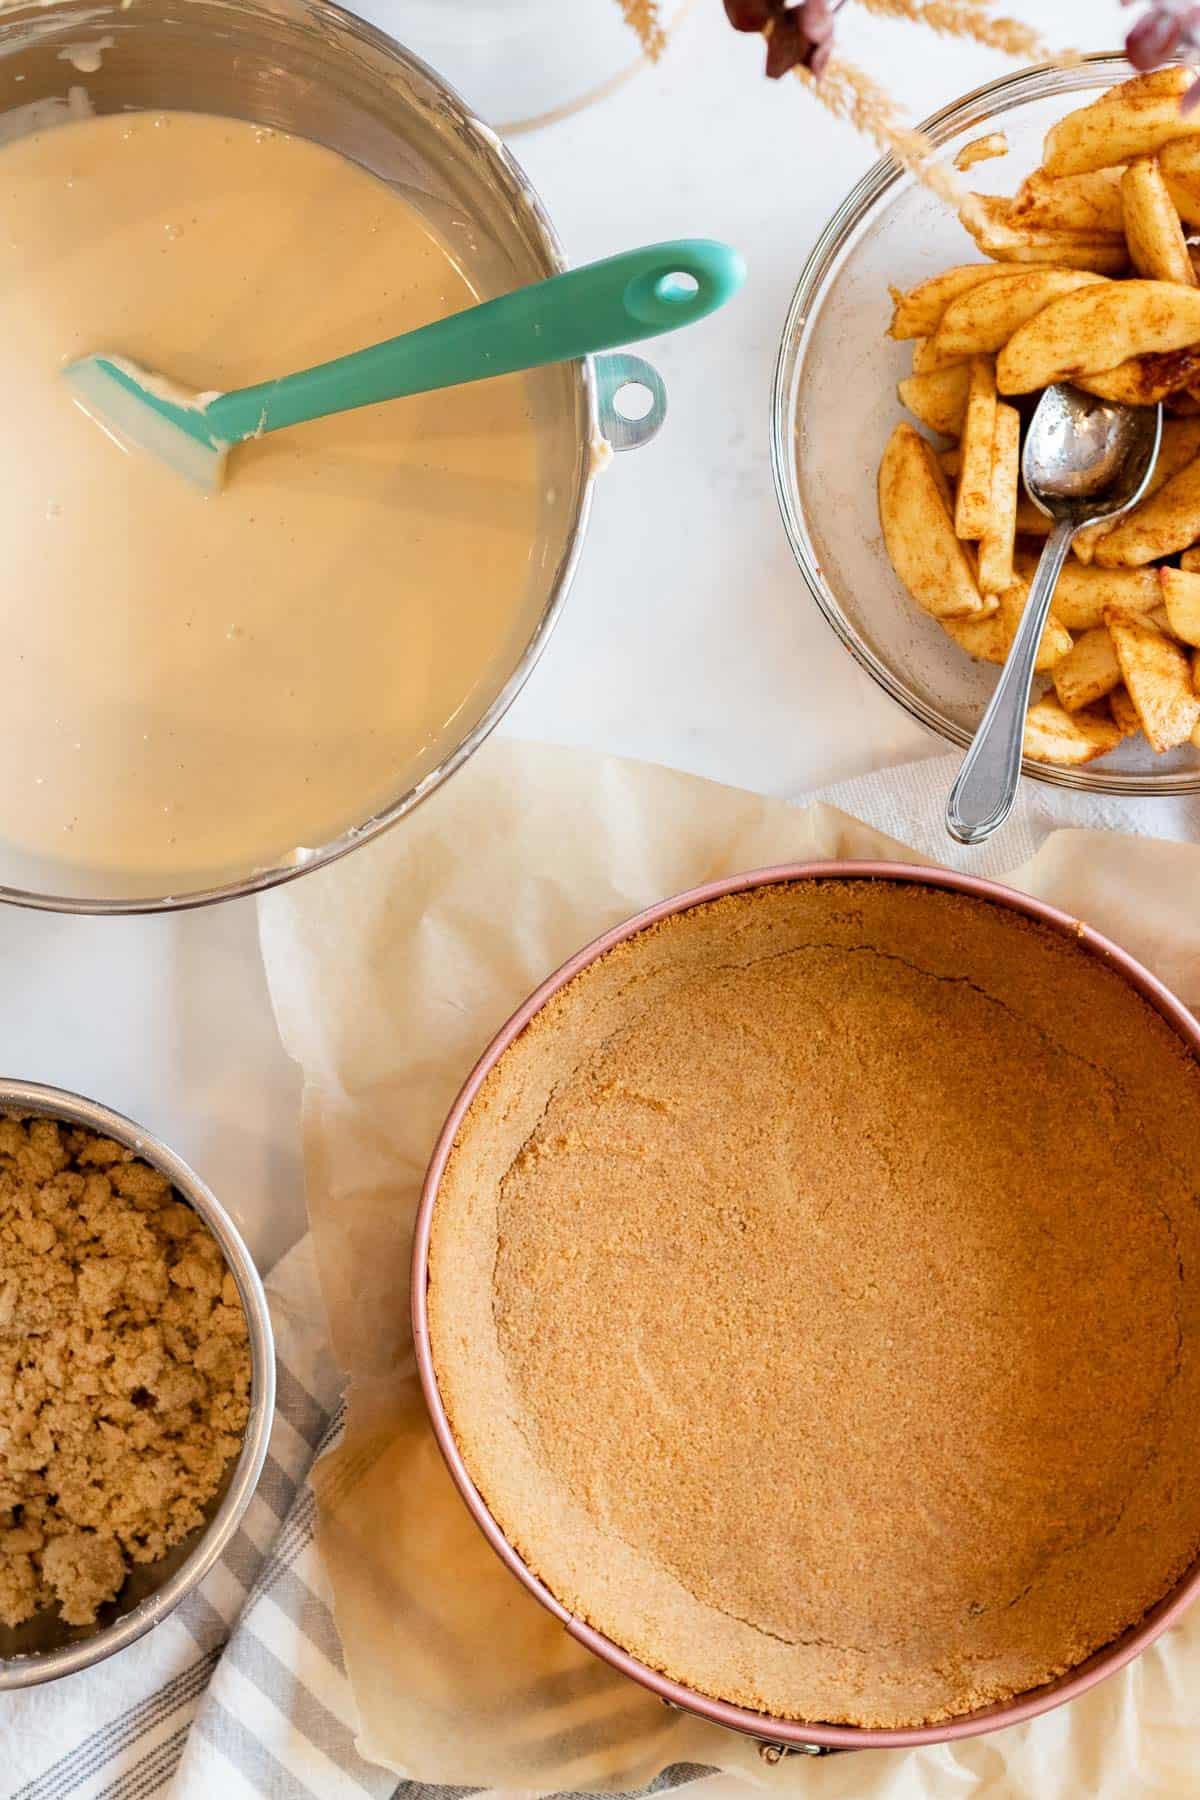
- Pour the crumbs into a 9 in springform pan and press into the bottom and up the sides 1 ½ inches, using your fingers or the bottom of a glass to press it down tightly.
- Bake the crust for 10 minutes. Cool on a wire rack. Turn the oven down to 325°F.
Apples
- Combine the sliced apples, brown sugar and cinnamon in a bowl and toss to combine. Set aside while making the cheesecake filling.
Crumble
- Combine flour, brown sugar and salt in a small bowl. Using your fingers or a fork, smash the butter into the flour mixture until small crumbs form throughout.
Cheesecake Filling
- Prepare the springform pan for a water bath. Once the crust has cooled, wrap the springform pan with 2 layers of heavy-duty foil wrapping and folding the edges at least ¾ up the sides of the pan. For an extra barrier, if desired, place an oven bag around the foil and tie it around the foil to secure it.
- Combine the softened cream cheese and brown sugar in the bowl of a stand mixer with a paddle attachment (or use a hand mixer) and mix on medium until smooth, about 2-3 minutes scraping the sides of the bowl occasionally.
- Add the eggs one at a time, mixing well after each.
- Add the vanilla and salt and mix well.
- Add the heavy cream mix until combined, about 30 seconds.
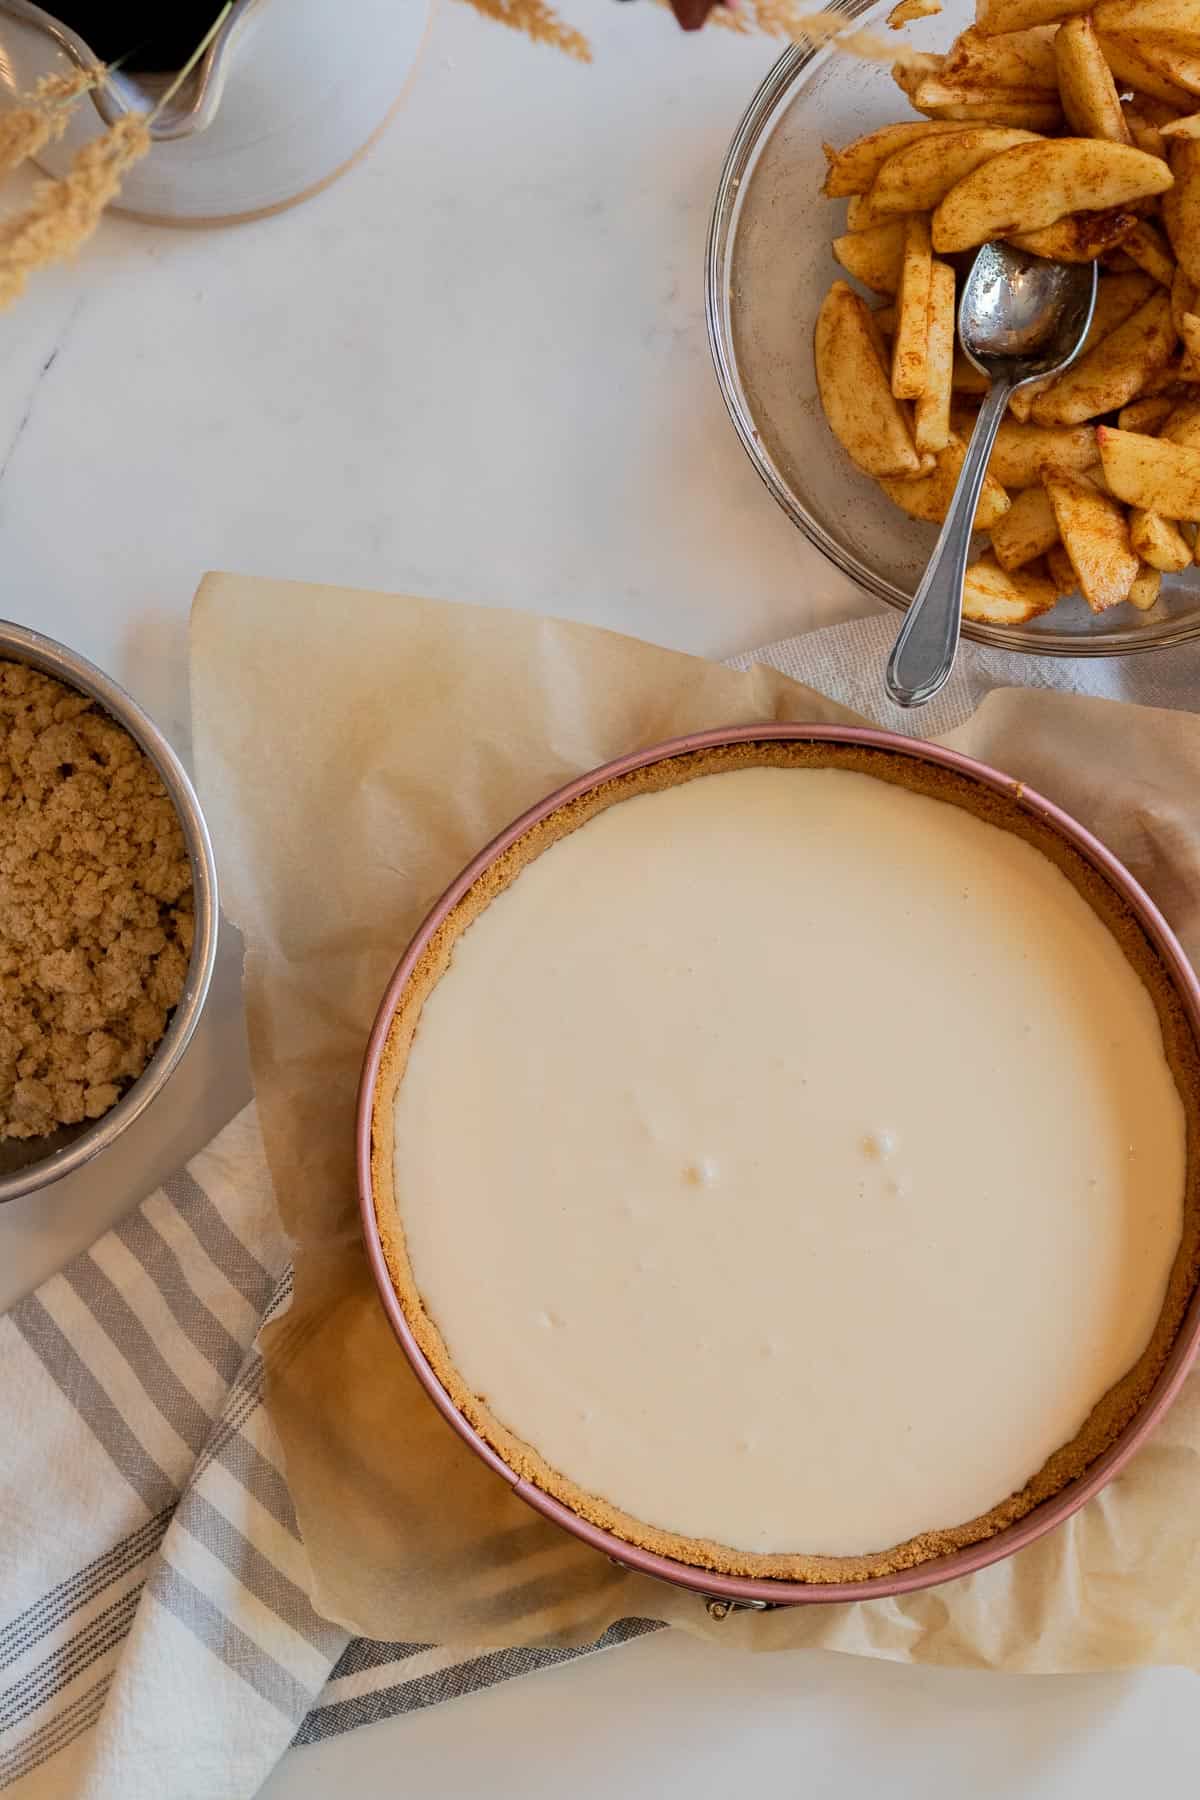
- Pour the batter into the prepared pan over the crust.
- Gently layer the apples over the top of the crust, covering the entire cheesecake. Leave aside any accumulated juices from the apples in the bowl and discard.
- Sprinkle the crumble topping over the top of the apples evenly.
- Place the springform pan into a roasting pan and place in the oven. Carefully pour very hot water into the roasting pan until it comes about halfway up the sides of the springform pan being careful not to get any water between the pan and the foil.
- Bake the cheesecake at 325 degrees F for 1 hour 30 minutes to 1 hour 40 minutes. If you have an instant read thermometer, the temperature should be 150-155 degrees. The cheesecake is done when the middle is still slightly jiggly but the edges are fully set.
- Turn the oven off and slightly prop open the oven door with a wooden spoon if it won’t stay open on its own. Allow to cool in the oven for 1 hour.
- Carefully remove the roasting pan from the oven and remove the cheesecake from the water. Remove the foil. Cool for another hour on a wire rack.
- Place the cheesecake in the refrigerator, covering the top with foil or plastic wrap and chill at least 4 hours or preferably overnight.
- To serve, pour salted caramel over individual slices or the whole cheesecake.
Notes
- The cheesecake can be kept for 3-4 days tightly wrapped in the refrigerator.
Joe says
this was amazing!
Tara Kringlen says
Glad to hear! Thanks Joe!
Joanne says
I have been making cheesecake for years, but this one may have been my best yet!
Tara Kringlen says
Great to hear! Thanks!
Patrick says
Sounds amazing! I'll make this for Thanksgiving this year. About the apples, I'm thinking maybe 1/4-inch slices?
Tara Kringlen says
Yes, 1/4 inch would be great!