
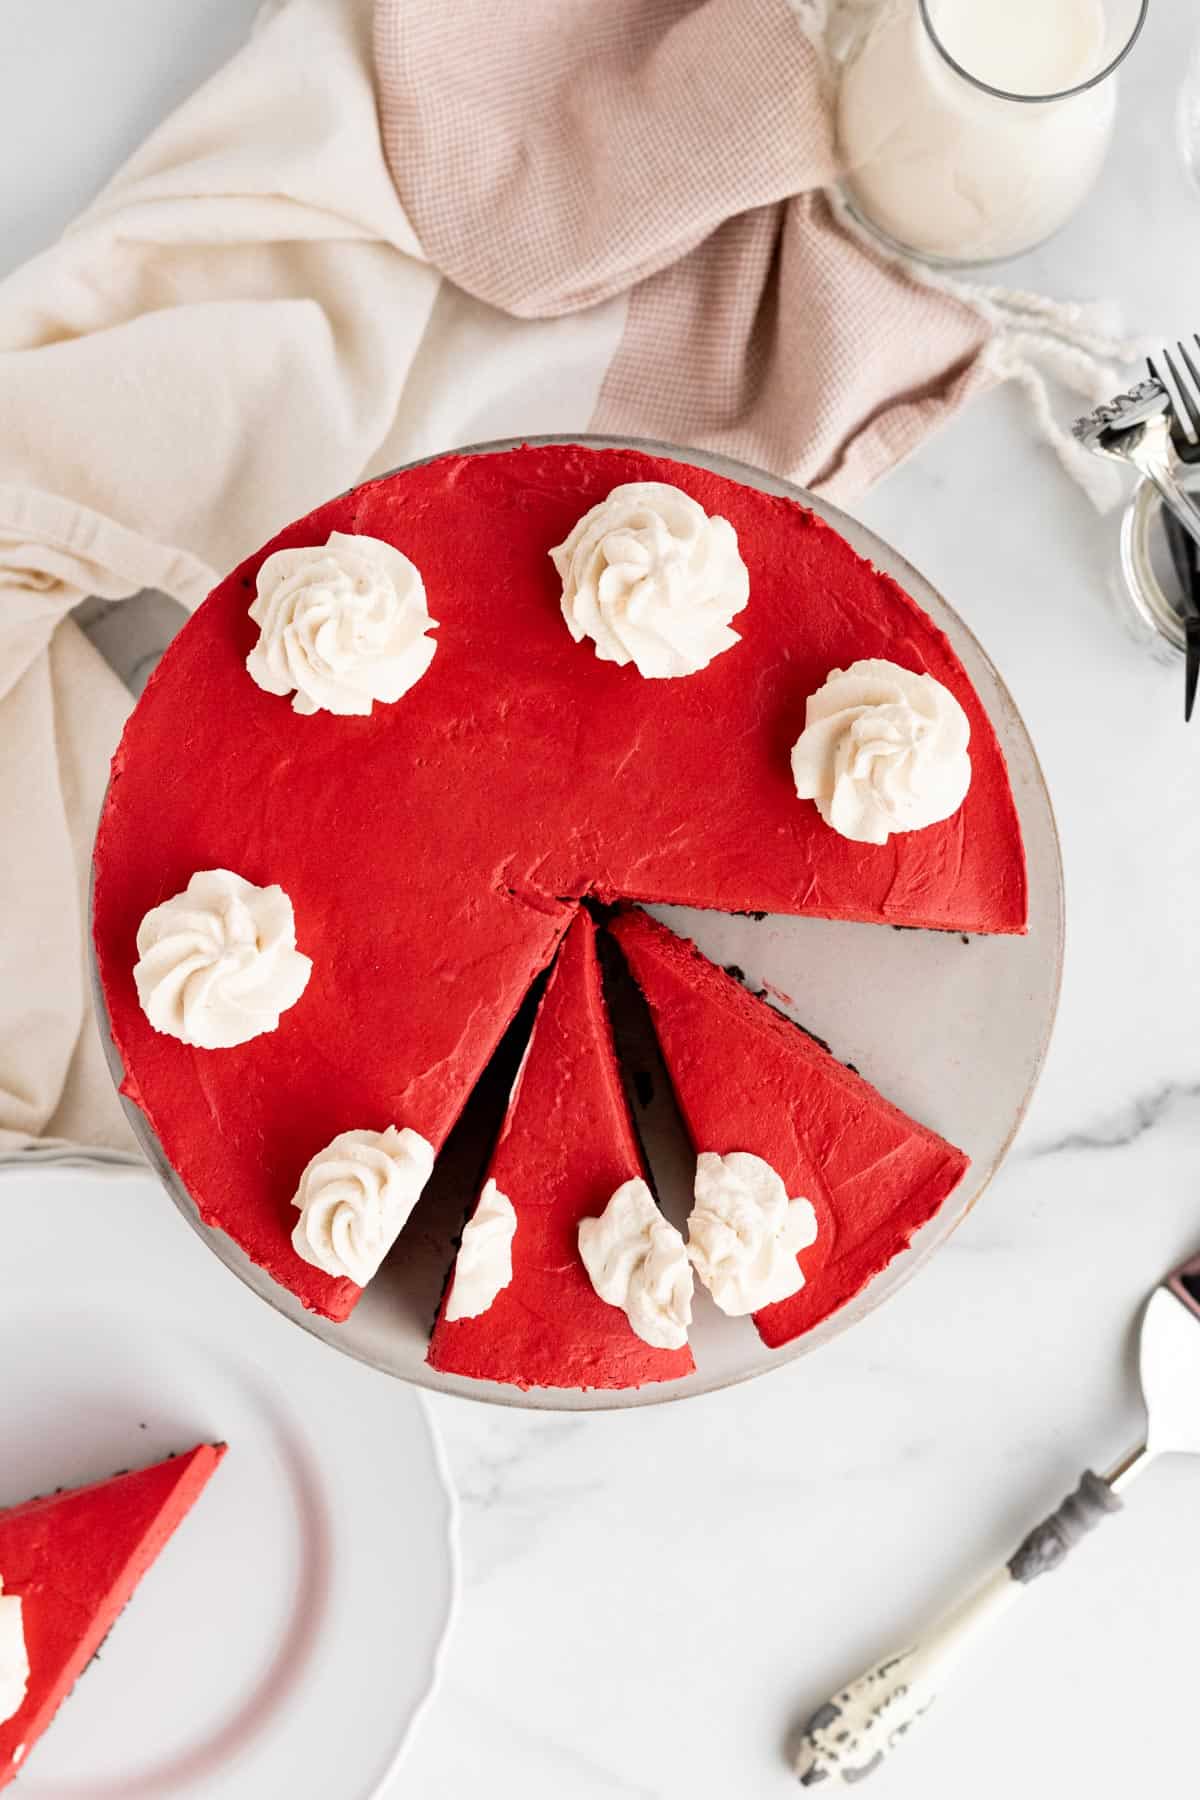
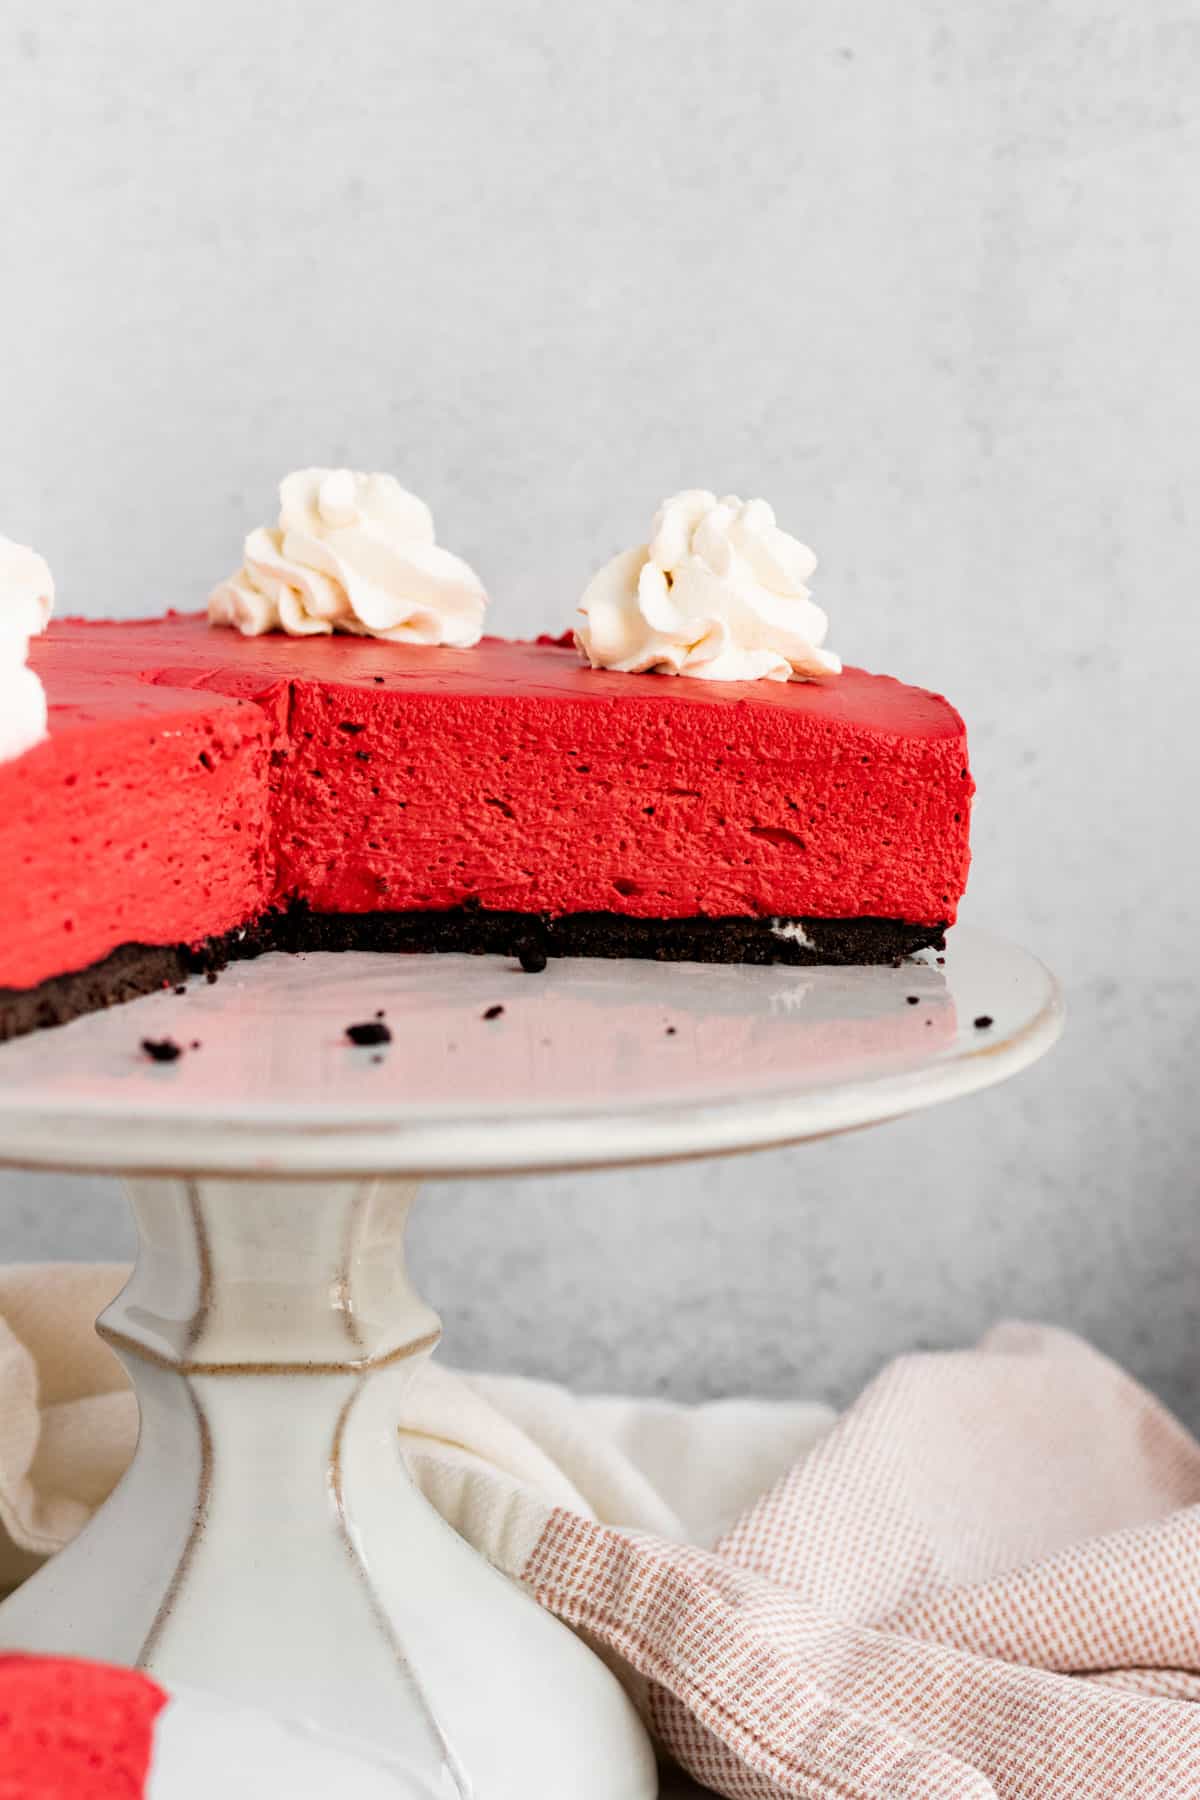
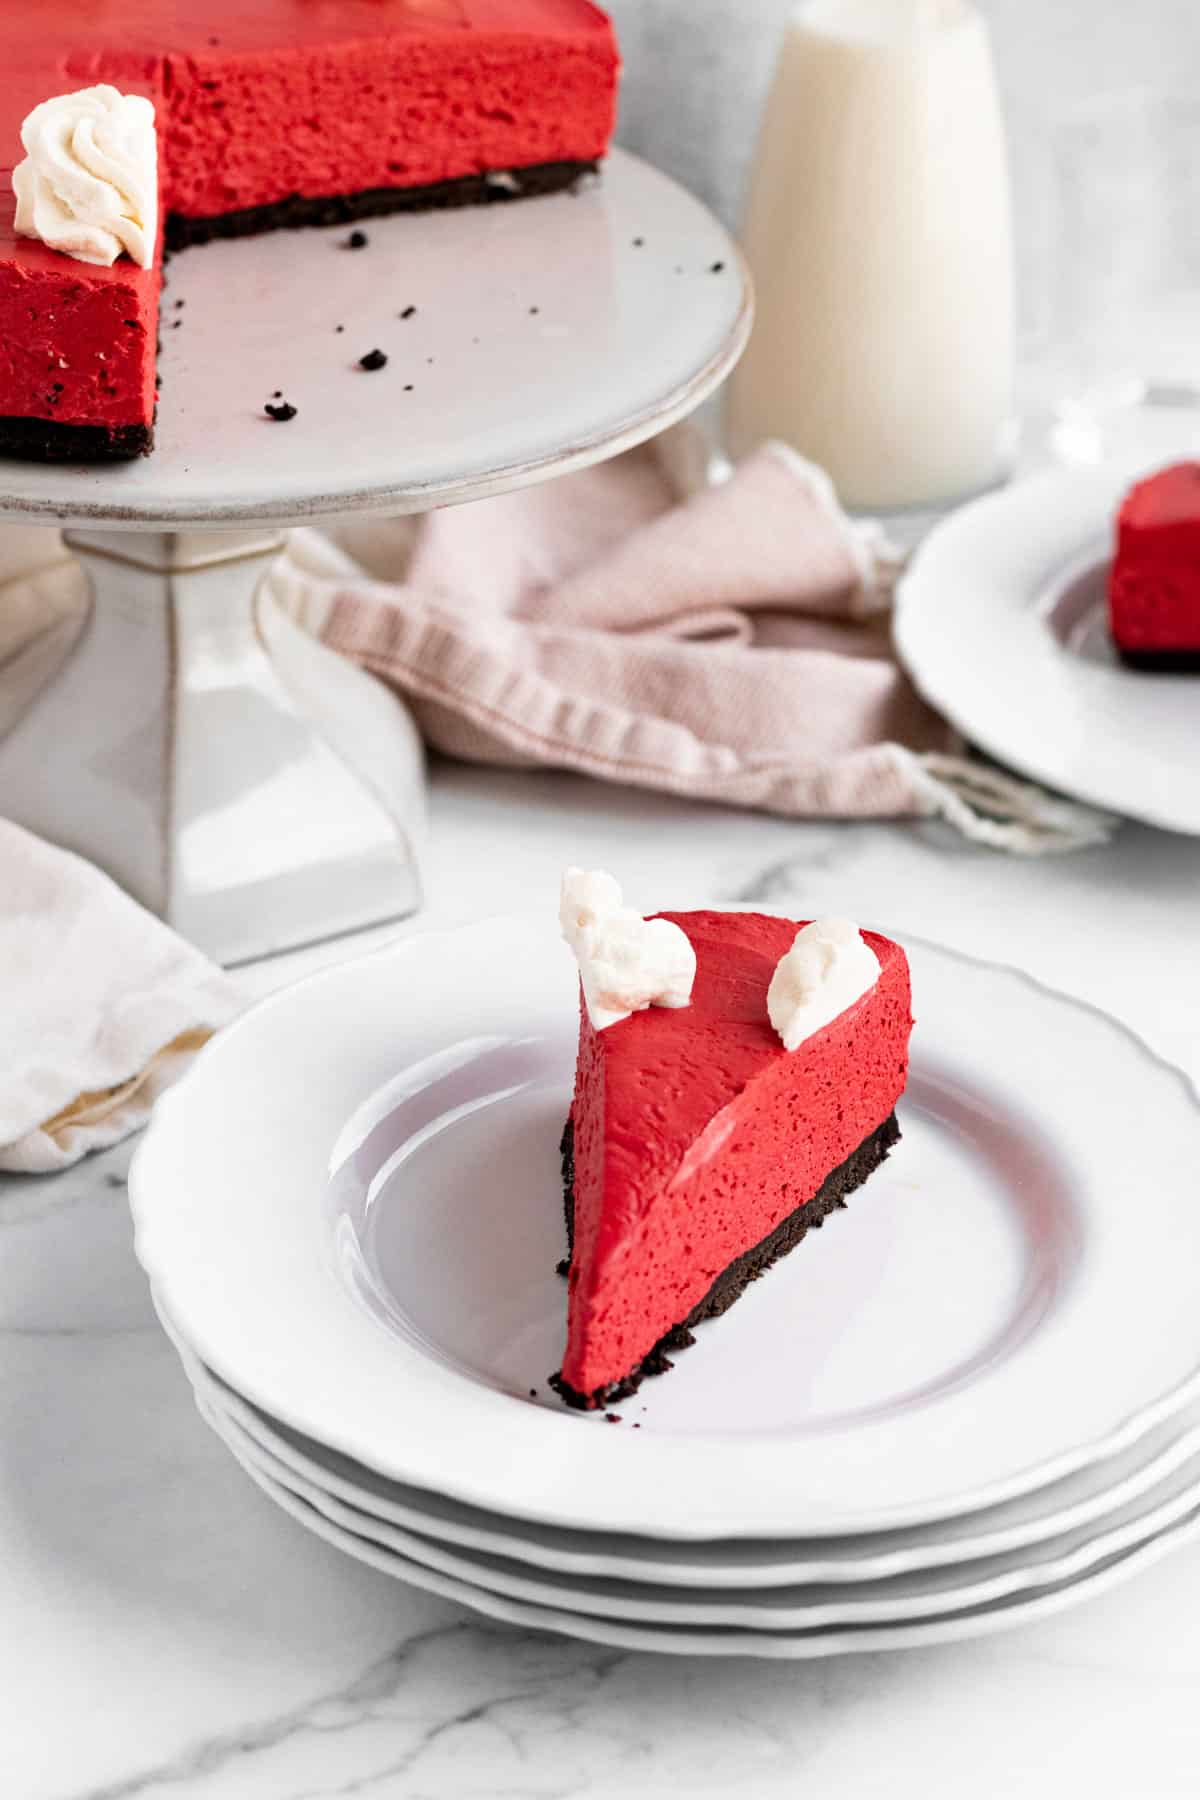
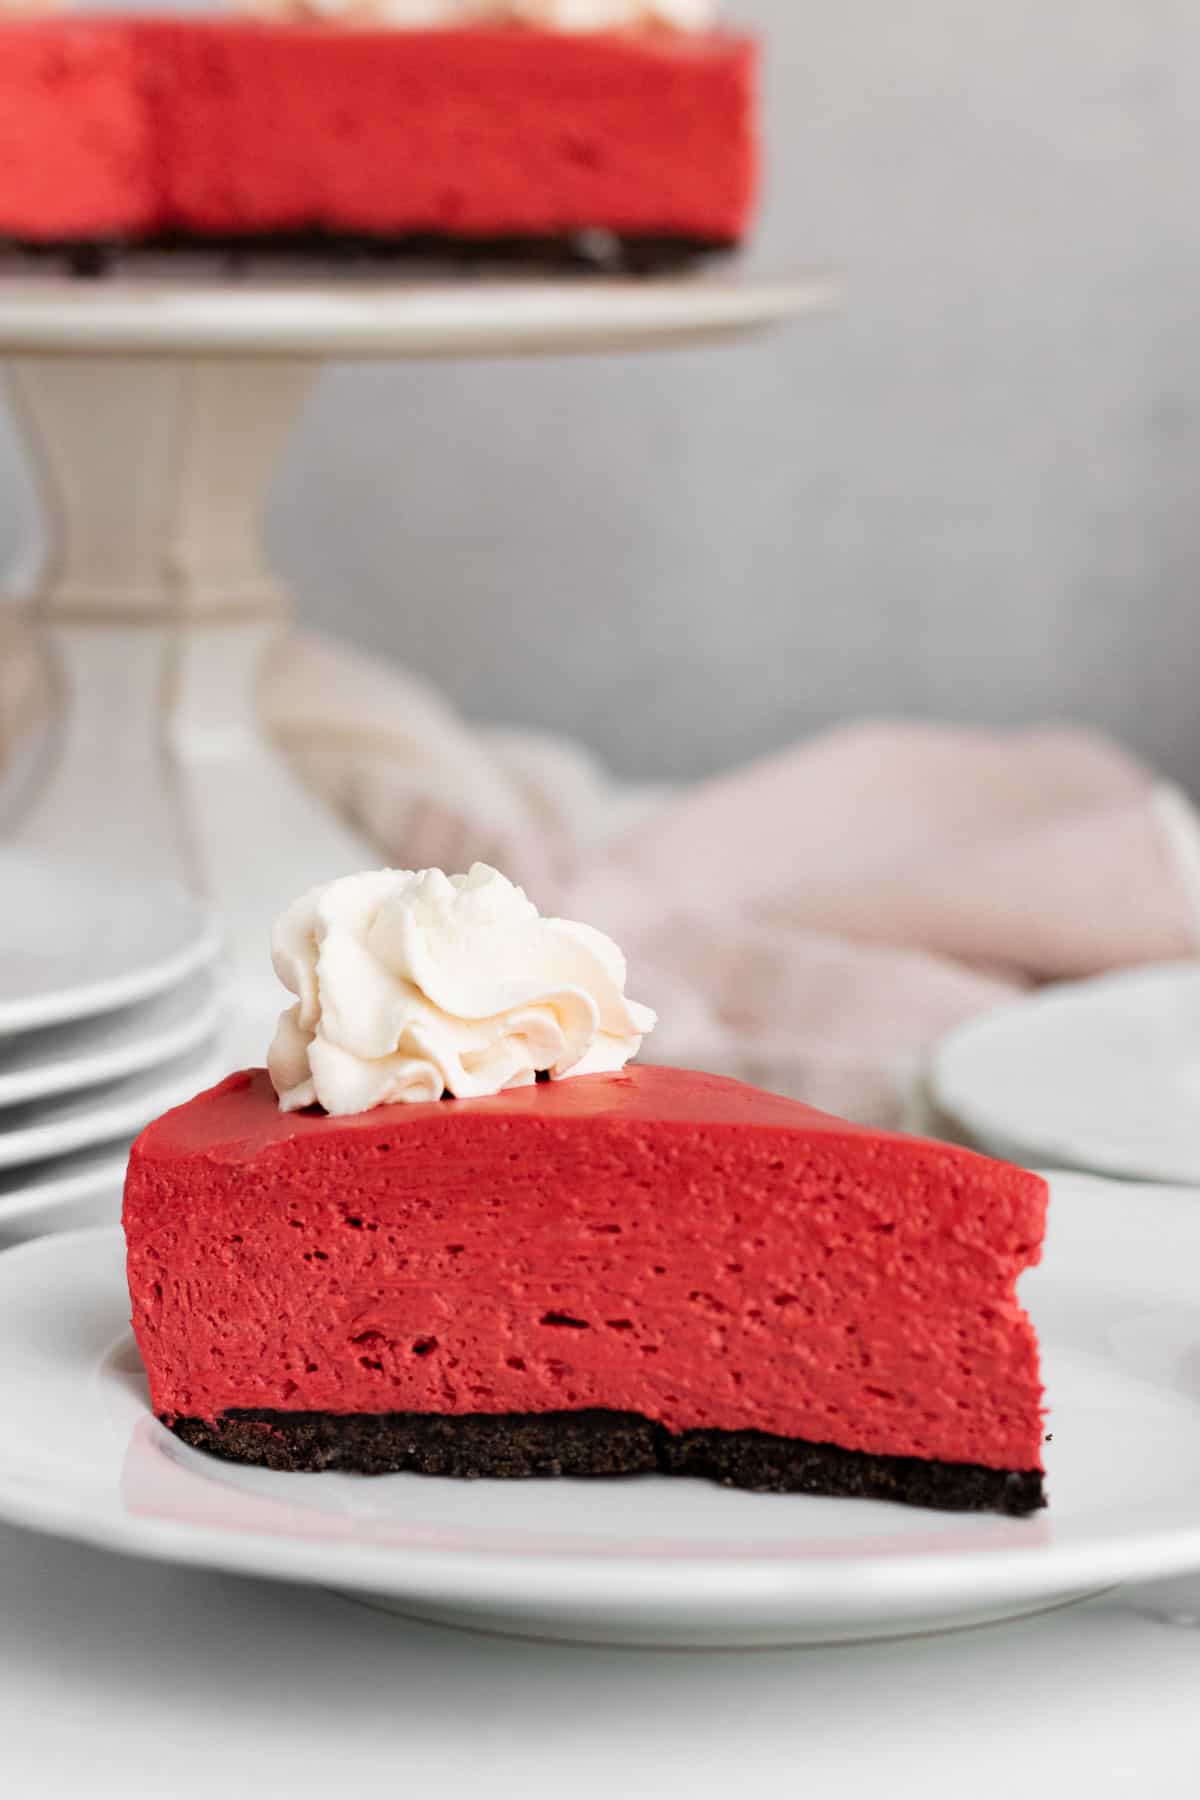
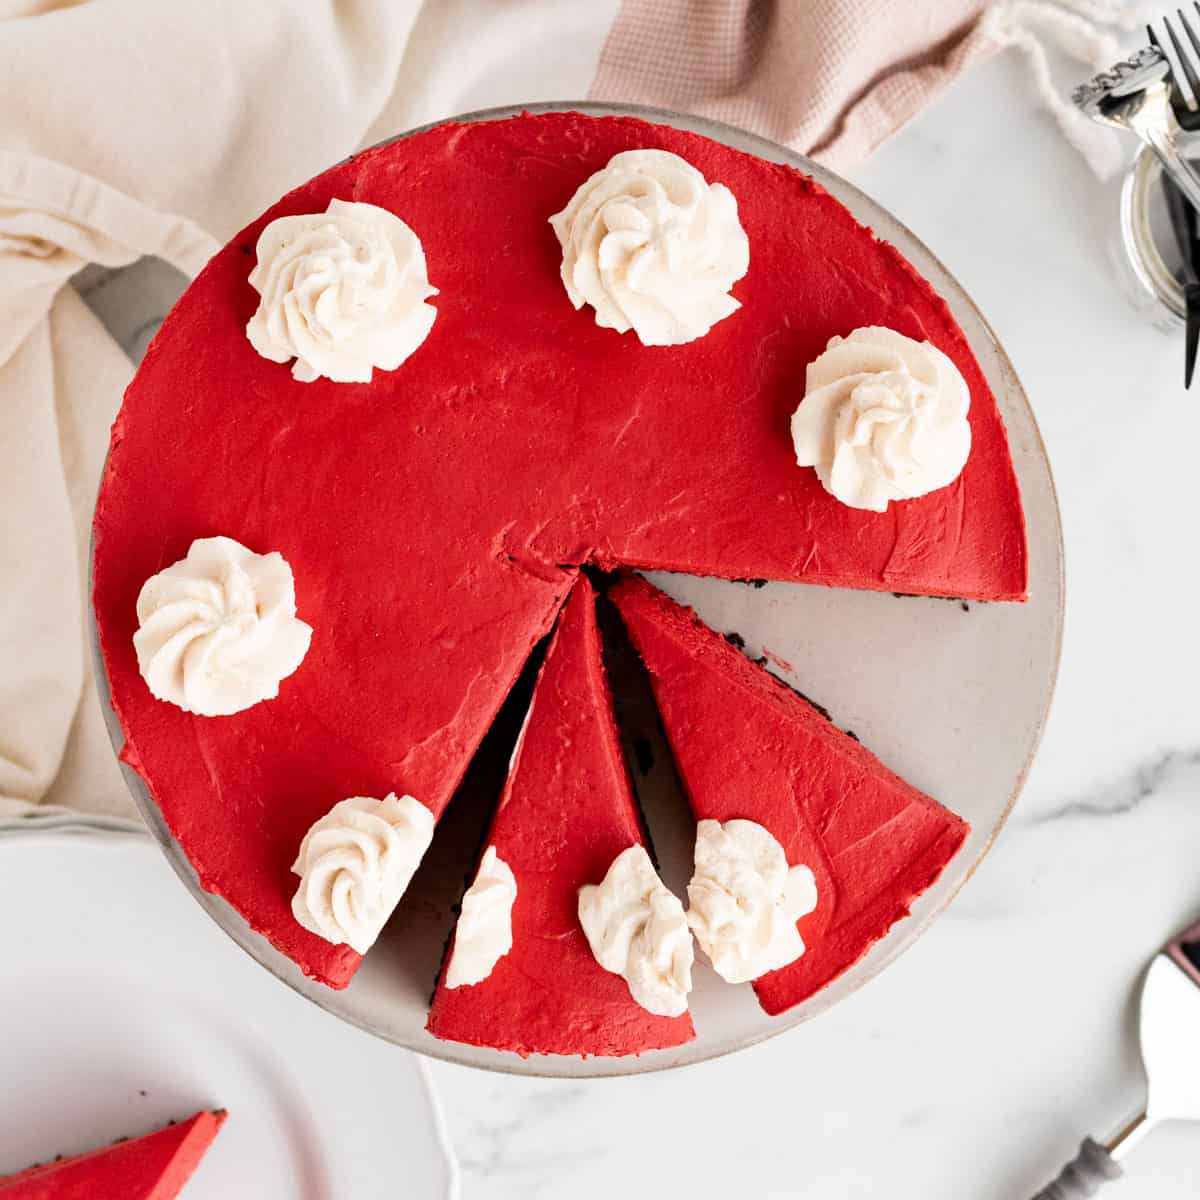
When you need a cheesecake but don't want the hassle of making one from scratch, choose this vibrant red velvet no-bake cheesecake! With an oreo crust and that signature red velvet taste with a touch of cocoa, this recipe is super simple. It's creamy, tangy and rich but still light. All the flavor but none of the hassle!
What is the difference between a baked and no-bake cheesecake?
While baked cheesecakes have their place in any home baker's repertoire, they are labor intensive and can sometimes be finicky. Water baths, cracks, knowing when they are done, and slowly cooling them are some of the roadblocks you may encounter.
While going through all those hassles is totally worth it for that smooth, creamy and rich finale of a classic cheesecake, sometimes we (I) just don't have time for that. Enter the no-bake cheesecake.
Regular cheesecakes are thickened and held together by eggs in the batter while a no-bake cheesecake is thickened with the addition of freshly whipped cream. Both require refrigeration for quite some time to really chill properly but you get to skip the hour-plus baking time and guesswork wondering if it's done with a traditional cheesecake.
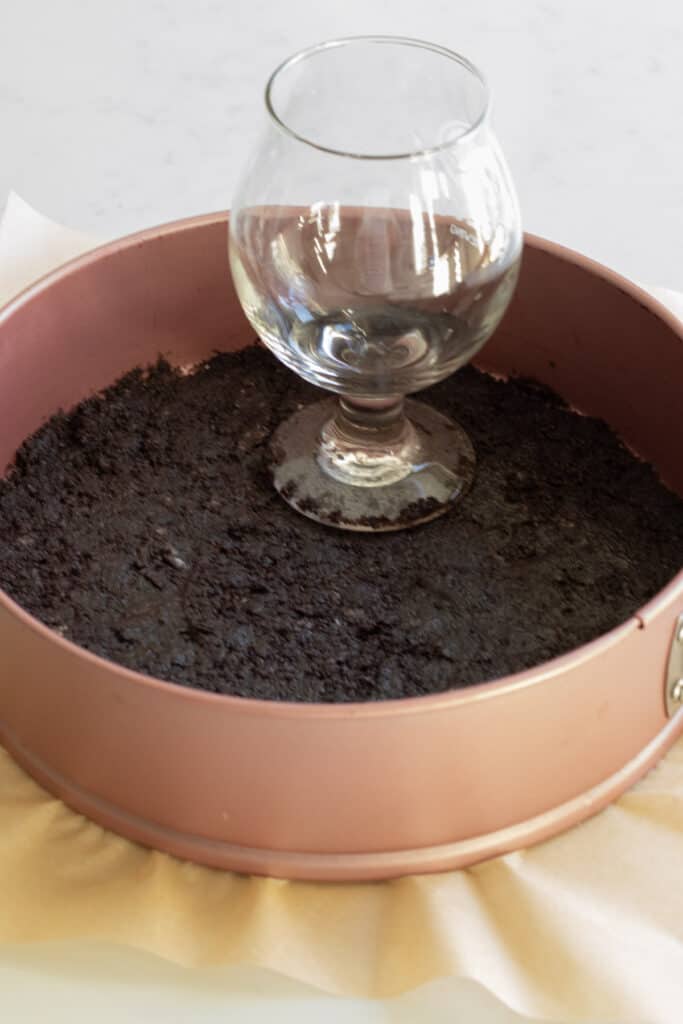
The crust is also not baked in no-bake cheesecakes. More butter is used to "glue" the crumbs together while pressing them tightly into the pan. Refrigerating the crust before filling it, prevents a crumbly mess.
How to make a no-bake cheesecake
No-bake cheesecakes start the same as a traditional cheesecake by making the crust. As stated above, there is no need to bake the crust prior to filling it but it's a good idea to refrigerate it while making the filling.
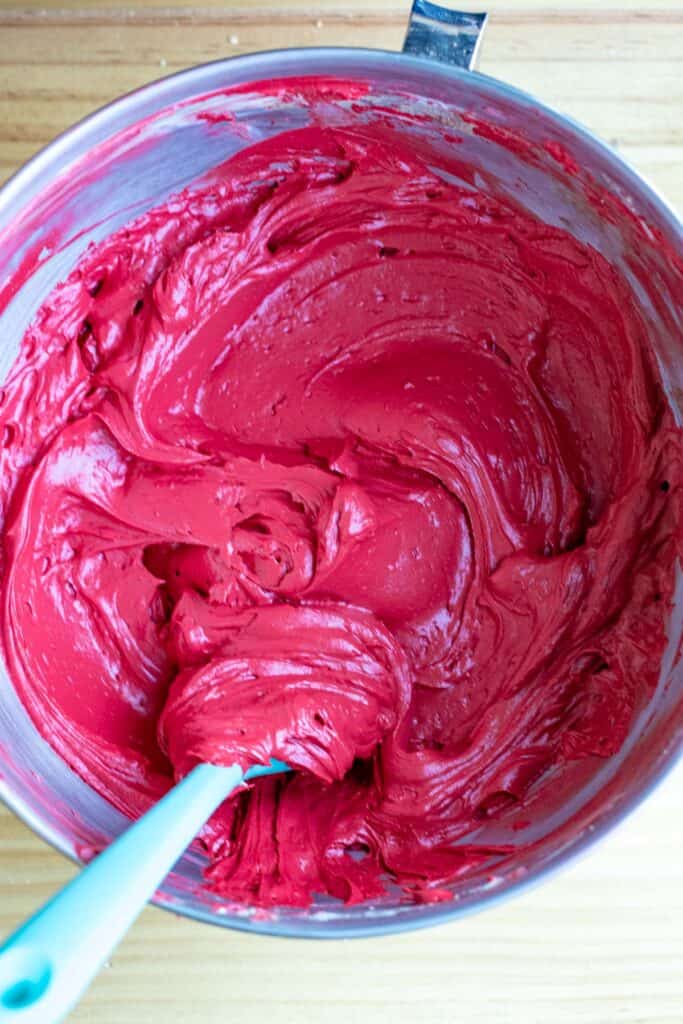
Similar to a traditional cheesecake, a no-bake cheesecake starts with creaming together softened cream cheese with granulated sugar. The granulated sugar will break down the cream cheese and form a perfectly smooth mixture.
Here is where we depart from a baked cheesecake. Instead of adding eggs, you'll add the rest of the cheesecake ingredients-usually your flavorings, sour cream for a bit more tang and creaminess and some vanilla.
For our red velvet no-bake cheesecake, these flavor add ins consist of unsweetened cocoa powder (for that signature red velvet hint of chocolate) and a whopping 2 tablespoons (or a 1oz bottle) of red food coloring (for that signature red color).
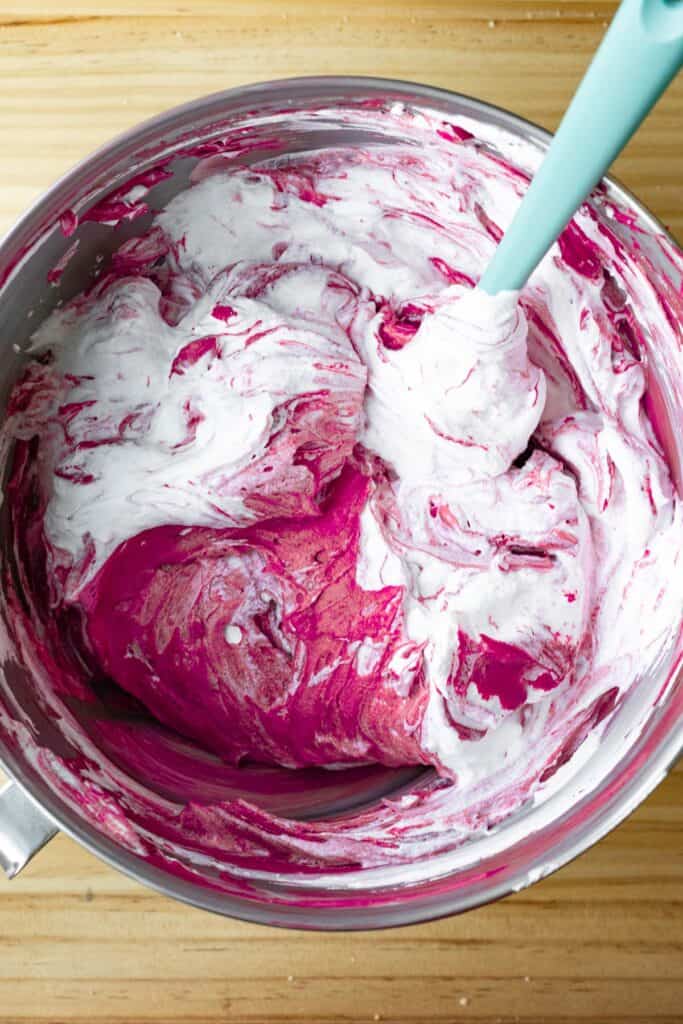
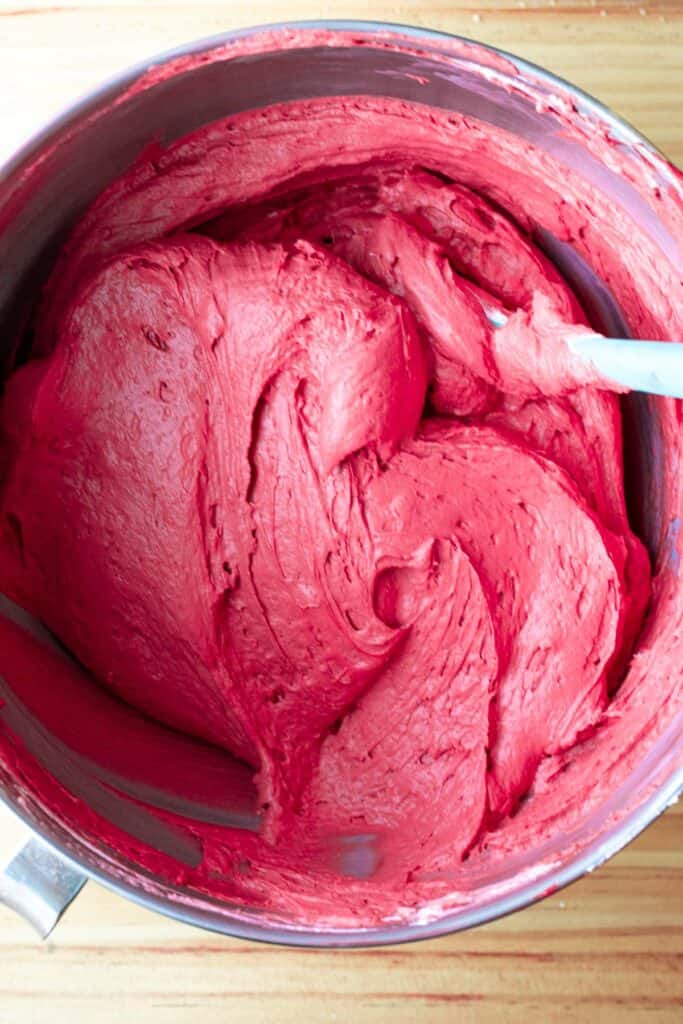
The last step is whipping heavy cream to stiff peaks. Whipped cream is folded into the cream cheese mixture creating a final light and airy but extremely creamy texture.
After pouring the cheesecake into the crust and smoothing the top, pop the cheesecake into the refrigerator and chill for at least 12 hours so perfectly smooth cuts.
Tips for the perfect no-bake cheesecake
While there are not the myriad of ways to mess up this no-bake cheesecake like there are with traditional cheesecakes, there are still a few things to keep in mind for the best outcome.
- Press down the crust tightly- The oreo crust does not need to be baked and has extra butter in it that will harden while it chills to help hold it together. It's also really important to press it tightly into the springform pan. Use the bottom of a glass to press it down tightly.
- Softened cream cheese- Begin with softened cream cheese. If you use cold cream cheese, you will end up with a lumpy filling as the cream cheese can't break down properly. If you forget to take the cream cheese out of the refrigerator, unwrap it and place it on a microwave-safe plate. Microwave it on half power for about 10 seconds and then turn it over and do another 5 seconds at half power. If it's still cold, continue for a few seconds at a time until softened. All microwaves are different so you may want to check it within those first 10 seconds to make sure it's not melting.
- Beat the heavy cream to stiff peaks- Because there are no eggs or baking involved to thicken the filling, heavy cream is used instead. The key to the right texture of this red velvet no-bake cheesecake is the heavy cream. It needs to be whipped to stiff peaks. You'll know you have stiff peaks when you remove the beater from the whipped cream and turn it upside down. The "peak" that forms should stay upright and not droop down.
- Chilling overnight- To get perfectly smooth slices when serving the cheesecake, you need to refrigerate it for about 12 hours. So just plan ahead and make it the night before serving (or morning of) so that it has adequate time to chill.
How to release it from the pan
You'll use a springform pan for this cheesecake. The crust is only on the bottom of the pan and not the sides for an easier release. When you are ready to serve the cheesecake, just slide a sharp knife around the edge of the pan to release the cheesecake from the sides.
Then you can release the spring and remove the outer ring. If you want to slide if off the bottom of the springform base, you can carefully run a knife between the pan and crust to loosen it up and then slide a large spatula underneath until you feel it release from the bottom. Carefully slide it off onto a serving plate/stand.
Storing the no-bake cheesecake
The cheesecake will last for a good 5 days stored in the refrigerator tightly covered. Good luck with leftovers lasting that long!
Can you freeze a no-bake cheesecake?
The cheesecake can be frozen for later. Let it chill thoroughly first if you don't want to freeze it in the pan.
After chilling, place the cheesecake on a freezer safe plate and wrap it in plastic wrap and then foil tightly. Freeze for 1-2 months. To thaw the cheesecake, just place it in the refrigerator overnight or at least a few hours before serving.
You can also freeze individual slices. Follow the same procedure above.
For more easy desserts, check out:
- Pumpkin Mousse Pie with a Gingersnap Crust
- Apple Oatmeal Cookies
- Lemon Cream Pie with a Golden Oreo Crust
- S'mores Tart
- Chocolate No-Churn Ice Cream with Salted Caramel and Hazelnuts
Tag me on Instagram @themarblekitchenblog if you make this and leave a star rating and comment below! Thank you and enjoy!
Red Velvet No-Bake Cheesecake
Ingredients
Oreo Crust
- 20 oreos or other chocolate sandwich cookie, finely crushed about 2 cups
- 4 tablespoon unsalted butter melted
Cheesecake Filling
- 1 ¼ cups heavy whipping cream
- 24 oz full-fat cream cheese room temperature
- ¾ cup granulated sugar
- ¼ cup unsweetened cocoa powder
- ¼ cup sour cream
- 2 tablespoons red food coloring or a 1 oz bottle
- 1 teaspoon vanilla extract
Instructions
Oreo Crust
- Combine crushed oreos and melted butter and mix well. Press into the bottom of a 9 inch springform pan. Use a glass to pack it tightly in the pan. Refrigerate the crust while you make the filling.
Cheesecake Filling
- Whip the heavy cream in a medium bowl until stiff peaks form. Set aside.
- In a stand mixer or using a hand mixer, beat together the softened cream cheese and the granulated sugar until creamy and combined.
- Add the remaining ingredients and mix until smooth.
- Fold the whipped cream into the cream cheese mixture gently until no white streaks remain.
- Pour the cheesecake filling into the crust and smooth the top with a spatula.
- Cover the cheesecake with foil or plastic wrap and refrigerate for 12 hours or overnight.
Notes
- Store the cheesecake tightly covered in the refrigerator for up to 5 days.

Leave a Reply