
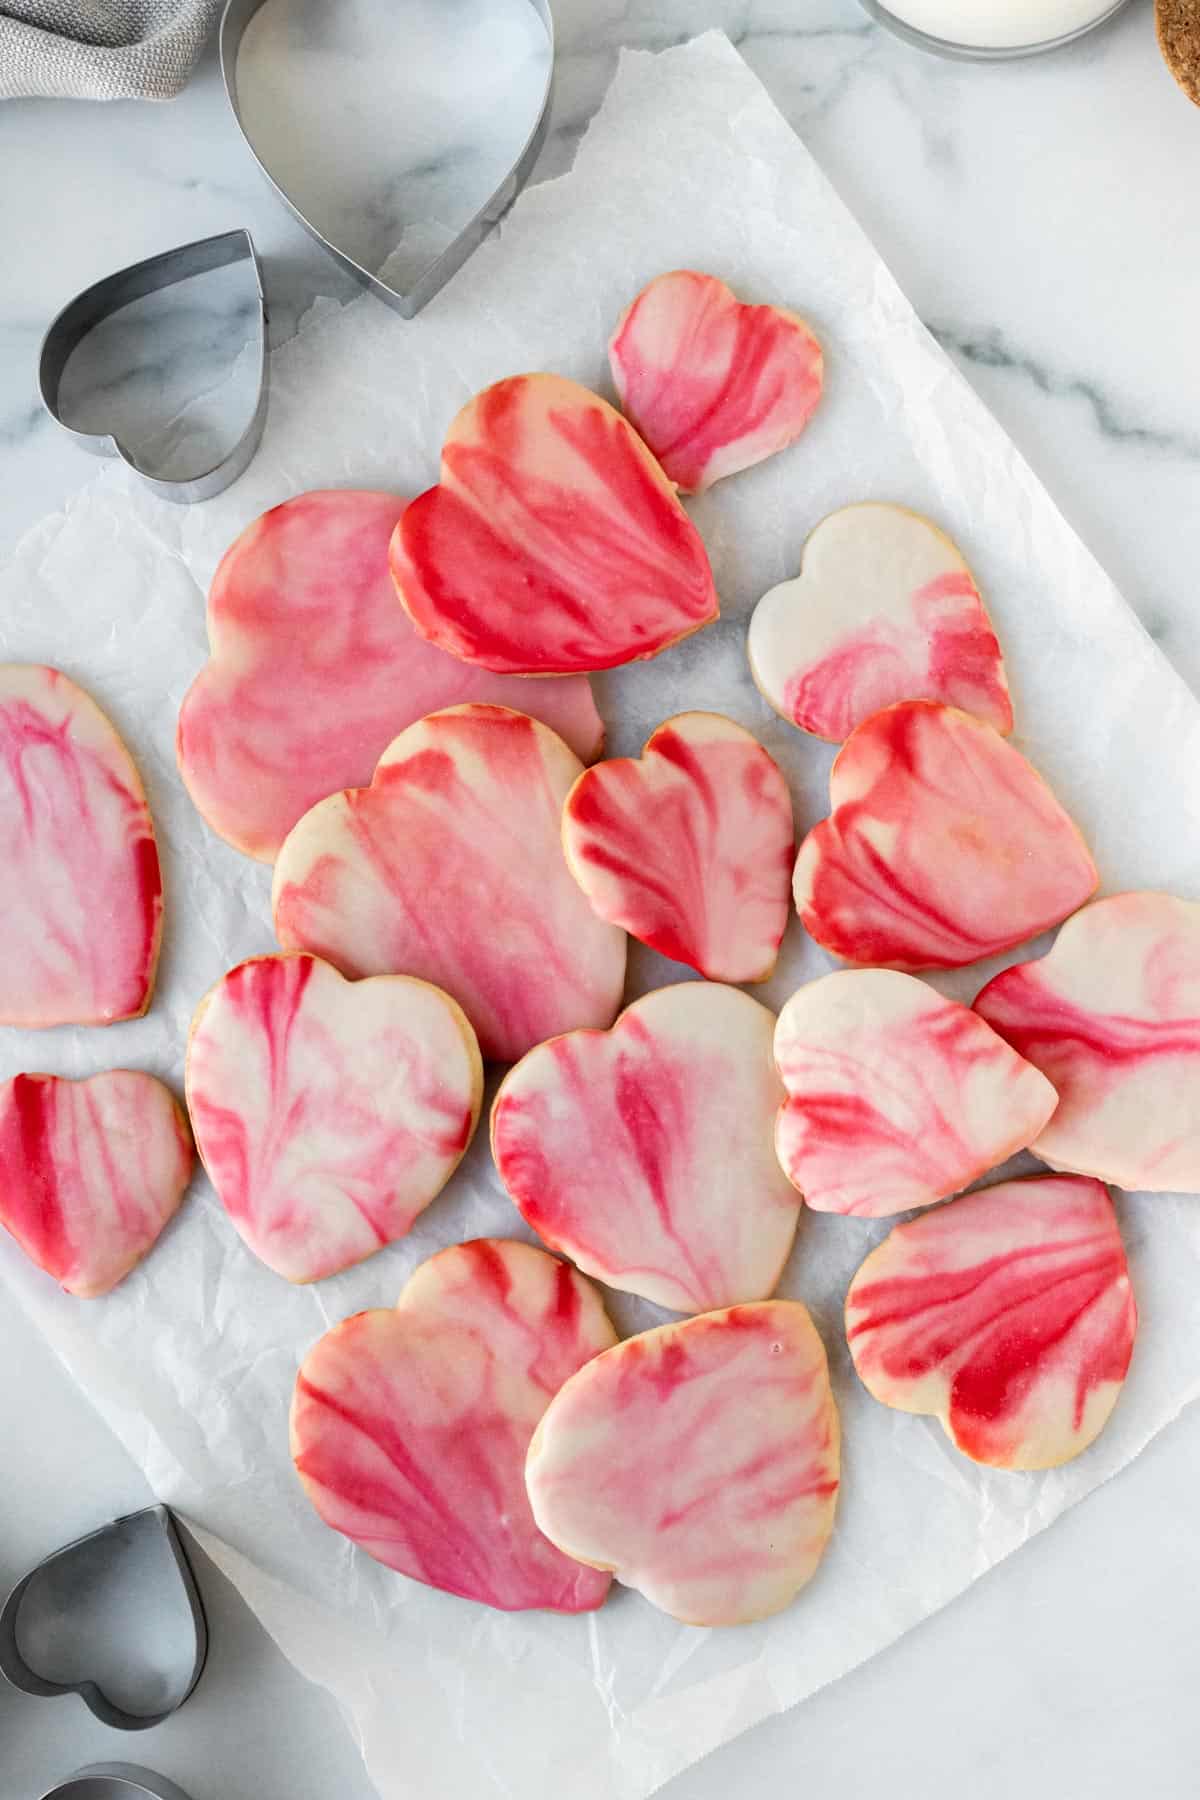
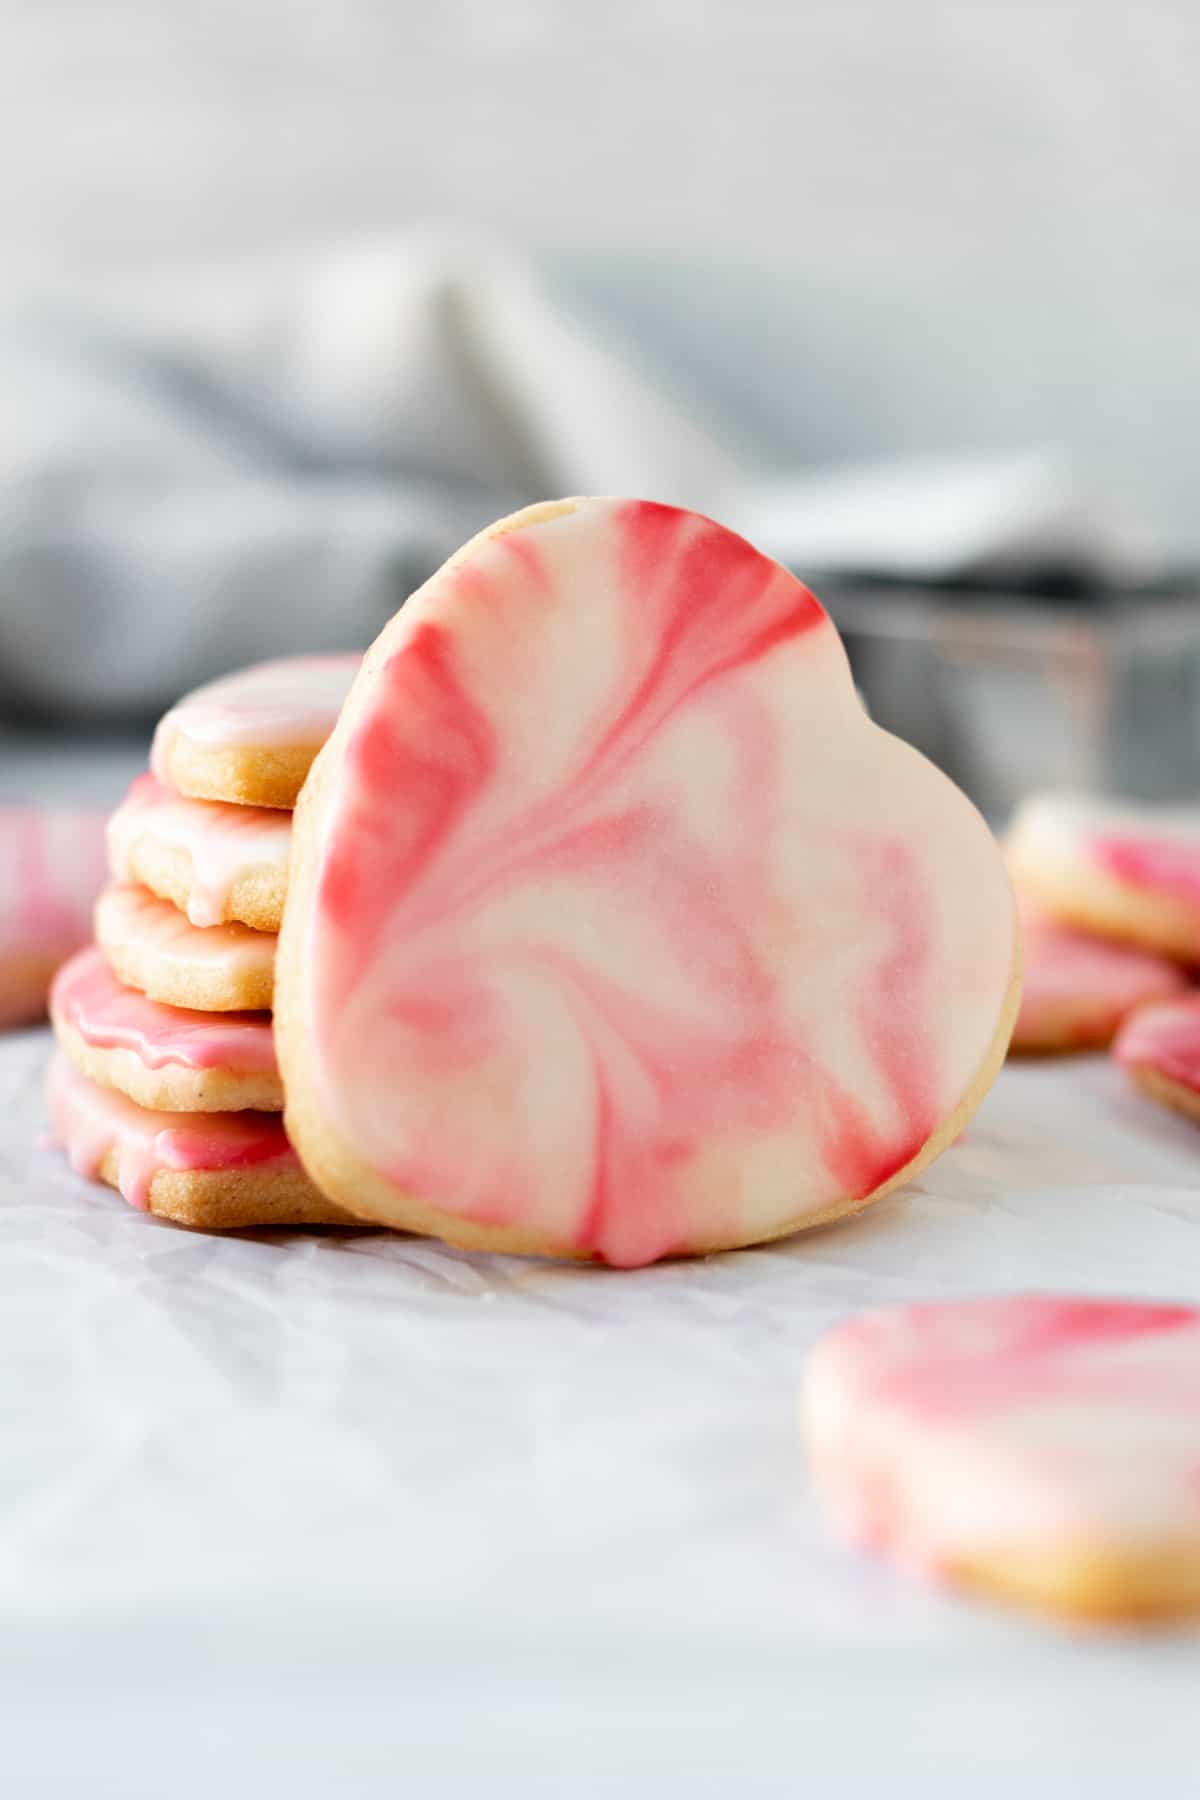
These marbled sugar cookies are the perfect cut-out sugar cookie studded with fragrant vanilla beans and topped with an easy vanilla glaze. The glaze is quick to make and the marbled design can be customized to any colors you desire. These easy sugar cookies are sure to impress!
Easy cut out sugar cookies
Everyone is in search of the elusive perfect cut-out sugar cookie. One that comes out great every time. One that doesn't spread in the oven so the shape is unrecognizable. Well, look no further because here they are.
Sugar cookies themselves are pretty straightforward. Sugar, flour, butter and eggs are the main components with a bit of salt, vanilla extract and a vanilla bean added for flavor.
Feel free to customize your sugar cookies by adding in different flavors. Almond extract is a classic addition but you could use various citrus zests or other extracts as well.
Tips for perfect sugar cookies
While sugar cookies are fairly straightforward, follow these few tips to make them perfect.
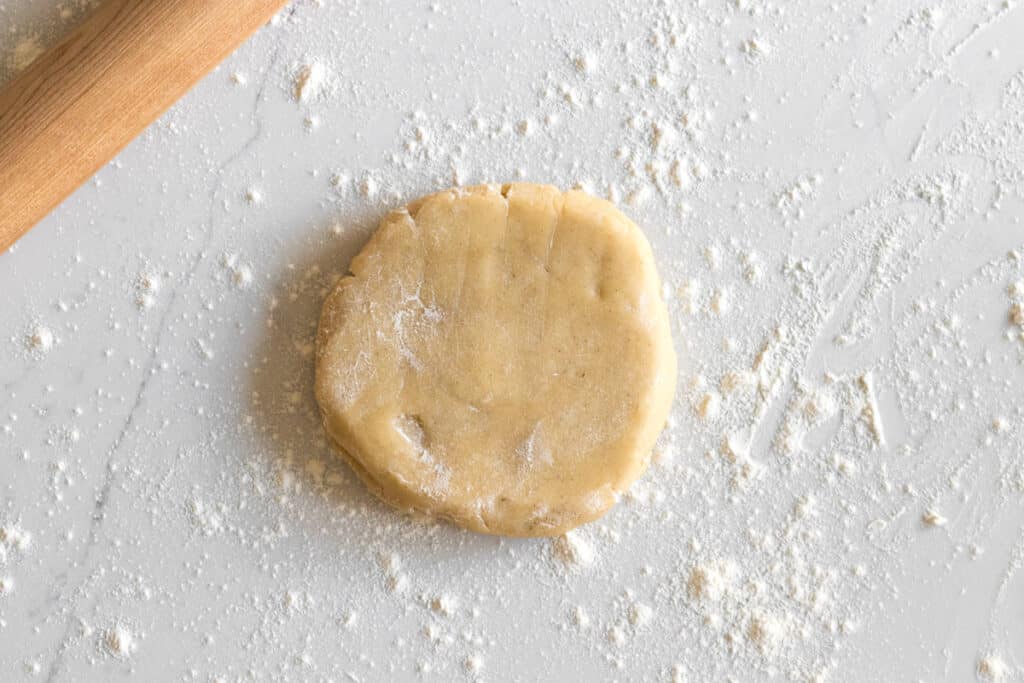
- Don't overmix- Mix the dough together until it almost forms a ball. Stop before it is a cohesive ball and then use your hands to bring the dough together into a full ball. Divide the dough into 2 halves, shape into a disc, cover with plastic wrap and then refrigerate.
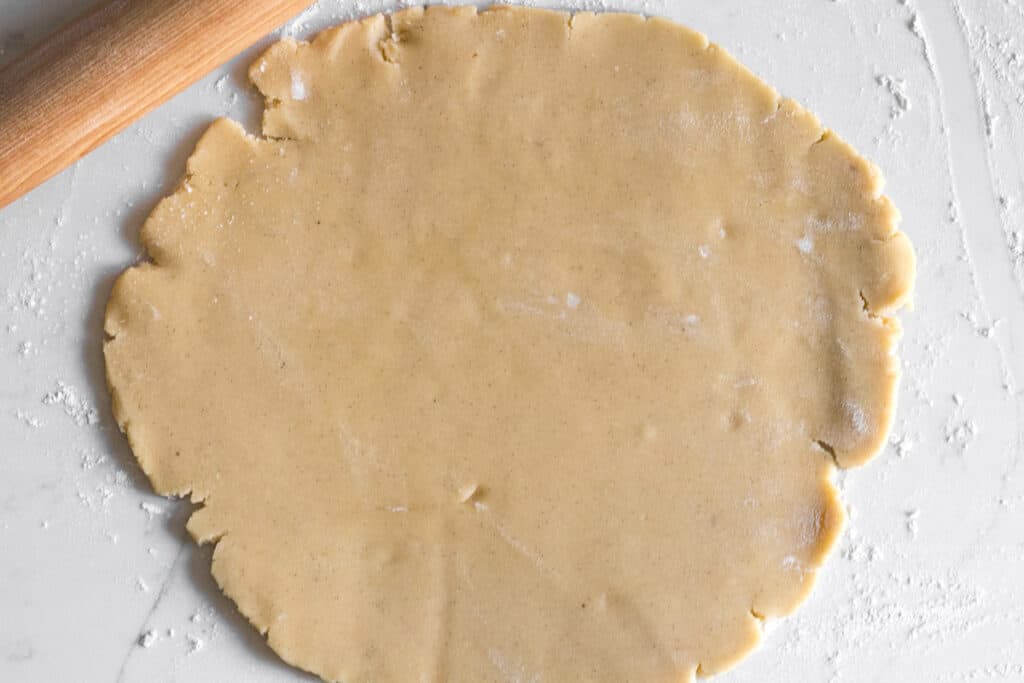
- Chill the dough- It's important to chill the dough before rolling it out for at least 1 hour. If the dough is not chilled, the cookies will spread in the oven losing some of their shape. Let the dough sit out for about 10 minutes prior to rolling to make it easier to work with. If your dough gets too warm after rolling out the cookies, just place the cookie sheet with the cut-out cookies into the refrigerator to chill for 20 minutes before baking.
- Thickness of the cookies- For the tastiest cookies that are still soft in the middle, roll out the dough to ¼ inch thick. This will give crisp edges but a slightly softer center.
Can the dough chill overnight?
Yes! If you don't want to do everything in one day, wrap the 2 discs of dough really well in plastic wrap. You can keep them refrigerated for up to 2 days and use them when you are ready. Allow the dough to sit at room temperature for about 10 minutes before rolling out.
How to get the marble effect on cookies
You may think the marble effect on these marbled sugar cookies is difficult to achieve, but it's not! Follow these tips for the best results:
- Start with the right consistency- It's important that the icing is the right consistency to start. Start by only adding 3 tablespoons of milk to the powdered sugar and stir until it comes together. Add more milk by the tablespoon as necessary to thin it out or more powdered sugar to make it thicker. If you pour a stream of icing back into the bowl, you want the streak of icing to remain visible on the surface 1-2 seconds before disappearing. You can also test the consistency by dipping a test cookie into it. You want the icing to be opaque so you can't see the cookie beneath the icing.
- Choose your colors- You can use gel food color or regular food color to achieve the right colors. I like to use this gel food coloring. Start with a very small amount of color first and then add more to get the color you want. I like my base color to be white so I divide about 2 tablespoons each of the white color into 2 small bowls. Color the 2 small bowls and leave the large bowl white. Remove a small amount of white icing from the large bowl and set aside.
- Choose the right sized bowl- For the white icing, make sure to choose a bowl that is wide enough to fit your largest cookie. You need to be able to dip the top of the cookie into the icing with enough room.
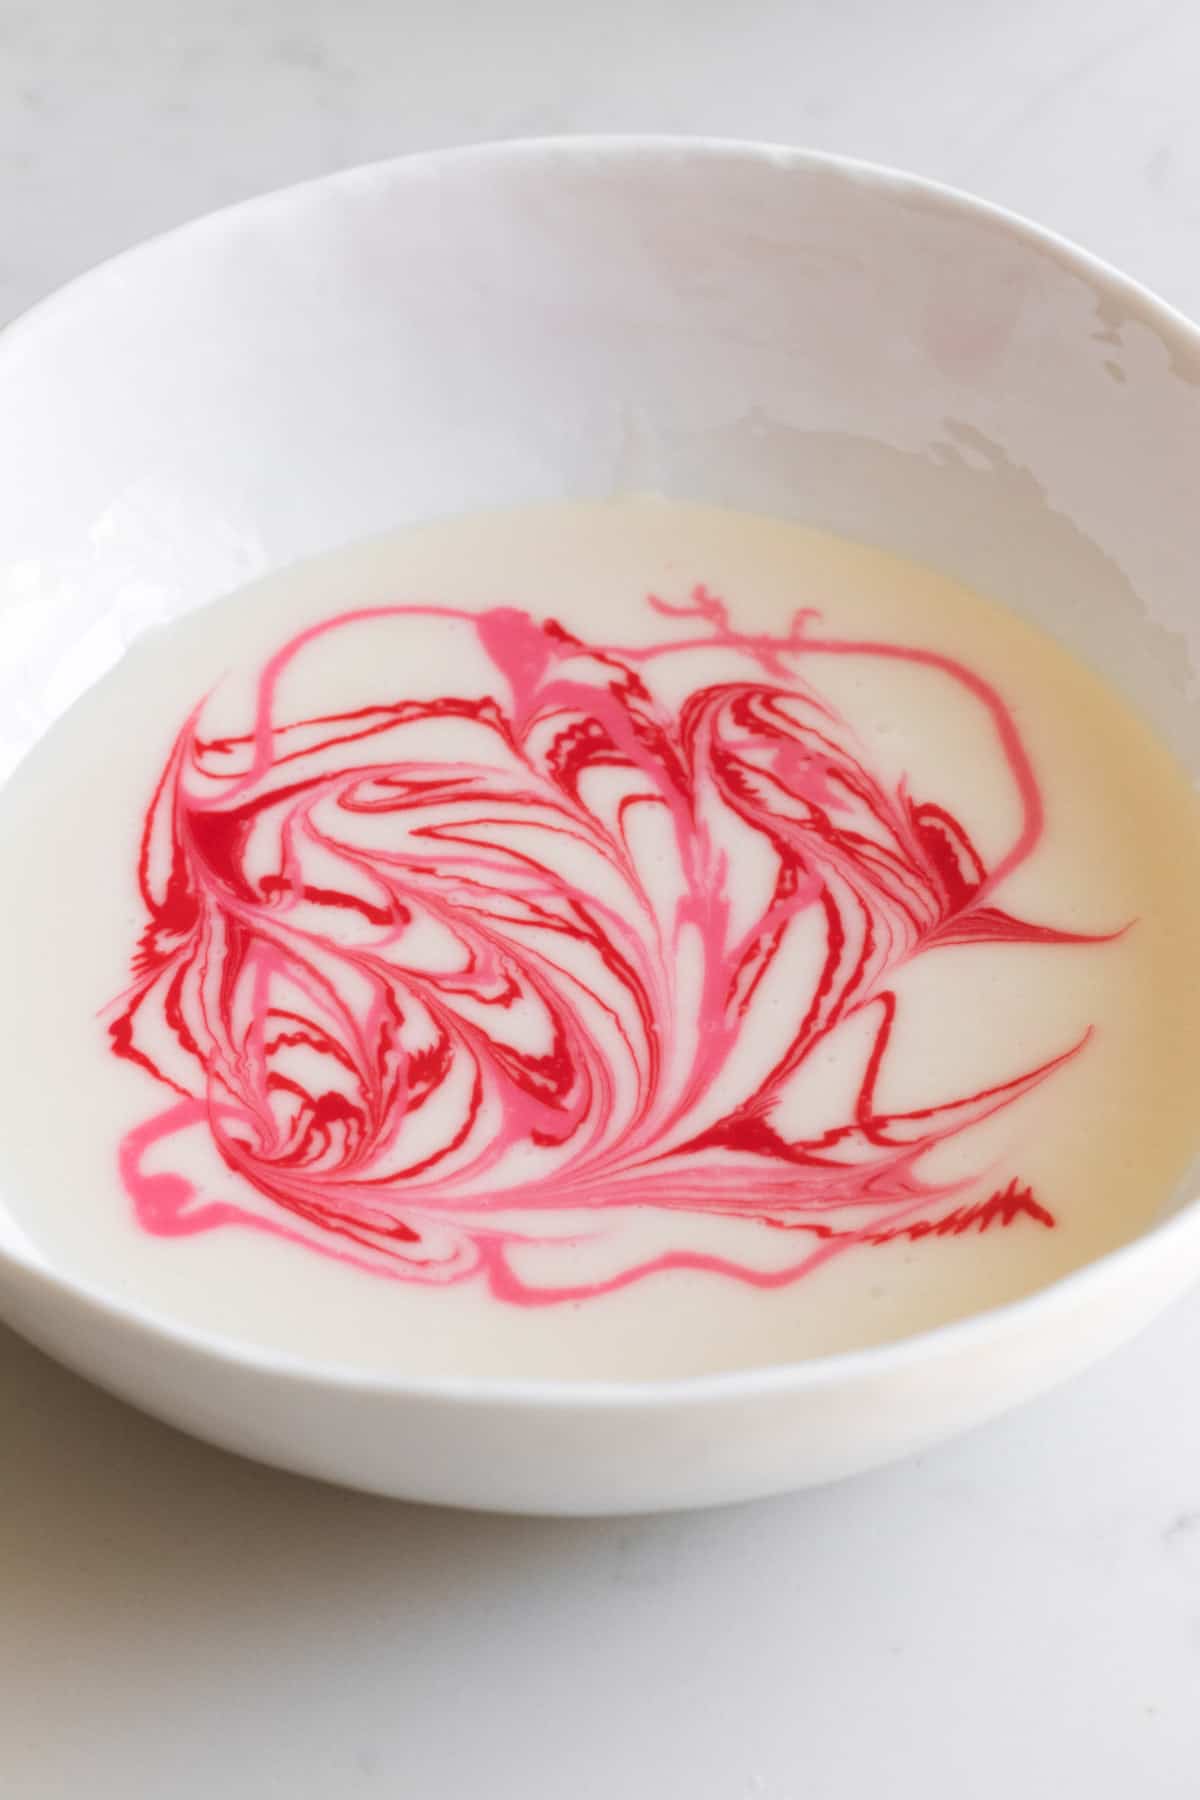
- Drizzle the colors lightly- A little of the colored icing goes a long way! To make the marble pattern, first, drizzle a few swirls of one color into the white icing. Do the same with the second color. Use a toothpick to very lightly swirl the colors together. One to two swipes of the toothpick is all you need. Too much and your colors will fade into each other too much.
- Pop any bubbles- If you see any bubbles on the surface of the icing, use a toothpick to pop them before dipping the cookies. You can also pop any that you see on the cookies after you dip them. Just lightly pop the bubbles on the cookie so you don't leave any marks and do this right away before it starts to dry.
- Dip the cookie- Hold a cookie between your fingers and dip the top all the way into the icing. Twist the cookie slightly to each side and pull it out of the glaze. Let any excess drip off the cookie. You can also control the swirls that form by tilting the cookie one way or the other as you let the excess drip off.
- Add more color- As the colors start to lessen after dipping multiple cookies, repeat the drizzling process above. If you need more white icing because the cookies are becoming too color-saturated, dollop small amounts of the reserved white icing into the bowl and swirl with a toothpick if needed.
- Dry completely- Let the cookies dry completely. This isn't royal icing that will harden completely but the icing will crust over. If you plan to layer them, let the icing dry for about 24 hours and layer between pieces of wax paper or parchment.
How to store the cookies
The marbled sugar cookies can be kept at room temperature. Once they are dry, place them in an airtight container. If you need to store multiple layers of cookies, place wax paper or parchment paper between each layer.
Make sure the cookies have completely dried before layering them!
Can you freeze the cookies?
The marbled sugar cookies can be frozen, but it's best to freeze unfrosted cookies. Layer them in an airtight container and freeze for up to 2 months. Let them come to room temperature prior to icing them.
For more cookie recipes, check out:
- Chocolate Peanut Butter Cookies
- Salted Toffee Chocolate Chip Cookies
- Lemon Crinkle Cookies with White Chocolate
- Lemon Lavender Shortbread Cookies
Tag me on Instagram @themarblekitchenblog if you make this and leave a star rating and comment below! Thank you and enjoy!

Marbled Sugar Cookies
Ingredients
Cookies
- 2 ¼ cups all-purpose flour
- ½ teaspoon baking powder
- ¼ teaspoon salt
- ¾ cup unsalted butter softened
- ¾ cup granulated sugar
- 1 large egg
- 1 teaspoon vanilla extract
- 1 vanilla bean cut through lengthwise and seeds scraped out, optional
Icing
- 3 ½ cups powdered sugar
- 3-6 tablespoon milk or half and half or heavy cream
- 1 teaspoon vanilla extract
- Red food coloring or any color you desire
Instructions
Cookies
- In a medium bowl, stir together flour, baking powder, and salt. Set aside.
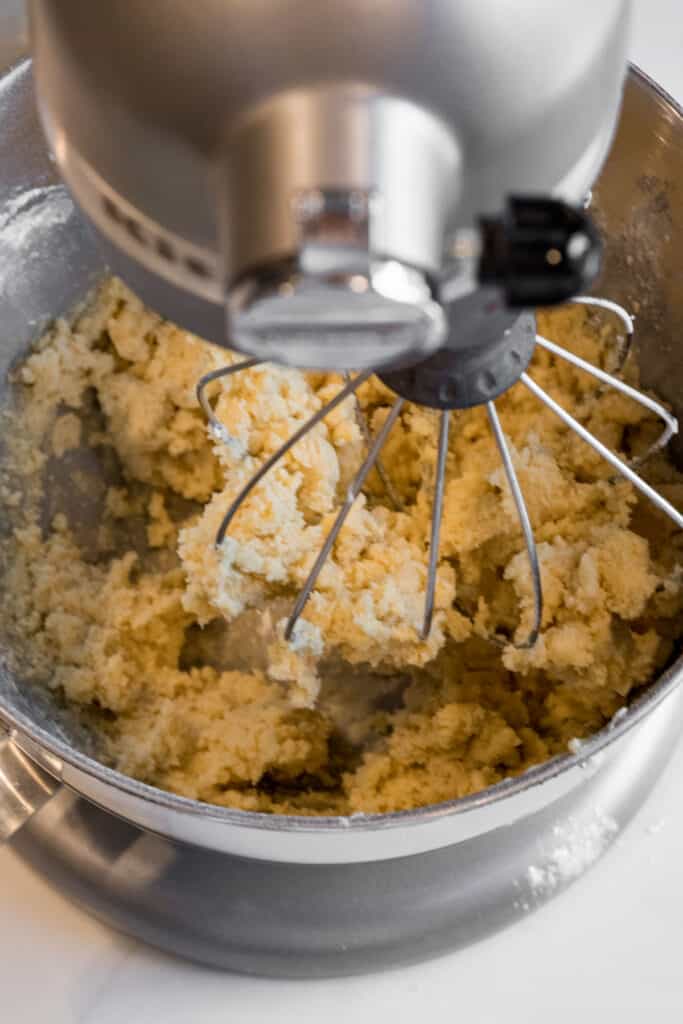
- In a stand mixer or with an electric mixer, beat the butter and sugar together until it’s lightened in color and fluffy, about 3 minutes.
- Add the egg, vanilla and vanilla bean and mix well. Scrape the bowl down as needed.
- Add the dry ingredients and mix just until the flour is incorporated and the dough comes together.
- Divide the dough into 2 halves and wrap each in plastic wrap. Refrigerate the discs for at least 1 hour and up to 2 days.
- Lightly sprinkle your surface with flour. Once chilled, use a lightly floured rolling pin to roll out each dough disc into a ¼ inch thick circle. Use more flour as needed to keep the rolling pin from sticking.
- Preheat the oven to 350 degrees Fahrenheit. Prepare a baking sheet with parchment paper.
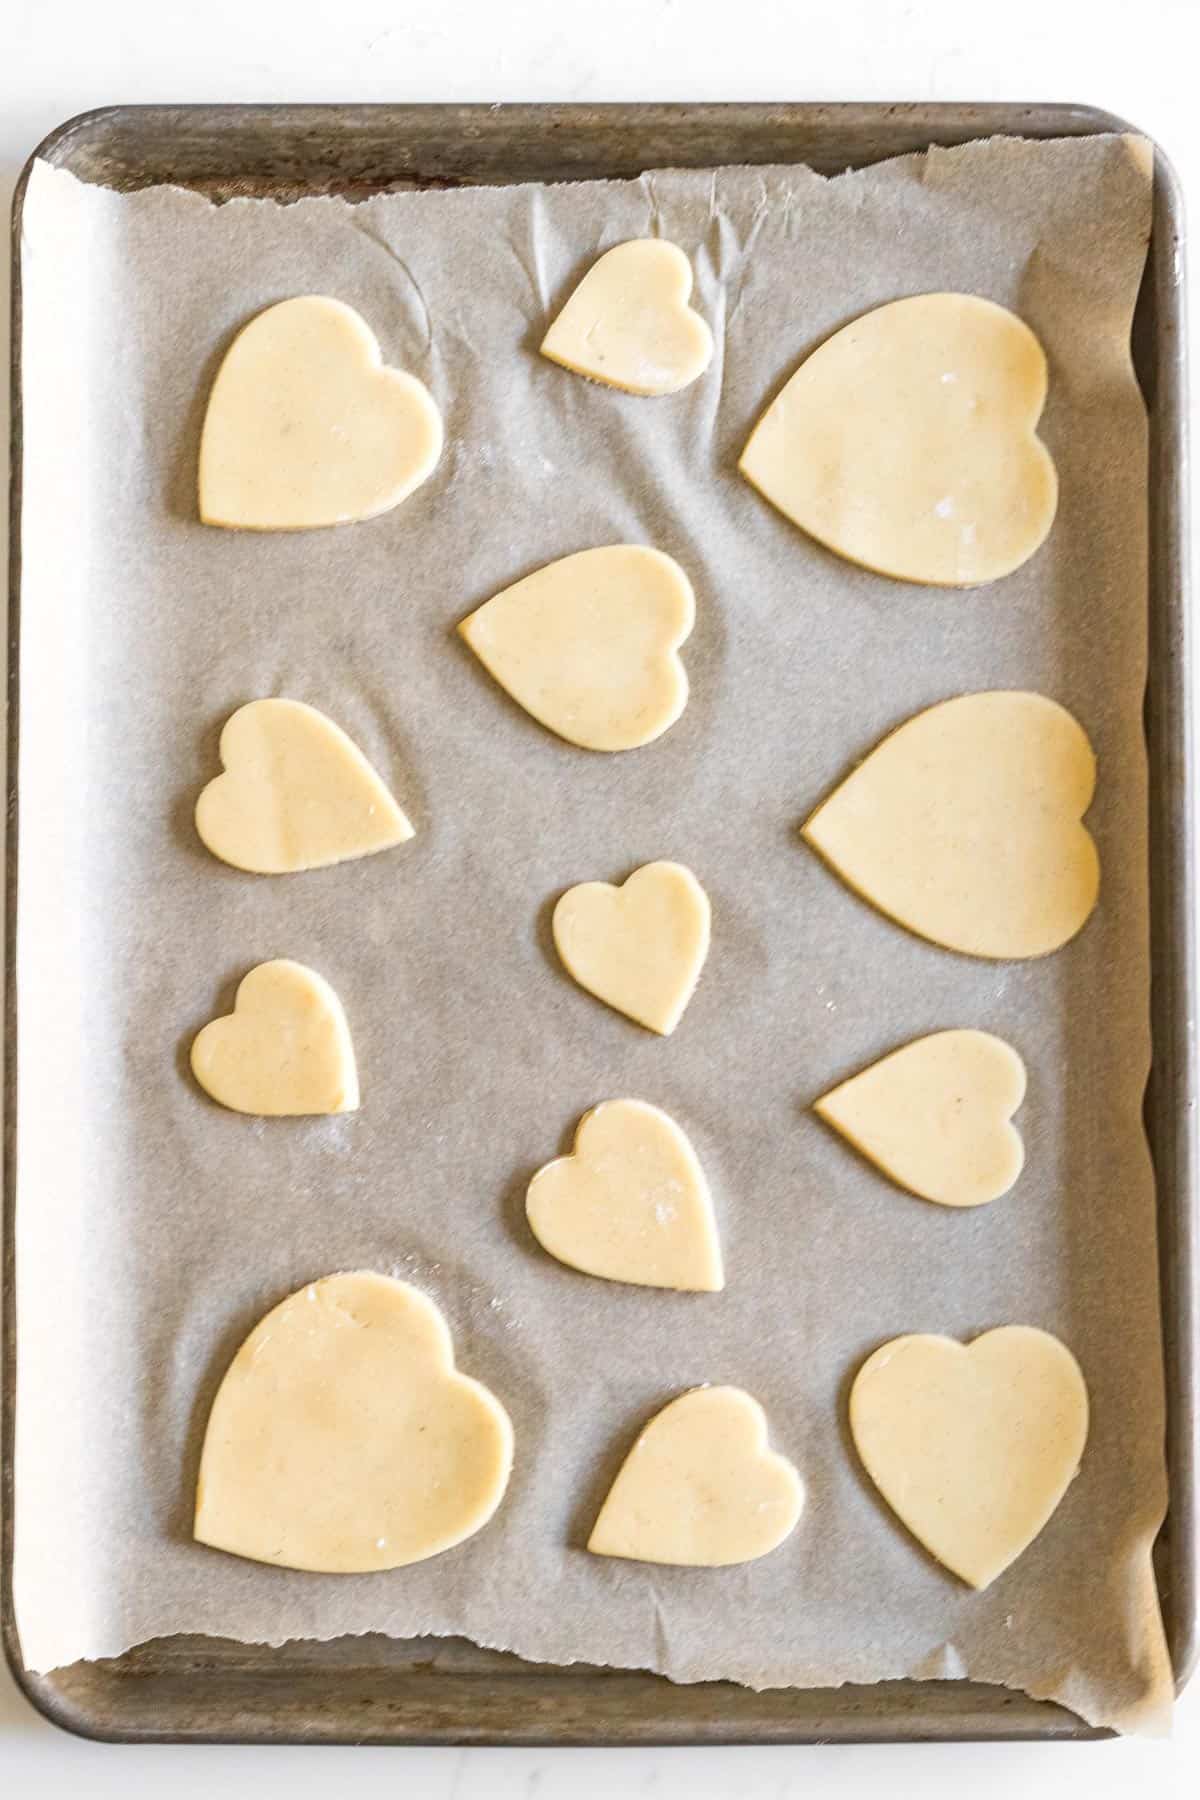
- Use cookie cutters to cut the dough into your desired shapes and re-roll the scraps into more ¼ inch thick discs to cut more cookies out until no scraps are remaining.
- Place the cookies on the prepared baking sheet 2-3 inches apart. Bake for 9-11 minutes until just starting to turn light golden brown. Cool on the baking sheet for a couple of minutes and then transfer to a wire rack to cool completely.
Icing
- In a medium bowl that is at least as wide as your largest cookie, combine powdered sugar, 3 tablespoons of milk and vanilla and stir until a thick icing forms. Add more milk by the tablespoon until you reach a thick consistency, about the consistency of glue. See the post for more consistency tips. Add more powdered sugar as needed if you’ve thinned out the icing too much.
- Place about 2 tablespoons each of icing into 2 small bowls and 1 tablespoon of icing into another small bowl. Set aside the larger bowl of white icing. Color the 2 bowls containing 2 tablespoons of icing each, starting with one drop of food coloring and adding more if needed until reaching your desired colors. Leave the 1 tablespoon of icing white and set aside.
- In the medium bowl with the white icing, drizzle a small amount of each colored icing into the white glaze and lightly swirl once with a toothpick (be careful to avoid swirling too much as you will lose the marble effect).
- Dip the top side of each cookie into the glaze, pushing into the glaze lightly and twisting slightly and then lifting up and drizzling off any excess. Place on a wire rack to dry and continue with the rest of the cookies. If the color wears off, drizzle a bit more of each color back into the white icing and swirl once with a toothpick. If you have too much color, dollop some of the reserved tablespoon of white icing over the colors and swirl again with a toothpick.
- Let the cookies dry on the cooling rack for at least an hour. If you want to store the cookies layered, then allow them to dry for 12-24 hours before layering and layer between wax paper or parchment paper. Store in an airtight container

Jo says
The icing recipe for the marble sugar cookies is way too thick! I've added way more than 9 tbsp of milk, but it's still not spreadable.
Tara Kringlen says
Hi Jo, you likely over-measured the powdered sugar. It needs to be measured like flour where you spoon it into a measuring cup and then level it off or you will have far too much which leads to needing more liquid to thin it out. You can also use a kitchen scale for more accuracy. A cup of powdered sugar weighs about 120 grams.